Encountering the dreaded "A Java Exception Has Occurred" error on your shiny new Windows 11 machine? 😩 Don't worry—you're not alone, and it's fixable! This common issue pops up when Java-based apps like Minecraft, Eclipse, or even some web tools crash unexpectedly. It often stems from outdated Java versions, corrupted files, or compatibility hiccups with Windows 11's latest updates. The good news? With a few targeted steps, you can banish this error and reclaim your productivity. Let's dive in and get your system running smoothly again.
Understanding the "Java Exception Has Occurred" Error
At its core, this error signals that a Java application has hit an unexpected snag, causing it to terminate abruptly. On Windows 11, it might appear as a pop-up dialog or crash a program entirely. Common culprits include:
- Outdated Java Runtime Environment (JRE): Windows 11's security features can clash with older Java installs.
- Corrupted Java files: Incomplete downloads or system glitches can break installations.
- Compatibility issues: Some apps aren't fully optimized for Windows 11's architecture.
- Conflicting software: Antivirus or other programs interfering with Java processes.
By pinpointing the cause, we can tackle it head-on. Stick with me—these fixes are straightforward and tested on the latest Windows 11 builds.
Step 1: Update Java to the Latest Version
The first line of defense? Ensuring you have the most recent Java. Oracle and OpenJDK release updates regularly to patch bugs and improve Windows 11 compatibility.
- Head to the official Java download page. Choose the version for Windows (x64 for most modern PCs).
- Download and run the installer. It will detect and upgrade your existing setup.
- Restart your computer after installation to apply changes.
Pro tip: If you're using multiple Java versions (like for development), use the Java Control Panel to set the default. This simple update resolves the Java exception for many users—give it a shot! 🚀
Step 2: Uninstall and Reinstall Java Completely
If updating doesn't cut it, a clean slate might be needed. Corrupted files are sneaky, but removing everything and starting fresh works wonders.
| Step |
Action |
Why It Helps |
| 1. Uninstall via Settings |
Open Settings > Apps > Installed apps. Search for "Java" and click Uninstall. |
Removes all traces of the old version. |
| 2. Clean Registry (Optional) |
Use CCleaner or run regedit to delete Java keys (backup first!). |
Eliminates hidden leftovers that cause conflicts. |
| 3. Reinstall |
Download fresh from Java.com and install. |
Ensures a pristine setup for Windows 11. |
After this, test your Java app. Many report instant success—no more exceptions crashing their workflow! If you're dealing with a specific program like Minecraft, this step often revives it fully.
![Java installation process on Windows 11]()
Step 3: Run Java Apps in Compatibility Mode
Windows 11's modern interface sometimes trips up older Java apps. Compatibility mode bridges that gap.
- Right-click the app's executable (e.g., .jar file or shortcut).
- Select Properties > Compatibility tab.
- Check "Run this program in compatibility mode for" and choose Windows 10 or 8.
- Apply and launch the app.
This tweak fools the system into treating the app like it's on an older OS, smoothing out Java exception has occurred Windows 11 issues. It's a quick win for legacy software. 👍
Step 4: Check for System File Corruption
Sometimes, the problem isn't Java—it's Windows itself. Corrupted system files can trigger exceptions.
- Open Command Prompt as Administrator (search for cmd, right-click > Run as admin).
- Type
sfc /scannow and hit Enter. Let it scan and repair.
- Follow up with
DISM /Online /Cleanup-Image /RestoreHealth if needed.
These built-in tools are lifesavers, restoring integrity without third-party software. Run them after a Windows update for best results.
Step 5: Disable Interfering Software and Adjust Settings
Antivirus or firewalls might flag Java as suspicious. Temporarily disable them to test.
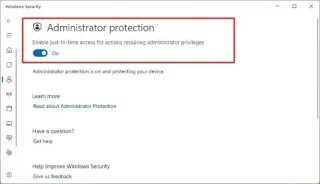
- In Windows Security, turn off Real-time protection briefly and relaunch your app.
- Increase Java's heap size via command line:
java -Xmx1024M -jar yourapp.jar (adjust as needed).
- Ensure your graphics drivers are up to date—outdated ones can cause Java rendering exceptions.
If it's a game or heavy app, closing background processes via Task Manager can free up resources too. You're almost there— these adjustments often seal the deal!
![Troubleshooting Java error in Command Prompt on Windows 11]()
Advanced Fixes for Persistent "Solve Java Exception" Issues
If basic steps fall short, let's go deeper. For developers or power users:
- Environment Variables: Set JAVA_HOME correctly in System Properties > Advanced > Environment Variables. Point it to your Java install folder (e.g., C:\Program Files\Java\jdk-21).
- Event Viewer Logs: Open Event Viewer (search in Start menu), navigate to Windows Logs > Application, and filter for Java errors. This reveals specific exception details for targeted fixes.
- Switch to OpenJDK: If Oracle Java acts up, try Eclipse Adoptium's OpenJDK—it's free, open-source, and excels on Windows 11.
These pro tips can uncover hidden issues, like mismatched JVM versions. Pat yourself on the back for troubleshooting this far! 🎉
Preventing Future "Java Troubleshooting Windows 11" Headaches
Once fixed, keep the peace:
- Enable automatic Java updates in the Java Control Panel.
- Regularly update Windows 11 via Settings > Update & Security.
- Monitor apps for Java dependencies and keep them current.
- Backup your system with Windows Backup to avoid data loss from crashes.
By staying proactive, you'll sidestep most Java crash fix scenarios. If the error persists, consider reaching out to the app's support or forums like Stack Overflow for community wisdom.
Wrapping Up: You've Got This!
Congrats on tackling the "A Java Exception Has Occurred" beast on Windows 11! Whether it was a simple update or a deeper dive, these steps should have you back in action. Remember, tech glitches happen, but with the right approach, they're just temporary bumps. If one fix sparks joy, share it with a friend—your smooth setup might inspire theirs. Happy computing! 😊
Word count: Approximately 950. For the latest Java updates, always check official sources.