The ProtonMail Bridge allows Linux users to use their ProtonMail account with traditional email accounts. Even ones that do not support ProtonMail, or it’s sophisticated encryption features by default.
Setting up the ProtonMail Bridge on Linux is tricky for new Linux users, but not impossible. If you’re a fan of ProtonMail and want to use your account on your favorite Linux email app, follow along with this guide to get it running!
Remarque : l'utilisation du pont ProtonMail nécessite un compte payant. Pour mettre à jour votre compte, cliquez ici .
Installation de l'application ProtonMail Bridge sur Linux
Sur le site officiel de ProtonMail, il est indiqué qu'il existe une version pour Microsoft Windows, Apple MacOS et Linux. Cependant, le bouton Linux est grisé et non cliquable. Lorsque vous passez la souris dessus, il est dit « envoyer un e-mail pour plus de détails » et il est marqué comme une application bêta.
S'il est vrai que les développeurs de ProtonMail Bridge ne facilitent pas le téléchargement de l'application depuis leur site Web, il n'est pas nécessaire de contacter ProtonMail pour mettre la main sur la dernière version de l'application Bridge. Pourquoi? Quelqu'un a placé le programme dans la boutique d'applications Flatpak, et cela fonctionne plutôt bien !
Remarque : si vous n'aimez pas Flatpak et préférez une autre façon d'installer et d'utiliser l'application ProtonMail Bridge sur votre système, votre meilleur pari est de contacter ProtonMail. Demandez-leur de participer à la bêta de Linux ! Les coordonnées se trouvent sur cette page .
Pour lancer l'installation de l'application ProtonMail Bridge sur votre PC Linux, commencez par lancer une fenêtre de terminal sur le bureau Linux. Appuyez sur Ctrl + Alt + T ou Ctrl + Maj + T sur le clavier.
Une fois la fenêtre du terminal ouverte, installez le package "flatpak" sur votre système Linux avec le gestionnaire de packages de votre ordinateur. Ou suivez notre guide pour savoir comment l'installer sur différentes distributions Linux .
When the “flatpak” package is installed, the Flatpak runtime is ready to go. The next step is to add the Flathub app store to your Linux PC. To do that, use the flatpak remote-add command down below.
flatpak remote-add --if-not-exists flathub https://flathub.org/repo/flathub.flatpakrepo
After adding the Flathub app store to your Linux PC, use the flatpak install command below to install the ProtonMail Bridge program. Keep in mind that when you run this command, the Flatpak runtime will also install various dependencies and tools that the app needs to function correctly.
flatpak install flathub ch.protonmail.protonmail-bridge
En supposant que la commande d'installation flatpak s'exécute avec succès, vous aurez la dernière version de l'application ProtonMail Bridge configurée sur votre PC Linux. Maintenant, ouvrez-le en recherchant "ProtonMail Bridge" dans le menu de l'application ou en exécutant la commande d' exécution flatpak suivante ci-dessous dans une fenêtre de terminal.
flatpak exécuter ch.protonmail.protonmail-bridge
Configurer le pont ProtonMail
Démarrez le processus de configuration de ProtonMail Bridge en lançant l'application (si vous ne l'avez pas déjà fait.) Lorsque le programme est ouvert, suivez les instructions détaillées ci-dessous pour le faire fonctionner.
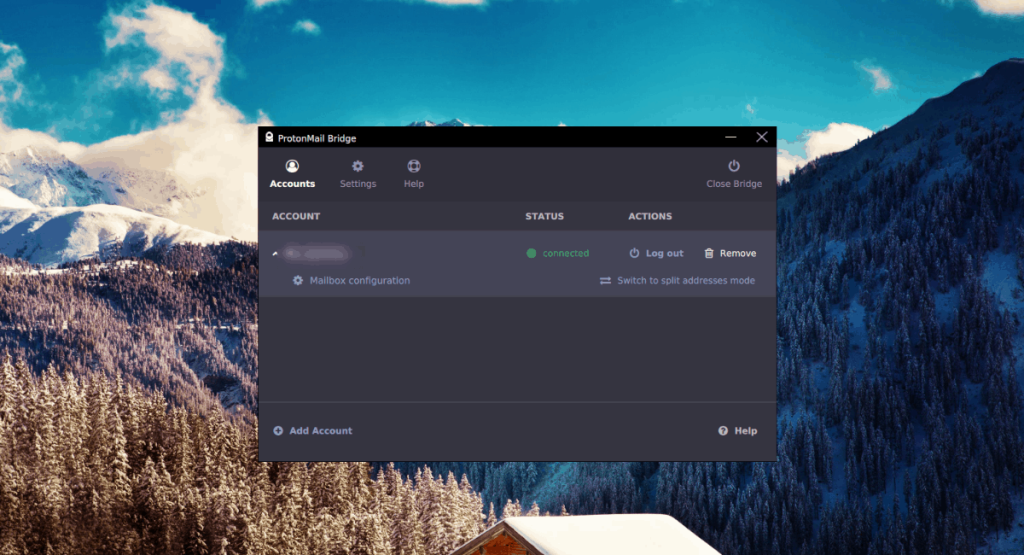
Étape 1 : La première étape de la configuration de ProtonMail consiste à installer un compte de messagerie compatible. À l'heure actuelle, la meilleure application de messagerie qui fonctionne avec ProtonMail Bridge est Mozilla Thunderbird. Suivez ce tutoriel pour installer le dernier Thunderbird si vous ne l'avez pas déjà installé .
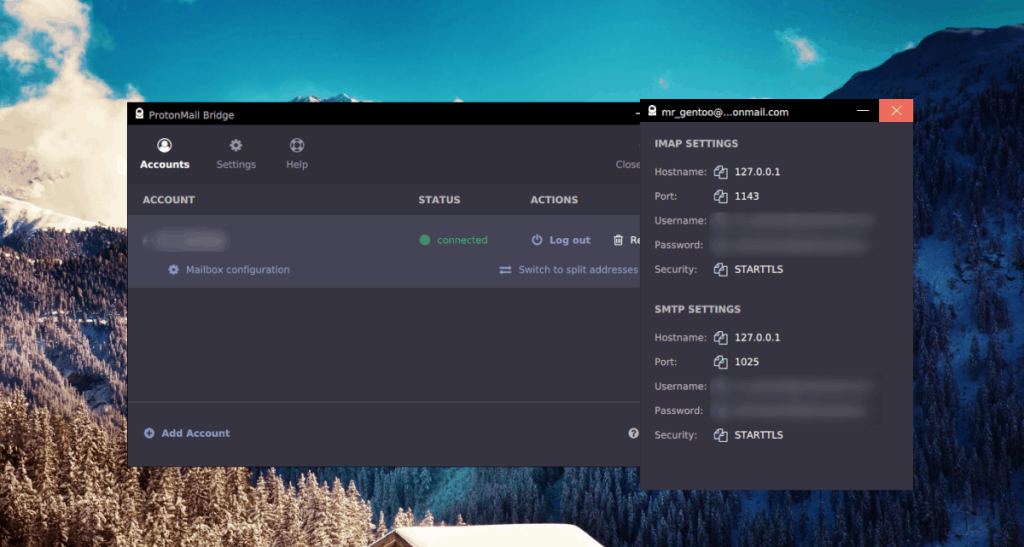
Étape 2 : Accédez au pont ProtonMail et connectez-vous avec votre compte et votre mot de passe. Ensuite, localisez le bouton « Configuration de la boîte aux lettres » et cliquez dessus. Il vous fournira les configurations correctes pour Thunderbird.
Étape 3 : Lancez Thunderbird sur votre PC. Au démarrage, l'assistant de création de compte apparaîtra. Entrez votre adresse e-mail ProtonMail dans la case « Adresse e-mail ».
Step 4: Locate the “Password” box and copy the password from the ProtonMail Bridge mailbox configuration window. Be sure to check the box next to “Remember password” so that you do not have to re-enter the password each time Thunderbird is opened.
Step 5: Find the “Manual config” button and click on it. Selecting this button will reveal advanced configuration options for Thunderbird.
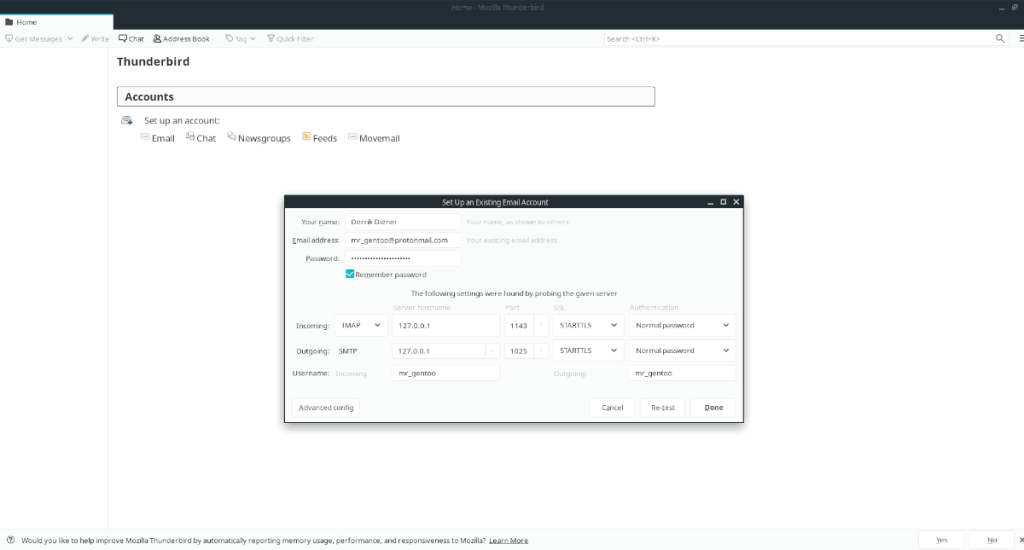
Fill out all of the text boxes in the Thunderbird with the information from both the IMAP and SMTP settings in the ProtonMail Bridge mailbox configuration window. All passwords must be set to “Normal password.”
Step 6: Find the “re-test” button at the bottom of the account creation window and click it. It will test the connection settings you have added to Thunderbird and assess if the information is acceptable.
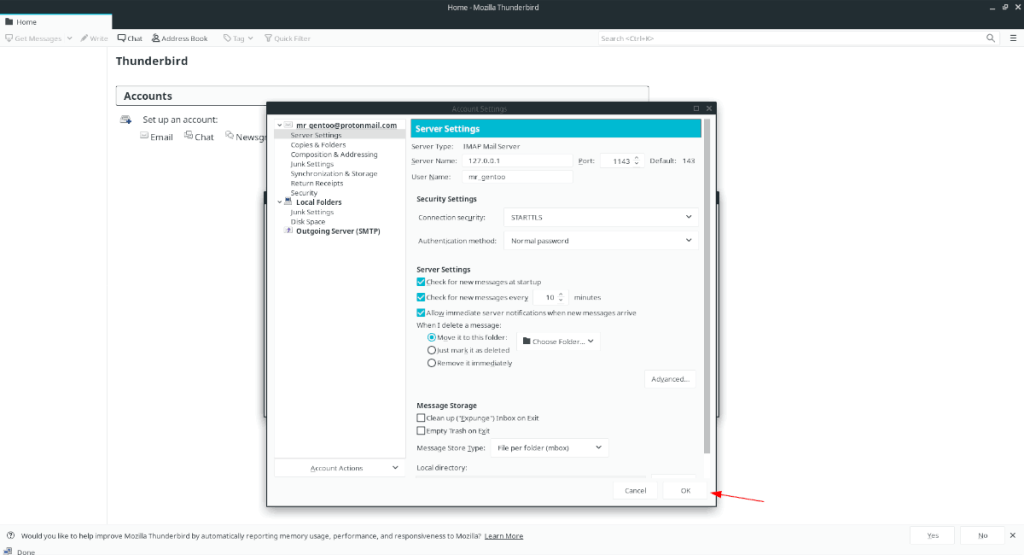
Step 7: Locate the “Advanced config” button at the bottom-left section of the account creation window and click on it. Selecting the “Advanced config” button will force Thunderbird to accept ProtonMail Bridge’s unique account settings.
Step 8: When the “Advanced config” window appears, do not change anything, as your information is already entered. Instead, select the “OK” button to confirm the account information is correct to add your ProtonMail account information to Thunderbird.
Step 9: Upon adding your ProtonMail account to Thunderbird, you will see a pop-up window appear. This pop-up window says, “Add Security Exception.” Select the “Confirm Security Exception” button.
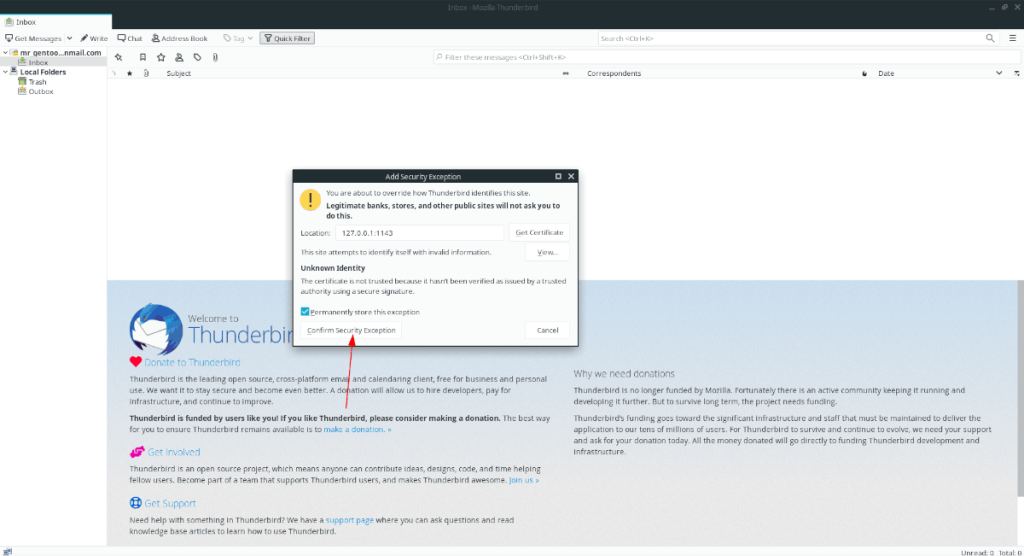
Please note that there is no actual security concern. The address in Thunderbird (127.0.0.1) is the localhost, which is your computer, running the encrypted ProtonMail Bridge app.
You will need to confirm a security exception twice. One for 127.0.0.1, and one for 127.0.0.1:1025. Keep in mind that the 127.0.0.1:1025 security exception prompt may not appear until you attempt to send an email.
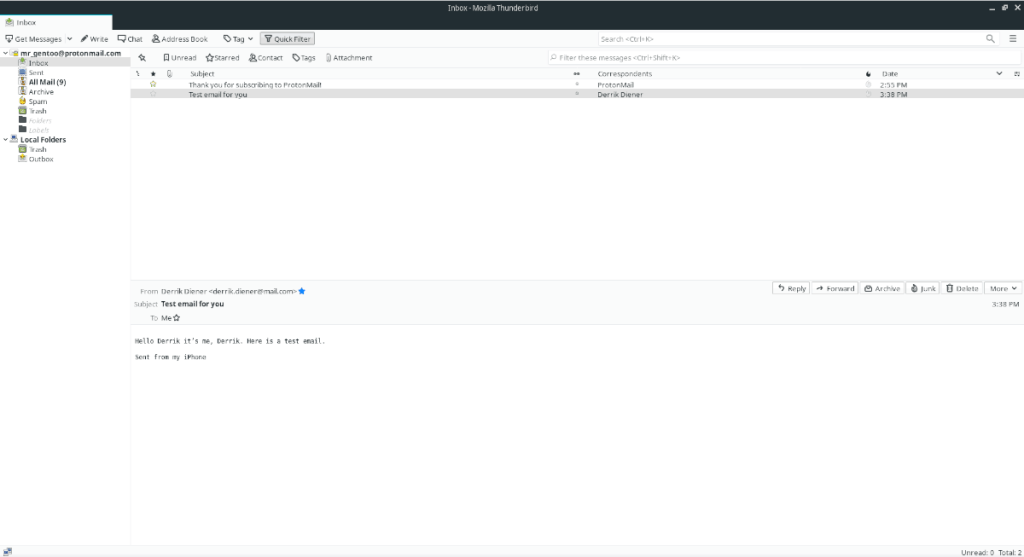
After confirming both security exceptions, your ProtonMail messages will load into Thunderbird. Enjoy!


![Téléchargez FlightGear Flight Simulator gratuitement [Amusez-vous] Téléchargez FlightGear Flight Simulator gratuitement [Amusez-vous]](https://tips.webtech360.com/resources8/r252/image-7634-0829093738400.jpg)
