หน้าแรก
» ลินุกซ์
»
How to Install Pardus 23 on Legacy Hardware: Step-by-Step
How to Install Pardus 23 on Legacy Hardware: Step-by-Step
An older desktop or laptop can still be useful, but installing a modern Linux distribution on it raises a few questions that matter more than the installation clicks themselves. Is the processor actually 64-bit? Should you choose GNOME or XFCE? Does “legacy hardware” mean a Legacy BIOS installation, and if so, should the disk use GPT or an MBR-style partition table? What should you do if the installer boots but the installed system does not?
For Pardus 23, these questions have fairly clear answers. As of October 2026, Pardus still lists Pardus 23.4 XFCE and GNOME among older releases that continue to be supported. The official Pardus 23.0 release notes describe XFCE 4.18 as the default lightweight desktop and list a minimum 1.0 GHz 64-bit CPU, 1 GB RAM, and 8 GB of disk space for Pardus 23. Pardus' later download information gives the same low-end class of requirement for the XFCE edition, while GNOME expects more CPU, memory, disk space, and display resolution.
The first requirement is not the age of the computer; it is the CPU architecture. Pardus 23 desktop installation images in the official archive are labeled amd64. A PC can have an old-fashioned Legacy BIOS and still have a 64-bit CPU, which is common with many Core 2-era and later systems. A truly 32-bit-only processor is different: the current Pardus 23 desktop ISO is not the right installation image for it.
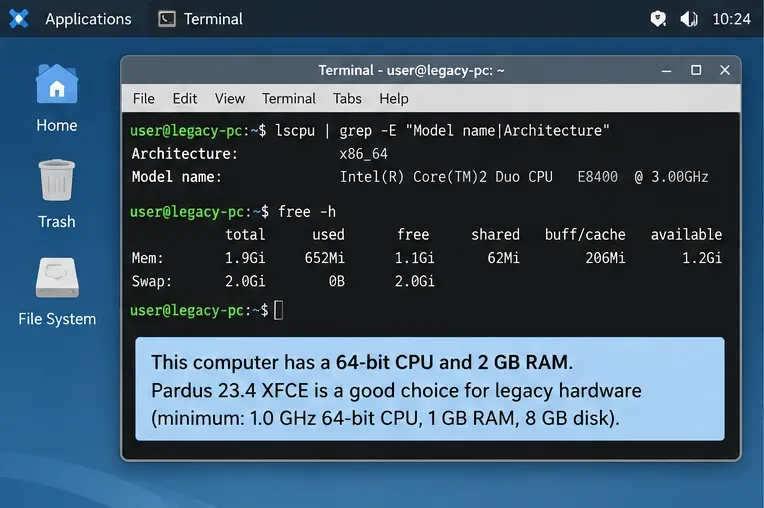
Before creating installation media, confirm that the old PC still has a 64-bit processor. Pardus 23 desktop ISOs are amd64 even when the machine uses traditional Legacy BIOS.
If the output says x86_64, the CPU meets the architecture requirement. For a machine near the minimum specification, choose XFCE rather than GNOME. The official Pardus 23 notes call XFCE lightweight and designed to use fewer system resources. That does not guarantee excellent performance on every old GPU, Wi-Fi adapter, or hard disk, but it is the more sensible Pardus 23 desktop starting point for low-spec hardware.
Which Pardus 23 ISO should I install in 2026?
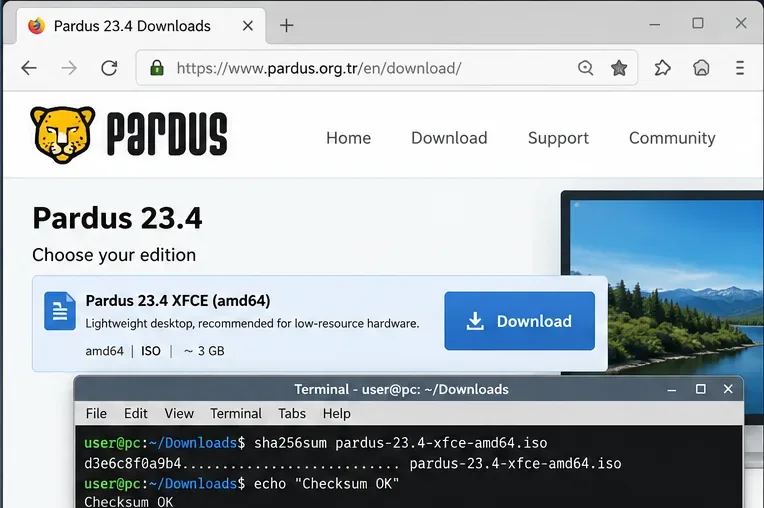
Use Pardus 23.4 XFCE unless you have a specific reason to install an earlier 23.x point release. Pardus' old-releases page currently lists 23.4 as a supported older release, and the official ISO archive contains Pardus-23.4-XFCE-amd64.iso together with MD5, SHA-1, SHA-256, and SHA-512 checksum files.
Download from the official archive rather than an unofficial mirror. After the download, verify the file against the published SHA256SUMS entry. On Linux, the basic check is:
sha256sum Pardus-23.4-XFCE-amd64.iso
Compare the resulting hash character-for-character with the official value in the Pardus 23 archive. A checksum mismatch means you should not continue with that file.
For low-resource systems, choose the Pardus 23.4 XFCE image from the official old-releases archive and compare its checksum with the published checksum file before writing the USB.
Do I need UEFI for Pardus 23?
No. The official Pardus XFCE installation guide documents both UEFI and Legacy boot paths. For a machine that only supports Legacy BIOS, Pardus can be installed using the Legacy path. The important rule is consistency: boot the installer in the same firmware mode that you intend to use after installation.
If the computer offers both UEFI and Legacy/CSM, choose one deliberately. This guide focuses on Legacy. The Pardus installation guide specifies an msdos partition table for Legacy installation, while its UEFI path uses GPT and an EFI System Partition. Mixing those instructions is a common way to end up with a system that installs successfully but does not boot.
Step 1: Write the Pardus ISO to a USB drive
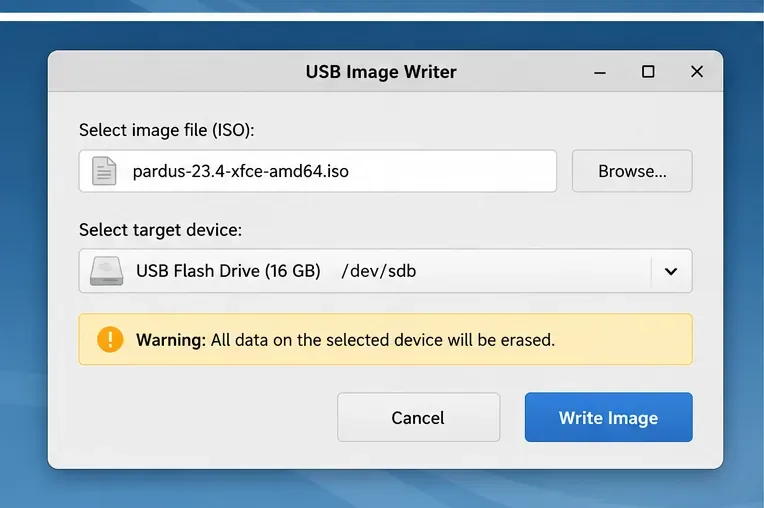
Use an image-writing tool rather than copying the ISO file onto a normal formatted USB drive. Pardus provides its own Pardus Image Writer, described by the project as an application for writing Linux and Windows image files to USB media. Other operating systems can use an equivalent raw-image writer.
Select the Pardus 23.4 XFCE ISO, select the correct USB device, and start the write. Everything already on that USB drive will be destroyed.
Write the ISO as an image to a USB drive. The selected USB is erased, so confirm the target device carefully before starting.
If the machine later drops to a GRUB prompt or refuses to boot the installer, recreate the USB and verify the ISO checksum before changing partitions or BIOS settings. A damaged download or incorrectly written installation medium can imitate a much more complicated boot problem.
Step 2: How should I configure an old BIOS?
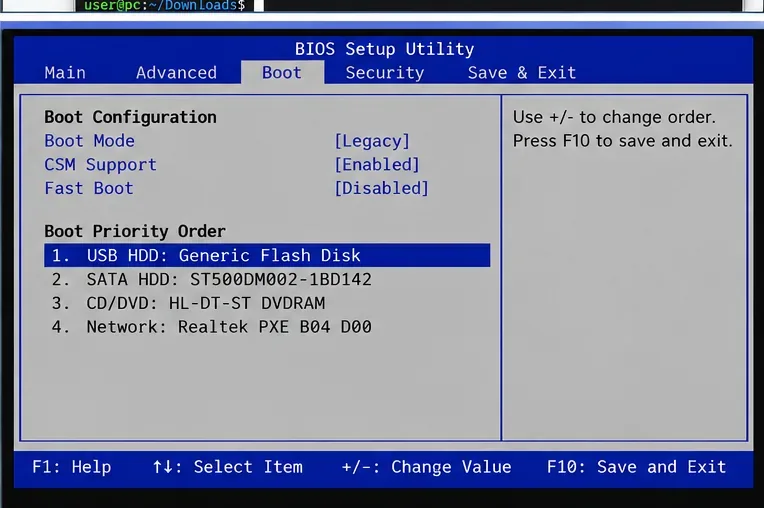
Insert the USB and enter the firmware setup or one-time boot menu. The exact key varies by manufacturer; the Pardus guide mentions common keys such as F2, F8, F12, and Delete. On a pure Legacy machine, select the USB device from the traditional BIOS boot list. On a hybrid system, choose the non-UEFI USB entry if you intend to install in Legacy mode.
เริ่มจากสาเหตุที่แก้ไขได้ง่ายก่อน ตรวจสอบค่า checksum ของไฟล์ ISO เขียนข้อมูลลง USB ใหม่ และลองใช้พอร์ต USB อื่น หากเมนูบูตมีตัวเลือกกราฟิกหรือความเข้ากันได้แบบอื่น ให้เลือกตัวเลือกนั้นแทนการแบ่งพาร์ติชั่นดิสก์ใหม่ทันที ความล้มเหลวของกราฟิกก่อนการติดตั้งมักจะไม่ได้รับการแก้ไขด้วยการเปลี่ยนระบบไฟล์รูท
การรองรับฮาร์ดแวร์เป็นจุดที่ข้อจำกัดของคู่มือการติดตั้งทั่วไปมีความสำคัญที่สุด Pardus 23 สร้างขึ้นบนระบบ Linux ยุค 6.1 ดังนั้น GPU ที่เก่ามากหรือชิปเซ็ต Wi-Fi ที่ไม่ธรรมดาอาจยังคงต้องใช้การแก้ไขปัญหา ในทางกลับกัน อุปกรณ์รุ่นใหม่บางอย่างอาจทำงานได้ดีกว่ากับเคอร์เนลเวอร์ชันใหม่กว่า หากเซสชันแบบ Live ตรวจไม่พบฮาร์ดแวร์ที่จำเป็น ให้ตรวจสอบอุปกรณ์นั้นก่อนที่จะทำการติดตั้งลงดิสก์