Linuxでの帯域幅の監視:2021年の上位5つのツール

Linuxがデータセンターでますます普及するにつれ、Linuxでの帯域幅の監視を検討し、最高のツールも検討しています。
IISは、Internet Information Servicesの略で、以前はInternet Information Serverと呼ばれていましたが、NTファミリをはじめとするWindows製品で使用するように設計されたMicrosoftのWebサーバーです。
このWebサーバーは、Windowsユーザーが、メディアファイル、ドキュメント、さらには本格的なWebサイトなど、さまざまな種類のコンテンツをWeb上でホストできるようにするために使用されます。現時点では、Apacheが最も人気のあるWindows Webサーバーであり、IISがそれに続きます。これは非常に印象的です。
IISとは何ですか?
IISは、サービスに関連付けられたWebサイトとその関連ユーザーを管理できる直感的なグラフィカルユーザーインターフェイス(GUI)のおかげで、使い慣れたWebサーバーです。IISのGUIを使用すると、Webサイトの設計、カスタマイズ、構成、および公開を1か所から簡単に行うことができます。
IISマネージャーと呼ばれる組み込みのWebサイト管理ツールがあり、セキュリティ設定、パフォーマンスパラメーター、ログ設定、および管理するWebサイトのエラーページやデフォルト値などのオプションを調整するために使用できます。
技術的な観点から見ると、IISは非常に用途が広く、大きな労力をかけることなく、標準のWebページと動的なWebページを同じように提供できます。したがって、これを使用してHTML Webページを作成および公開できますが、PHPページおよびASP.NETアプリケーションも管理できることを知っておくと便利です。
その柔軟性のおかげで、IISは動的Webページに含まれるスクリプトとアプリケーションを実行し、訪問者のWebブラウザー画面に結果を表示できます。静的Webサイトを使用すると、プロセスはさらに簡単になります。IISは、HTMLコンテンツと画像(存在する場合)を訪問者のWebブラウザーに送信するだけです。
IISの目的は何ですか?
マイクロソフトの完全なサポートの恩恵を受けており、多数の高度な機能を備えているという事実を考えると、IISは、eショップやプロモーションポートフォリオWebサイトなどの商用Webサイトの作成と管理に最適です。
欠点は、IISを商用目的で使用することは、商用ライセンスが必要になることも意味します。さらに、このライセンスタイプの価格は、含めるユーザーの数によって異なります。
そのため、IISを使用してWebサイトを作成およびホストできること、および静的および動的なWebコンテンツをサポートすることをすでに確立しています。ただし、IISはそれだけではありません。たとえば、組み込みのモジュールサポートを使用して、サーバーの機能を強化できます。
サーバーにストリーミングモジュールをインストールして、Webサイトの訪問者がストリーミングメディアコンテンツの恩恵を受けることができるようにすることができます。また、強力なURL実装ルールを作成できるURL書き換えモジュールを使用して、訪問者がそれらを簡単に覚えて、検索エンジンがそれらをより速く見つけることができるようにすることもできます。
したがって、Webサイトをすばやく作成して公開する方法が必要な場合は、IISが最善の方法の1つであることは言うまでもありません。オープンソースであり、ユーザー数に関係なく無料で使用できるため、ApacheHTTPが依然として最良の方法です。
IISのバージョン履歴
当初、IISは、研究プロジェクトとして開発されたWebサーバーの代替として意図されていたことは言及する価値があります。最初のMicrosoft署名のWebサーバープロジェクトはフリーウェアとして配布され、EMWAC(European Microsoft Windows NT Academic Centre)用に設計されました。
ただし、EMWACサーバーがmicrosoft.com Webサイトに向かうすべてのトラフィック量を処理できなかったため、プロジェクトは中止され、MicrosoftはIISの形式で独自のWebサーバーを開発しました。
注目すべき点の1つは、IISのほとんどのバージョンがWindowsオペレーティングシステムのバージョンと一緒に、または一緒にリリースされたことです。確かに、当時のIISは、今日の私たちの知識の影にすぎませんでした。実際、各Windowsリリースは、IISの進化のチェックポイントとして非常に役立ちます。
IISの使用を計画している場合は、最新の安定バージョンを使用してみてください。これは通常、セキュリティが最も厳しく、特に最新バージョンのWindowsまたはWindowsServerを実行している場合に最高のパフォーマンス指向の結果が得られるバージョンです。
IISをインストールするにはどうすればよいですか?
前に述べたように、IISは実際にはWindowsバージョンにバンドルされているはずなので、IISをインストールする必要はありません。Windows 10を使用している場合は、PCでIIS10.0のバージョンがすでに利用可能になっているはずです。
ただし、MicrosoftはデフォルトでIISをアクティブ化しないことを決定したため、手動で有効にする必要があります。しかし、心配しないでください。これを実現するのは、厳密にはロケット科学ではありません。PCでIISをアクティブ化するには、次の手順に従ってください。
ここで、PCを再起動して、システムが必要なすべての構成ファイルをロードし、IISを最大限に使用できるようにすることができます。PCを再起動しなくても機能する場合もありますが、新しい機能を有効にした後でシステムを再起動することは決して悪い考えではありません。
PowerShellを使用して、コンピューターでIISを有効にすることもできます。聞いたことがない場合、PowerShellは複雑なツールであり、CMDと間違えられます。PowerShellはそれよりもはるかに複雑ですが、あまり詳しくは説明しません。面倒なことはありませんが、PowerShellを使用してWindowsPCでIISを有効にする方法は次のとおりです。
Enable-WindowsOptionalFeature –online –featurename IIS-WebServerRoleご覧のとおり、PowerShellは、Windows 10PCでIISを有効にした後で再起動する必要がないことを示唆しています。プロセスを元に戻す場合は、次のコマンドを使用して、PowerShellを使用してIISを無効にすることができます。
Disable-WindowsOptionalFeature –online –featurename IIS-WebServerRoleただし、この機能を無効にするために、PowerShellでさえPCを再起動することをお勧めします。後で再起動することもできますが、その間は新しいプロジェクトを開始しないでください。
IISサーバーはどのように機能しますか?
何よりもまず、IISにはすべてのクライアントサーバー要求を処理できる独自のプロセスエンジンがあることに注意してください。したがって、クライアントがWebサーバーに要求を送信するたびに、IISはその要求を処理し、応答を生成して、クライアントに送信します。
アーキテクチャの観点から、このプロセスは2つの異なるレイヤーで展開されます。
上で述べたように、HTTP.SYSはカーネルモードで見つけることができます。HTTP.SYSは、クライアント要求をアプリケーションプールに転送するために使用されます。この要求転送プロセスは、クライアントがWebサイトのURLと対話して、ページにアクセスしようとするたびに開始されます。これが発生するたびに、HTTP.SYSはクライアントの要求を取得し、特定のアプリケーションプールのキューに入れます。
要求の転送後、w3wp.exe(ワーカープロセス)はISAPIフィルターを読み込み、HttpRuntime.ProcessRequestを単独で読み込むか、ASPXページの場合はaspnet_isapi.dllと組み合わせて読み込みます。HttpRuntime.ProcessRequestの起動は、処理の開始を示します。その後、HttpRuntimeプロセスはHttpApplicationオブジェクトを使用してプールを構築し、その内容はHTTPを介して渡されます。
次に、HTTPモジュールがアクティブ化され、要求がASP.NETページのHTTPハンドラーに到達するまでこのプロセスが続行されます。リクエストがHTTPルートを通過すると、ページの表示が開始されます。
ワーカープロセスとは何ですか?
まず第一に、ワーカープロセスは1つだけではないことに注意してください。実際、Webサーバーとその上でホストするコンテンツの正常な機能を保証する、そのようなエンティティがいくつかあります。これは、Webサイトであろうとアプリケーションであろうと関係ありません。
したがって、IISのワーカープロセスは、IISで以前に構成したすべてのアプリケーションとWebサイトの実行環境を提供する役割を果たします。これらのプロセスには、前述のサービスが適切に機能するために重要ないくつかの情報が含まれています。
APIを使用して、メモリフットプリントまたはCPU使用率に関する情報を取得できる可能性があります。これらの詳細は、Webサーバーとそれに関連するワーカープロセスの全体的な状態を注意深く監視するのに役立ちます。
最後になりましたが、APIを使用して、ワーカープロセスエンドポイントにDELETEリクエストを送信するだけで、ワーカープロセスを終了できます。
アプリケーションプールとは何ですか?
名前はやや自明ですが、IISのアプリケーションプールの目的ははるかに複雑です。何よりもまず、アプリケーションプールにはワーカープロセスが含まれているため、コンテナーの役割を果たしていると言っても過言ではありません。さらに、アプリケーションが同じサーバーで実行されているか、別々のサーバーで実行されているかに関係なく、アプリケーションを相互に分離します。これは、プールが通常機能する方法とは逆です。
1つのアプリケーションプールが複数のWebサイトを保持できることを知っておくことが非常に重要です。つまり、アプリケーションプールは、ワーカープロセスによって処理されたURLのセットにすぎないと言えます。これらのプールでのアプリケーションの分離は、管理を大幅に簡素化できるという事実によって正当化されます。さらに、この分離のおかげで、1つのアプリケーションプールに障害が発生した場合でも、他のアプリケーションプールは通常どおり続行できます。
IISサーバーを構成する方法は?
コンピューターでIISを有効にし、そのコンポーネントについて少し学習しました。次に、IISを適切に構成して、大きな労力をかけずに独自のWebサーバーを実行できるようにする方法を見てみましょう。
しばらく前に述べたように、人々がIISを使用する主な理由の1つは、Webアプリケーションの展開を容易にするためです。IISとその高度なインストーラー機能を使用すると、ビートをスキップすることなく、複数のサーバーでWebアプリを構成および展開できます。また、IISが簡単に処理できるため、マシンごとに新しい構成を作成する必要はありません。
新しいWebサイトを構成する場合、最初に行うことは、[ファイルとフォルダー]ビューに移動することです。このビューでは、既存のアプリケーションファイルを管理したり、必要に応じて新しいファイルを追加したりできます。Webサイトの管理パネルが後でそれらを使用することを考慮して、アプリケーションファイルを個々のディレクトリに配置する必要があることに注意してください。
ファイルの処理が完了したら、IISサーバービューに移動できます。このビューでは、[新しいWebサイト]ツールバーを使用して、新しいWebサイトの名前を入力できます。次に行う必要があるのは、WebサイトのHTTP / HTTPS設定を調整し、セキュリティを強化するためにSSLの使用を検討することです。WebサイトまたはフォルダーのHTTPおよびSSLを構成する方法は次のとおりです。
IIS WebサーバーをSSLで保護するにはどうすればよいですか?
Secure Sockets Layerの略であるSSLは、ユーザーとターゲットWebサイト間の通信を暗号化するための最良の方法の1つです。多くのウェブサイトがHTTPからHTTPSに飛躍したことをしばらく前に覚えていますか?そうですね、SSL証明書は、このプロセスの重要な部分であり、今もなお重要です。
良いニュースは、IISを使用してSSLをWebサイトに非常に簡単に展開できることです。一方、証明書は、データ暗号化の観点からWebサイトが信頼できると認められる唯一の方法であるため、必ず購入する必要があります。
したがって、最初のステップは、SSL証明書プロバイダーを見つけてそのようなアイテムを購入することです。購入後、コードまたは証明書ファイルのいずれかを受け取ります。IISでSSLを構成するには、証明書ファイルが必要になるため、先に進む前に必ず証明書ファイルを取得してください。
SSLでIISWebサーバーを保護する
これで、IISサーバーの証明書が正常にインストールされました。ただし、Webサイトの証明書をバインドする必要があるため、これだけでは十分ではありません。それが終わるまでに、Webサイト、ポート、およびIPアドレスに関連付けられた証明書を備えた安全なWebサイトができあがります。
セキュリティ証明書をWebサイトにバインドする
So we’ve managed to install SSL on your IIS web server and associate it with your website. You can use the steps above to associate certificates with more than just one website if the need arises. However, there’s still one thing we need to do: redirect incoming HTTP traffic to HTTPS, to ensure encryption of our visitors’ traffic.
Redirect HTTP to HTTPS
(.*) in the Pattern field{HTTPS} in the Condition input field^OFF$ in the Pattern fieldhttps://{HTTP_HOST}/{REQUEST_URI} in the Rewrite URL fieldThat’s it, you’ve now completely implemented SSL on your web server, bound it to your website, and configured the site to redirect incoming HTTP traffic to HTTPS. If done correctly, visitors who try to access your website using HTTP will be automatically redirected to its secure HTTPS counterpart.
What are Virtual Directories?
As we’ve established before, creating and managing a website isn’t the only thing that IIS is capable of doing. You can also create applications, which we already mentioned, but most importantly, you can create virtual directories by simply giving them a name that maps them to a physical directory.
The way this feature works is by letting users access various types of content that are hosted on a server quickly through a direct name. Surely enough, this content could be a website, but it could also be photos, videos, or other types of smaller media files.
Back in the day when IIS 6.0 was all the fuss, virtual applications, and directories were treated as separate objects by IIS. As such, applications consisted of the following elements:
Starting with IIS 7.0, virtual applications and directories are organized within a hierarchy, but they’re still considered to be separate objects. Thus, a website, which is higher in the hierarchy, can contain several applications, or virtual directories that are mapped to a physical location on your PC.
What are log files in IIS?
In IIS log files serve the same purpose they do wherever else you may encounter them. You can use these files to check how things unfolded on your web server, see important events, and, most importantly, understand where things went wrong if any malfunction occurs.
In other words, an IIS log file keeps tabs on everything that happens to your web server, in case you ever need it. A few examples of recorded data include the precise date and time of the events, how much data was transmitted, and the IP addresses related to the events.
Find log files on IIS 7.0 and later
Find log files on IIS 6.0 and earlier
Can I change ports in IIS?
IIS uses port 80 for all HTTP traffic by default, but that doesn’t mean you can’t change it to another value if you want or need to. Changing to a different port can help you avoid certain firewall-related connectivity issues or dodge attacks that target certain service-port vulnerability combos.
Change default port in IIS
Since IIS usually uses port 80 by default, there’s no need to specify it whenever you want to test your website’s functionality, for instance, from inside a browser. You just type your domain name and you should be able to access your website without a hiccup.
However, if you insist on changing the default port, you’ll need to specify it each time you’re trying to access your website from a web browser. You can do that by adding :port number (where port number is the actual port you’re using) at the end of your domain name.
If, for instance, we would change the port of our website to, let’s say 2609, accessing it would look like this: Tips.WebTech360.com:2609. Pretty simple, right?
Now if you’re using an older version of Windows, and implicitly an older version of IIS, there are a few things you’ll need to do in a different manner to change the default port.
Change IIS port on Windows 8.1
How can I monitor IIS?
If you’re not exactly a fan of keeping things in order through manual testing and checking log files frequently (we get you), you may want to consider leaning on third-party software solutions that could keep an eye on your IIS web server for you.
SolarWinds Server & Application Monitor
SolarWinds Server & Application Monitor is currently one of the best third-party utilities that can help you monitor your IIS website, server, application, or virtual directory without significant efforts. You just point it to the things you want to keep track of and let it work its magic.
Not only does this tool let you know if your websites and web servers are up and running, but it also provides you with an impressive range of key metrics, including but not limited to CPU, memory & disk usage, and response times.
Furthermore, if there’s something wrong with one of the websites you’re monitoring, SolarWinds Server & Application Monitor can automatically restart it for you in an attempt to fix the issue in a simple manner.
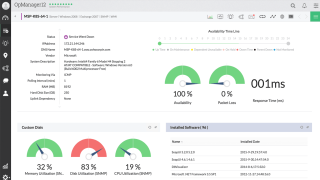
SolarWinds Server & Application Monitor’s screen is split into multiple sections, where you can monitor and analyze your applications and websites, access an overview of your applications’ health status displayed in graph form, and even manage applications at the press of a button.
You can also use this tool to keep track of your SSL certificates‘ expiration dates so that you can always be on top of things when it’s time to renew a soon-to-expire certificate. More so, you can use SolarWinds Server & Application Monitor to manage SSL certificates for several websites or servers for added convenience.
If you’re curious and want to give SolarWinds Server & Application Monitor a try, you’ll be glad to know that there’s a 30-day free trial available, so that you can test run its capabilities before committing to purchasing a license.
What is IIS – Conclusion
To wrap it up, IIS is a handy Microsoft webserver service you can use to create your own server, as well as manage websites, applications, and virtual directories in it without breaking a sweat. It’s currently the second most popular Windows web server in the world, losing first place to Apache HTTP, which is a completely free alternative.
IIS is mainly used to manage commercial websites, which requires you to purchase a commercial license. The price of such a license varies depending on the number of users you plan on having on the website.
Configuring IIS is somewhat intuitive, but you’ll need to be a bit tech-savvy to be able to make out all of its features, understand what each of them does and configure them to get the most out of your web server and associated websites or applications.
Linuxがデータセンターでますます普及するにつれ、Linuxでの帯域幅の監視を検討し、最高のツールも検討しています。
PostgreSQLは非常に成熟したオープンソースデータベース管理システムです。2023年最新の最高のPostgreSQL監視ツールを見てみましょう!
組織のBYODの取り組みをサポートし、最高のモバイルデバイス管理ツールのレビューを通じて、企業のセキュリティと生産性を向上させる方法を見つけましょう。
マネージドファイル転送(MFT)の主要なプログラムと、FTPやWebベースのファイル転送を超える最適なツールを比較します。
Wake-on-LANテクノロジーは、コンピューターの電源をリモートでオンにするための非常に便利な手段です。最新のWake-on-LANツールを確認しましょう。
Windowsのパワーユーザーの場合、PCでさまざまな操作を実行する方法が、複数のアプローチを持っており、
Ping スイープはさまざまな方法で活用できます。ベスト 10 の Ping スイープ ツールの方法と紹介について説明しますので、読み続けてください。
Web サイトは重要であり、適切なパフォーマンスを得るために常に注意深く監視する必要があります。ここでは、Web サイトを監視するための最適なツールをいくつか紹介します。
ネットワーク管理ソフトウェア市場は非常に混雑しています。最適なネットワーク管理ツールの推奨事項に従って、検索を短縮します。
ここでは、任意の数のマシンを管理する煩わしさを軽減するための最高のソフトウェア展開ツールをいくつか紹介します。


