หน้าแรก
» ลินุกซ์
»
How to Configure a WireGuard Point-to-Site VPN Server on Debian 12
How to Configure a WireGuard Point-to-Site VPN Server on Debian 12
A WireGuard point-to-site VPN on Debian 12 (Bookworm) is a practical way to let laptops, phones, or remote workstations reach a server or route traffic through it. One important clarification comes first: WireGuard does not have a special “server mode.” Every participant is a peer. In a point-to-site design, one Debian host simply acts as the stable, publicly reachable hub and each remote device gets its own key pair and tunnel address.
This guide uses Debian’s packaged WireGuard tools, wg-quick, IPv4 forwarding, and nftables. It assumes the Debian server has root or sudo access and that UDP port 51820 can reach it. If the server is behind a home or office router, you must forward that UDP port to the Debian host. If the ISP uses carrier-grade NAT (CGNAT), ordinary router port forwarding may not be enough; confirm that you actually have a reachable public address before troubleshooting WireGuard itself.
What will this configuration do?
The example VPN uses 10.8.0.0/24. The server is 10.8.0.1, and the first client is 10.8.0.2. The client can be configured as either a full-tunnel VPN, where IPv4 Internet traffic exits through the Debian server, or a split tunnel, where only selected private networks use WireGuard.
Debian’s own WireGuard documentation confirms that WireGuard is available through the distribution packages, while the official WireGuard quick-start documents key generation, wg-quick, and the optional persistent keepalive behavior. See the Debian WireGuard documentation, the official WireGuard Quick Start, and Debian’s wg-quick manual page.
Step 1: Install WireGuard and nftables
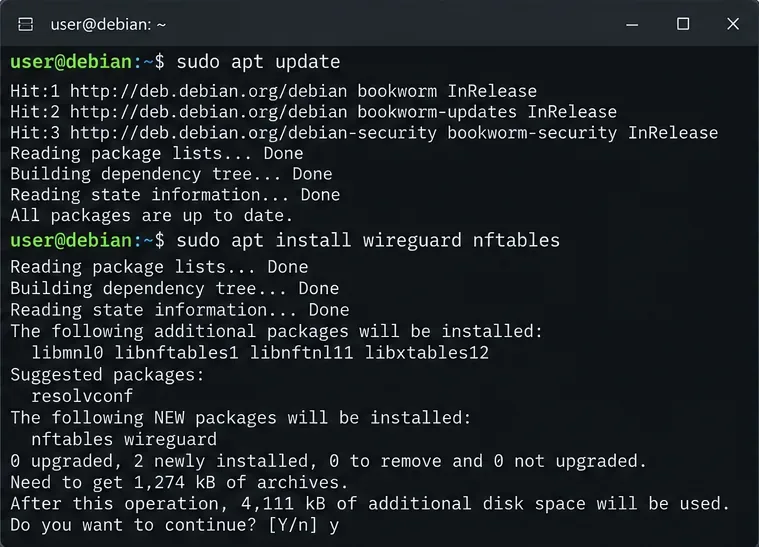
Update package metadata, then install WireGuard and nftables:
A common misconception is that Debian 12 needs an out-of-tree WireGuard kernel module. It does not. WireGuard has been in the Linux kernel for years; Debian’s packages provide the userspace management tools you need. Action: use Debian packages instead of downloading an unverified installation script.
Install WireGuard and nftables from Debian’s package repositories before creating the tunnel configuration.
Step 2: Generate the server key pair
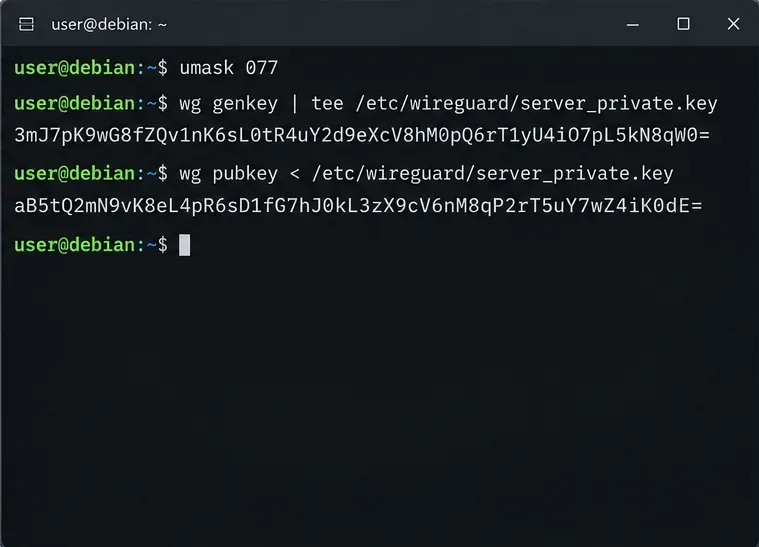
Create the key files with restrictive permissions:
sudo -i
install -d -m 700 /etc/wireguard
umask 077
wg genkey | tee /etc/wireguard/server_private.key | wg pubkey > /etc/wireguard/server_public.key
chmod 600 /etc/wireguard/server_private.key
cat /etc/wireguard/server_public.key
The private key must remain private. The public key is what you copy into client configurations. Ideally, generate each client’s private key on that client rather than on the server. That way the server never needs to possess client private keys.
Generate the Debian server’s WireGuard private key and derive its public key while using restrictive file permissions.
Step 3: Enable IPv4 forwarding
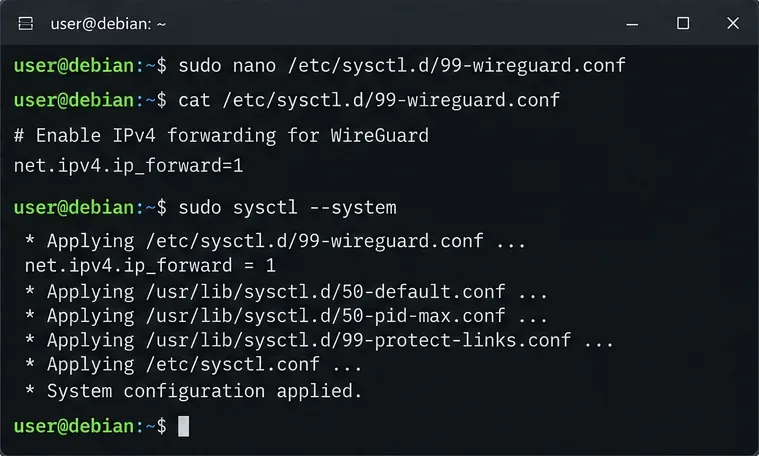
อุโมงค์ VPN อาจสร้างขึ้นได้สำเร็จในขณะที่การรับส่งข้อมูลแบบเราเตอร์ยังคงล้มเหลว สาเหตุเป็นเพราะการส่งต่อ IP ของ Linux เป็นการตั้งค่าเคอร์เนลที่แยกต่างหากจาก WireGuard เอง สร้างไฟล์ sysctl แบบถาวร:
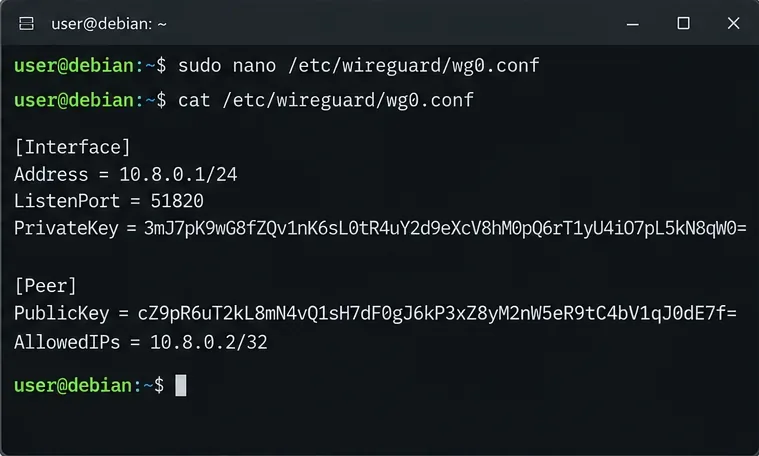
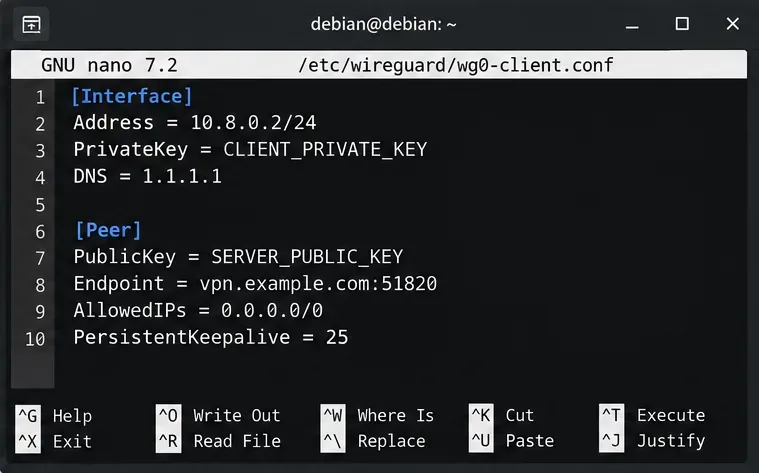
แทนที่vpn.example.comด้วยชื่อ DNS สาธารณะหรือ IP สาธารณะของเซิร์ฟเวอร์DNSบรรทัดนี้เป็นตัวเลือก และการรองรับการใช้งานของไคลเอ็นต์อาจแตกต่างกันไป สำหรับการแบ่งอุโมงค์ ให้เปลี่ยนAllowedIPsเป็นเฉพาะเครือข่ายที่ควรผ่าน VPN เท่านั้น เช่น10.8.0.0/24บวกกับ LAN ส่วนตัว เช่น192.168.50.0/24.
ตรวจสอบsysctl net.ipv4.ip_forward, nft list ruleset, และชื่ออินเทอร์เฟซขาออก
สามารถเข้าถึง 10.8.0.1 ได้ แต่ไม่ใช่เครือข่าย LAN ส่วนตัว
ลูกค้าไม่มีเส้นทาง LAN หรือ LAN ไม่มีเส้นทางส่งกลับ
เพิ่มซับเน็ต LAN ให้กับไคลเอ็นต์AllowedIPsและกำหนดค่าการกำหนดเส้นทางหรือ NAT ให้เหมาะสม
บางเว็บไซต์หยุดชะงัก
อาจมีปัญหาเกี่ยวกับ path-MTU
ทดสอบด้วยแพ็กเก็ตขนาดเล็กก่อนที่จะกำหนดค่า MTU ที่แน่นอน ระบบwg-quickสามารถเลือกค่า MTU ได้โดยอัตโนมัติ ดังนั้นอย่าตั้งค่าเป็น 1420 เพียงเพราะคู่มืออื่นแนะนำ