ONLYOFFICE 데스크톱 편집기와 LibreOffice 비교: 성능 벤치마크 및 실제 장단점 분석
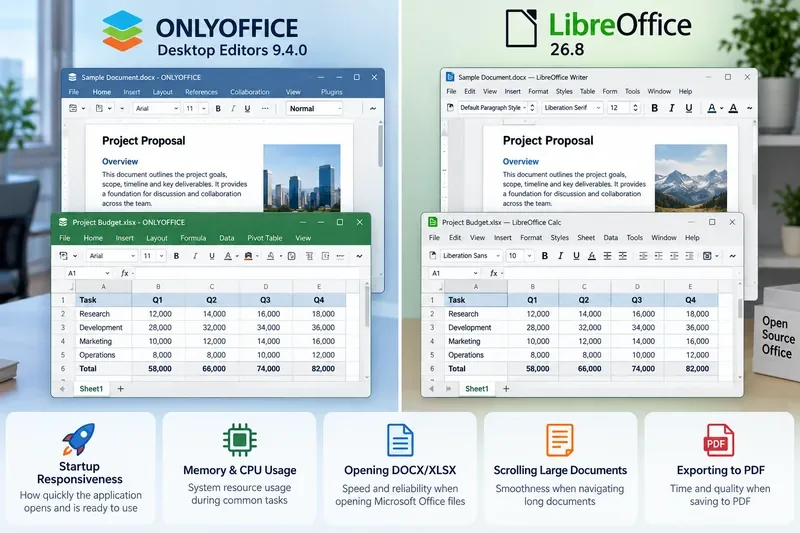
ONLYOFFICE 데스크톱 편집기와 LibreOffice를 시작 속도, 메모리 요구량, 파일 처리, 호환성 및 작업 부하 적합성 측면에서 인위적인 벤치마크 점수 없이 비교합니다.
ONLYOFFICE JWT authentication works only when the Document Server and the integrating application use the same secret key. On current Docker deployments, JWT validation is enabled by default. For a stable integration, set your own persistent JWT_SECRET instead of relying on the container's automatically generated value, then configure the same secret in Nextcloud, your custom document manager, or whichever connector talks to ONLYOFFICE Docs.
This practical reference focuses on the configuration you are most likely to need: Docker and Docker Compose, custom integrations that sign editor configuration, header/body behavior, verification, rotation, and common errors. It is based on current ONLYOFFICE documentation checked in October 2026.
| Setting | Typical Docker value | Purpose |
|---|---|---|
JWT_ENABLED | true | Enables JWT validation. Current Docker images default to enabled. |
JWT_SECRET | A strong private random value | Shared HMAC secret used to sign and validate tokens. |
JWT_HEADER | Authorization | Header name used for JWT-bearing HTTP requests. |
JWT_IN_BODY | false by default | Controls token validation in request bodies for supported HTTP requests. |
| Signing algorithm | HS256 | Algorithm used by ONLYOFFICE's official signature examples. |
Starting with ONLYOFFICE Docs 7.2, Docker deployments enable JWT by default and generate a random secret when you do not supply one. The official Docker documentation warns that an automatically generated secret can change after a reboot or container recreation and break integrations. Set an explicit secret for any real deployment. See Configuring JWT for ONLYOFFICE Docs and the official Docker installation guide.
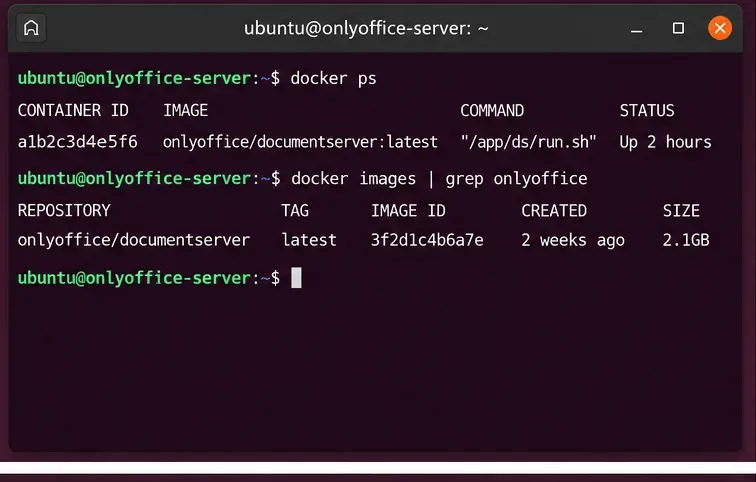
For a Docker host, start with:
docker ps --format 'table {{.Names}}\t{{.Image}}\t{{.Status}}'
docker images | grep onlyoffice
Determine whether the instance was launched with docker run, Docker Compose, a control panel, or another orchestration layer. You need to change the source configuration that creates the container. Editing a generated file inside the container is not the persistent solution.
For Docker specifically, ONLYOFFICE tells administrators to use environment variables rather than manually editing /etc/onlyoffice/documentserver/local.json. If you edit JWT values directly in that file, the Docker startup process can restore or regenerate them when the container restarts.
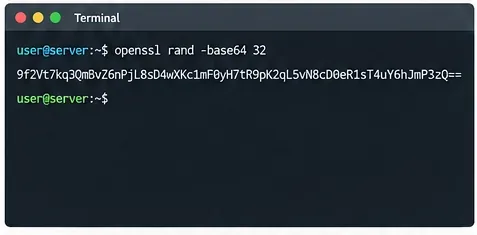
A convenient shell command is:
openssl rand -hex 32This produces 32 random bytes represented as 64 hexadecimal characters. ONLYOFFICE does not require this exact format; the important requirement is that both sides share the same secret and that it is difficult to guess.
Treat JWT_SECRET like a password or API credential:
ONLYOFFICE's signature documentation explicitly warns that token signing must happen on the server because any browser-side code that contains the secret exposes it to users. The official examples use HMAC-SHA256 (HS256). See ONLYOFFICE JWT signature documentation.
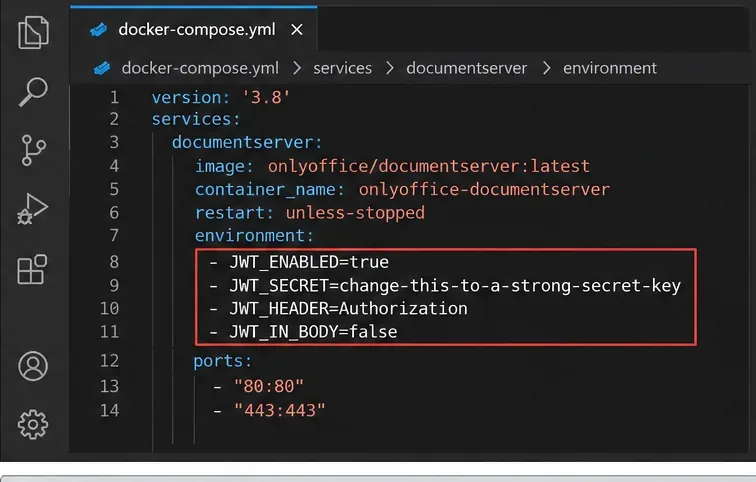
A minimal Compose service can include:
services:
  documentserver:
    image: onlyoffice/documentserver:latest
    restart: unless-stopped
    environment:
      JWT_ENABLED: "true"
      JWT_SECRET: "${ONLYOFFICE_JWT_SECRET}"
      JWT_HEADER: "Authorization"
      JWT_IN_BODY: "false"
    ports:
      - "8080:80"
Keep the actual secret outside the Compose file when practical. For example, put it in a permission-restricted .env file:
ONLYOFFICE_JWT_SECRET=replace_with_your_random_secretThen ensure that file is excluded from version control and readable only by the administrators or service account that needs it.
The official ONLYOFFICE Docker-DocumentServer repository documents JWT_ENABLED, JWT_SECRET, JWT_HEADER, and JWT_IN_BODY. Current Docker startup code defaults JWT validation to enabled, uses Authorization as the default header, and generates a random secret when an explicit one is not supplied.
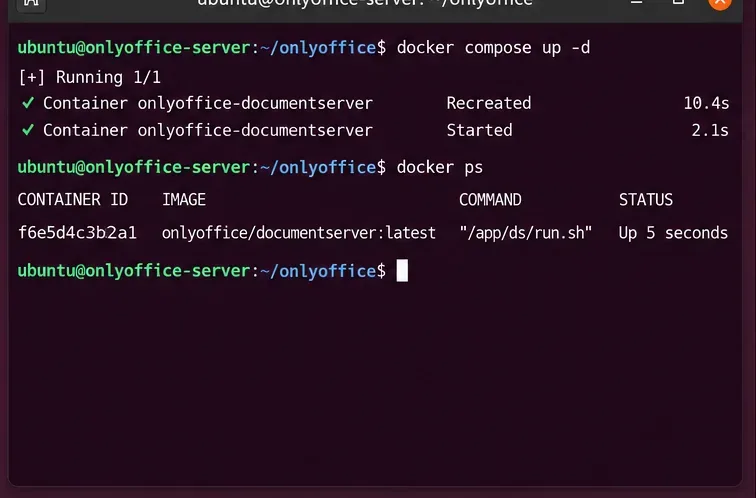
For Compose:
docker compose up -d --force-recreate
docker compose ps
For a container originally created with docker run, the official JWT guide instructs administrators to stop and remove the old container, then create a new one with the JWT environment variables. Do not remove persistent volumes or bind-mounted data while doing this.
You can also inspect the running container's environment without printing the secret itself:
docker inspect onlyoffice-documentserver \
  --format '{{range .Config.Env}}{{println .}}{{end}}' \
  | grep '^JWT_' \
  | sed 's/^JWT_SECRET=.*/JWT_SECRET=[REDACTED]/'
If the container name differs, replace onlyoffice-documentserver accordingly.
This is the part most often missed. Enabling JWT on ONLYOFFICE Docs without configuring the document-management side causes rejected editor requests. The connector or custom application must sign requests with exactly the same secret.
In the ONLYOFFICE settings for Nextcloud, enter the same secret key used by the Document Server. The header name must also match. ONLYOFFICE's current Nextcloud integration documentation lists jwt_secret and jwt_header as connector settings, with Authorization as the normal default header. See the official Nextcloud connector documentation.
커넥터에 "비밀 키", "JWT 비밀" 또는 이와 유사한 레이블이 있는 필드가 있는 경우, 해당 필드에 별도의 비밀 키를 생성하지 마십시오. 기존 비밀 키 값을 그대로 복사하십시오.
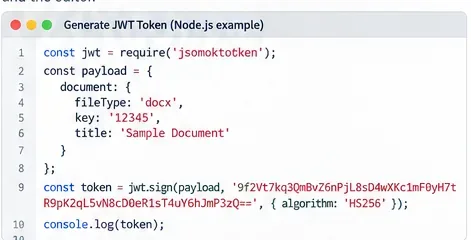
사용자 지정 애플리케이션의 경우 먼저 편집기 구성을 빌드하고 백엔드에서 해당 구성에 서명한 다음 생성된 JWT를 최상위 token속성에 할당합니다.
Node.js 예시:
import jwt from "jsonwebtoken";

const config = {
  documentType: "word",
  document: {
    fileType: "docx",
    key: "document-2026-001",
    title: "Project Plan.docx",
    url: "https://files.example.com/project-plan.docx"
  },
  editorConfig: {
    callbackUrl: "https://app.example.com/onlyoffice/callback"
  }
};

config.token = jwt.sign(config, process.env.ONLYOFFICE_JWT_SECRET, {
  algorithm: "HS256"
});
ONLYOFFICE의 브라우저 서명 관련 문서에 따르면 파일을 열기 위한 토큰 페이로드는 편집기 구성과 동일한 구조를 가져야 합니다. 버전 7.1부터 유효성 검사에 사용되는 매개변수 집합이 이 작업에 대해 엄격하게 규제되므로, 오래되었거나 불완전한 구조에 서명하는 것은 실패의 일반적인 원인입니다. 브라우저 토큰 서명을 참조하십시오 .
결과적으로 전달되는 구성에는 DocsAPI.DocEditor토큰이 포함됩니다.
new DocsAPI.DocEditor("placeholder", config);공식 API 참조에서는 config.tokenONLYOFFICE Docs가 편집기 구성을 검증하는 데 사용하는 암호화된 서명을 다음과 같이 정의합니다.
ONLYOFFICE에서 JWT는 브라우저 편집기 설정뿐만 아니라 명령, 변환 및 콜백 트래픽과 같은 서비스 간 요청에도 사용됩니다.
| 교통 | 토큰이 사용되는 곳 | 핵심 사항 |
|---|---|---|
| 브라우저 편집기 초기화 | config.token | 토큰 페이로드는 서명된 에디터 구성과 일치해야 합니다. |
| 수신되는 서비스 요청 | 본문 또는 헤더 | POST 요청의 경우, 본문 토큰을 사용하면 HTTP 헤더 크기 제한을 피할 수 있습니다. |
| GET 요청 | 헤더 | GET 요청에는 본문 토큰이 적용되지 않습니다. |
| 발신 콜백 | 설정에 따른 본문/헤더 | 연동 시 공유 비밀 키를 사용하여 토큰의 유효성을 검사해야 합니다. |
ONLYOFFICE는 요청 토큰을 본문과 헤더 모두에 지원합니다. 보안 FAQ에 따르면 헤더는 서버별 길이 제한에 걸릴 수 있으므로 수신 요청에는 본문 토큰을 사용하는 것이 좋습니다. 문서 7.1부터는 수신 본문 토큰이 있는 경우 우선적으로 사용되며, 그렇지 않은 경우 헤더 토큰이 사용됩니다. 발신 측에서는 본문 토큰과 헤더 토큰을 모두 전송할 수 있습니다. 자세한 내용은 ONLYOFFICE 요청 토큰 문서를 참조하십시오 .
Docker 변수의 JWT_IN_BODY기본값은 이므로 false, 단순히 존재한다는 이유만으로 활성화하지 마십시오. 통합 기능이 본문 토큰을 일관되게 전송하고 검증하도록 설계된 경우에만 이 변수를 변경하십시오.
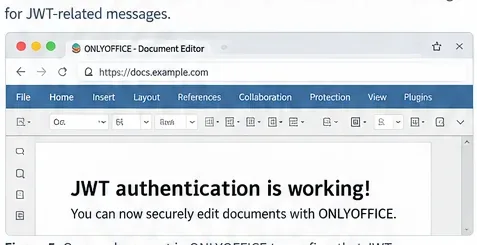
유용한 검증 순서는 다음과 같습니다.
문서 서버 환영 페이지가 성공적으로 표시된다고 해서 두 애플리케이션 간에 JWT가 올바르게 구성되었다는 것을 의미하지는 않습니다 . JWT 오류는 통합 과정에서 편집기 구성, 명령, 변환 요청 또는 콜백을 전송할 때만 나타나는 경우가 많습니다.
공식 보안 개요에서는 예상되는 동작을 설명합니다. ONLYOFFICE는 토큰을 검증하고 서명된 페이로드 값을 사용합니다. 검증이 필요한 시점에 토큰이 없거나 유효하지 않으면 요청이 거부됩니다. 자세한 내용은 ONLYOFFICE 문서의 보안 개요를 참조하십시오 .
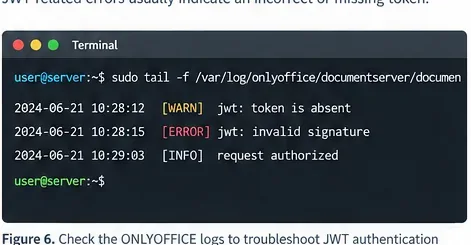
현재 Docker 시작 코드는 관리자에게 JWT 상태 도우미를 안내합니다. 올바른 컨테이너 이름을 사용하여 다음 명령을 실행하세요.
docker exec onlyoffice-documentserver \
  sudo documentserver-jwt-status.sh
로그를 확인할 수도 있습니다.
docker logs --tail 200 onlyoffice-documentserver
docker exec onlyoffice-documentserver \
  find /var/log/onlyoffice/documentserver -type f -maxdepth 3 -print
비밀 키를 변경한 직후 통합이 실패하는 경우 다음 항목들을 순서대로 비교하십시오.
JWT_ENABLED재생성된 컨테이너에서 실제로 활성화되어 있습니까 ?가장 가능성이 높은 원인은 비밀 키 불일치 또는 유효성 검사를 수행하는 요청과 다른 페이로드로 서명된 토큰입니다. 관련 설정을 변경한 후에는 토큰을 다시 생성하십시오. 문서에 있는 예제 토큰을 재사용하지 마십시오. 해당 예제 토큰은 데모용 비밀 키로 서명되었으며 서버에서 유효하지 않습니다.
이는 일반적으로 배포가 자동으로 생성된 JWT 비밀 키에 의존하고 있음을 의미합니다. ONLYOFFICE는 재부팅 또는 컨테이너 재구축 후 임의의 비밀 키가 다시 생성될 수 있음을 명시적으로 경고합니다. 비밀 키를 JWT_SECRET직접 설정하고 통합에 동일한 값을 입력하십시오.
먼저 양쪽의 비밀 키와 헤더를 확인하세요. ONLYOFFICE의 Nextcloud 문서에서는 커넥터의 헤더가 jwt_headerDocument Server에 구성된 헤더와 일치해야 한다고 명시하고 있습니다. 현재 기본값은 다음과 같습니다 Authorization.
프록시 또는 웹 서버의 헤더 크기 제한을 초과하는 헤더에 JWT가 전송되는지 조사하십시오. ONLYOFFICE의 보안 FAQ에 따르면 이것이 해당 POST 요청에 본문 토큰을 사용하는 것이 더 바람직한 이유 중 하나입니다.
JWT 비밀 키 교체는 반드시 조정되어야 합니다. 커넥터가 이전 비밀 키로 계속 서명하는 동안 문서 서버만 변경하는 것은 아무런 이점이 없습니다.
간단한 단일 인스턴스 배포의 경우:
JWT_SECRET하나의 통합된 변경 사항으로 업데이트하십시오.로드 밸런서 뒤에 여러 Document Server 인스턴스가 있는 경우, 동일한 통합 서비스를 제공하는 모든 인스턴스는 변경 시 호환 가능한 JWT 구성을 갖춰야 합니다. 즉흥적으로 노드를 하나씩 교체하는 대신, 배포 계획을 수립하십시오.
JWT_SECRET. 임의로 생성된 값에 의존하지 마십시오.Docker 기반 ONLYOFFICE 설치의 경우, 안정적인 구성은 간단합니다. 강력한 비밀 키를 생성하고, 컨테이너 환경 변수를 통해 설정한 다음 JWT_ENABLED=true, JWT_SECRET컨테이너를 다시 생성하고 커넥터 또는 백엔드에 동일한 비밀 키를 구성하면 됩니다. 사용자 지정 통합은 브라우저 코드가 아닌 서버에서 HS256으로 편집기 구성 및 서비스 요청에 서명해야 합니다.
JWT가 재시작 후 갑자기 작동하지 않는 경우, 비밀 키가 영구적으로 저장되었는지 확인하십시오. 구성 변경 직후에 오류가 발생하는 경우, 다른 부분을 확인하기 전에 비밀 키, 헤더 및 서명된 페이로드를 비교하십시오. 이 세 가지 검사를 통해 인증 수준을 낮추지 않고 대부분의 JWT 설정 오류를 해결할 수 있습니다.
ONLYOFFICE 데스크톱 편집기와 LibreOffice를 시작 속도, 메모리 요구량, 파일 처리, 호환성 및 작업 부하 적합성 측면에서 인위적인 벤치마크 점수 없이 비교합니다.
Convert batches of DOCX files to PDF with LibreOffice from Bash or PowerShell. Learn safe folder setup, commands, profile fixes, and output checks.
Docker를 사용하여 Ubuntu 24.04 LTS에 ONLYOFFICE Workspace Community를 설치하고, 서버를 검증하고, 포털 설정을 완료하고, HTTPS를 활성화하고, 일반적인 설정 오류를 방지하는 방법을 알아보세요.
ONLYOFFICE 스프레드시트와 Excel에서 수식 결과가 다르게 나오는 경우, 재계산, 로캘, 날짜, 배열, 링크, 반복 및 정밀도를 확인하여 문제를 해결하십시오.
macOS Sonoma에서 LibreOffice가 SMB 또는 다른 네트워크 드라이브에 저장할 때 충돌하는 문제를 해결하세요. 문서를 보호하고, 원인을 파악하고, 안전한 해결 방법을 테스트해 보세요.
Configure ONLYOFFICE JWT authentication correctly with Docker, a persistent JWT secret, HS256 signing, connector settings, testing, troubleshooting, and safe key rotation.
CPU, RAM, 스토리지, WebSockets, 리버스 프록시, 로그 및 버전별 아키텍처를 점검하여 자체 호스팅 Docker 서버에서 ONLYOFFICE 공동 편집 지연 현상을 진단하고 해결합니다.
Collabora CODE가 생성하는 외부 연결을 확인하고, 주기적인 업데이트 확인 및 선택적 통합을 비활성화하고, 문서 데이터 가져오기를 제한하고, WOPI 트래픽 편집 요구 사항을 유지하세요.
선택한 Writer 섹션을 암호로 보호하고, 읽기 전용 결과를 확인하고, 파일 암호화가 필요한 경우를 알아보세요.
ONLYOFFICE Docs와 웹용 Word를 DOCX 레이아웃, 페이지 컨트롤, 지원되는 형식, 그리고 공유 또는 인쇄 전에 서식이 제대로 적용되었는지 확인하는 실용적인 방법 측면에서 비교해 보세요.