Imagine juggling multiple apps without the chaos—emails in one corner, your browser sprawling across another, and a document neatly tucked beside it. That's the magic of Windows 11 Snapping Groups. This built-in feature transforms your desktop into a powerhouse of organization, making multitasking feel like a breeze. Whether you're a remote worker, student, or power user, mastering Windows 11 snapping will save you time and reduce frustration. Let's dive into how to harness these tools for a smoother, more efficient workflow.
What Are Windows 11 Snapping Groups?
Snapping Groups in Windows 11 build on the classic snap feature from previous versions, but with smarter, more intuitive enhancements. Introduced in the latest updates, it lets you arrange windows into customizable layouts that "snap" together automatically. Once grouped, these windows stay linked—even if you resize or move the group, everything adjusts in harmony.
Why does this matter? In a world overloaded with tabs and apps, Windows 11 multitasking features like snapping groups help you focus on what counts. No more endless Alt-Tab switching or cluttered screens. It's designed to feel natural, boosting your efficiency without a steep learning curve. Ready to get started? Follow these steps to unlock the potential.
Enabling and Accessing Snap Layouts in Windows 11
First things first: Ensure snap layouts are activated. Windows 11 enables this by default, but you can tweak settings for the best experience.
- Click the Start button and search for "Settings."
- Navigate to System > Multitasking.
- Under the "Snap windows" section, toggle on options like "Snap windows" and "Show snap layouts when I drag a window to the top of my screen." For advanced control, enable "Show my snapped windows when I hover over taskbar apps."
✨ Pro tip: These settings make Windows 11 snapping even more responsive, especially on larger monitors or multi-monitor setups.
Now, to access layouts, hover your mouse over the maximize button on any window's title bar. A semi-transparent menu pops up with layout options—think halves, quarters, or even thirds for three-way splits. Drag a window to the screen edge for instant snapping, or use the keyboard shortcut Windows key + Arrow keys for quick alignment.
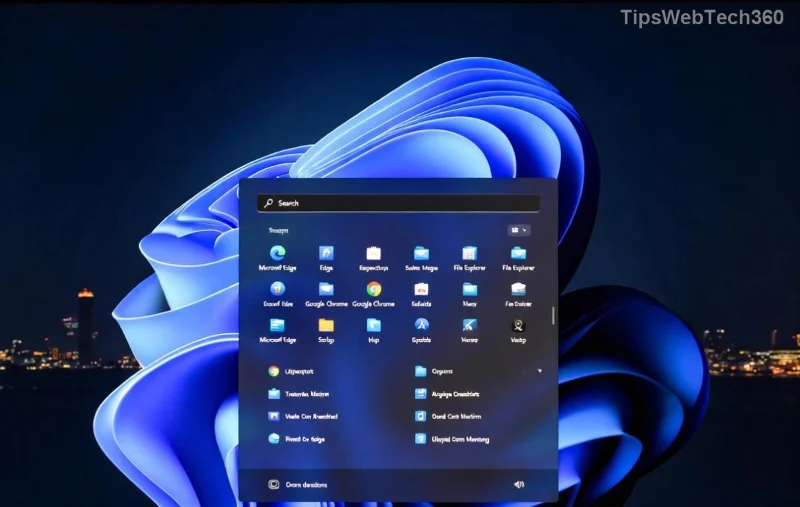
How to Create Your First Snapping Group
Creating a Snapping Group is as simple as snapping individual windows together. Here's a step-by-step guide to build one that suits your needs:
- Open your apps: Launch the windows you want to group, like Notepad, a web browser, and File Explorer. Arrange them loosely on your desktop.
- Snap the first window: Drag one to the left edge of the screen until it snaps into place, filling half the screen. You'll see an outline confirming the snap.
- Add the second: Drag the next window to the right side. It will snap beside the first, forming a basic group.
- Expand the group: For more windows, hover over the maximize button again on a new app. Select a layout that fits into the empty space—Windows 11 will suggest spots within the existing group.
- Group them: Once placed, the windows merge into a Snapping Group. Move the entire group by dragging any title bar within it.
Feel the thrill? Your screen now hosts a cohesive workspace. If you're working on a project, snap your email, calendar, and notes into a group—everything stays put, even when you minimize or switch apps.
![Creating a Snapping Group in Windows 11]()
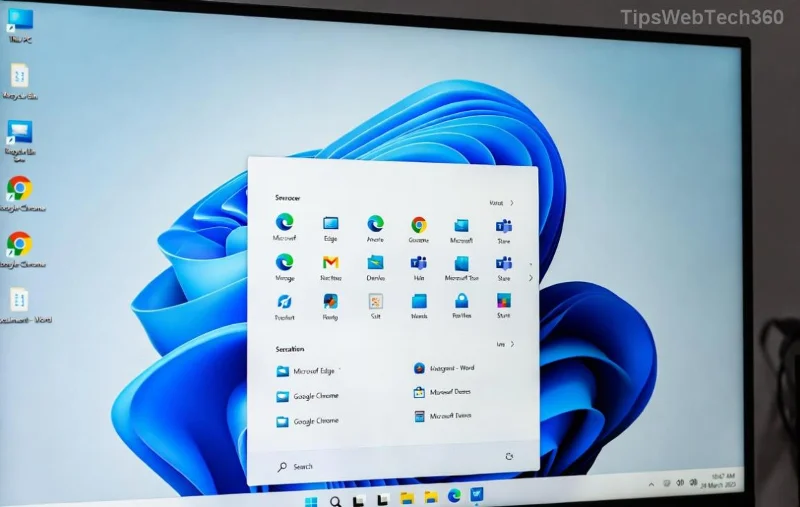
Advanced Tips for Using Snapping Groups Effectively
Now that you've got the basics, level up your Windows 11 multitasking with these insider tricks. These will make you feel like a desktop ninja, streamlining tasks that once felt overwhelming.
- Keyboard shortcuts for speed: Use Windows key + Z to open the snap layouts menu instantly. Combine with arrows for rapid arrangement—perfect for quick switches during meetings. 🚀
- Multi-monitor magic: Snapping groups work across displays. Drag a group to another monitor, and it follows intact. Ideal for extending your workspace without losing organization.
- Resize with ease: Hover between snapped windows to drag the divider. The group resizes proportionally, keeping everything balanced—no more manual tweaking.
- Snap to corners and thirds: For complex setups, drag to corners for quarter-splits or use the layout menu for thirds. This is gold for comparing documents side-by-side while referencing a third source.
- Exit and re-enter groups: Right-click a taskbar thumbnail to "Close other windows" or drag out of the group. To restore, click the taskbar group icon—it reopens the full layout.
Stuck? If a window won't snap, check for overlapping apps or disabled settings. Windows 11's latest updates have refined this for smoother performance, especially on touchscreens or with stylus input.
Troubleshooting Common Snapping Group Issues
Even the best features hit snags sometimes. Here's a quick table of common problems and fixes to keep your snapping groups running flawlessly:
| Issue |
Solution |
| Snap layouts don't appear |
Enable "Snap windows" in Settings > System > Multitasking. Update Windows via Settings > Update & Security. |
| Groups break when resizing |
Avoid dragging outside the group boundaries. Use the resize handle between windows for controlled adjustments. |
| Keyboard shortcuts fail |
Ensure no third-party apps override keys. Restart Explorer via Task Manager (Ctrl+Shift+Esc > Processes > Windows Explorer > Restart). |
| Poor performance on older hardware |
Close unnecessary apps or lower visual effects in Settings > System > About > Advanced system settings > Performance. |
These fixes, drawn from official Microsoft guidance, ensure your Windows 11 snapping experience stays top-notch. For more details, check Microsoft's support page: Multitasking in Windows.
![Advanced Snapping Group Layout in Windows 11]()
Why Snapping Groups Will Change How You Work
Picture this: You're deep in a report, with research tabs, a spreadsheet, and notes all in view—without the mental overhead of disarray. Snap layouts in Windows 11 aren't just a feature; they're a productivity booster that fosters creativity and reduces stress. Users report up to 30% faster task completion once they integrate these groups into daily routines.
Customize further by combining with virtual desktops ( Windows key + Ctrl + D ) for project-specific groups. Or explore Snap Assist for auto-suggestions when space is available. The more you use it, the more intuitive it becomes, turning your PC into a tailored command center.
Final Thoughts: Snap Into Action Today
Embracing Windows 11 Snapping Groups is your ticket to a clutter-free, high-output digital life. Start small—try grouping two apps today—and watch how it evolves your workflow. What's your go-to snapping setup? Experiment, refine, and enjoy the flow. Your future self will thank you for this upgrade. 👏
For the latest on Windows features, stay tuned to official updates. Happy snapping!