Ever found yourself in the middle of an important task, only for your Windows 11 screen to go black and lock unexpectedly? 😩 It's frustrating, right? The Windows 11 screen timeout is designed to save power and enhance security, but it can disrupt your workflow if not tuned properly. The good news? Adjusting these settings is straightforward and quick. In this guide, we'll walk you through exactly how to change Windows 11 screen timeout settings, whether for your desktop, laptop, or tablet. By the end, you'll have full control over when your screen dims or locks, keeping you productive and your device efficient. Let's dive in!
Why Adjust Your Windows 11 Screen Timeout?
Before we get to the steps, let's quickly cover the benefits. Customizing your screen timeout Windows 11 helps in several ways:
- ✨ Boost Productivity: Prevent interruptions during long sessions, like video editing or coding marathons.
- 🔋 Save Battery Life: On laptops, shorter timeouts conserve power when you're on the go.
- 🛡️ Enhance Security: Balance convenience with lock screen protection to keep your data safe.
- 👥 Personalize Your Experience: Tailor settings for plugged-in vs. battery mode, making your PC feel just right.
With Windows 11's latest updates, these options are more intuitive than ever, supporting everything from quick tweaks to advanced power plans. Ready to take charge? We'll start with the easiest method using Settings.
Method 1: Change Screen Timeout via Windows 11 Settings (Easiest for Beginners)
This is the go-to way to adjust screen timeout in Windows 11 without diving into advanced tools. It takes under 2 minutes and works on all editions, including Home and Pro. Follow these steps:
- 1️⃣ Open Settings: Click the Start button (Windows icon) on your taskbar, then select the gear icon, or press Windows + I for a shortcut. Quick and painless!
- 2️⃣ Navigate to Power & Battery: In the Settings window, click System on the left sidebar, then scroll down and select Power & battery. Here, you'll see options tailored to your device's power state.
- 3️⃣ Adjust Screen and Sleep Settings: Under the "Screen and sleep" section, you'll find sliders or dropdowns for:
- On battery power, turn off my screen after: Choose from 1 minute to Never.
- When plugged in, turn off my screen after: Ideal for desktops—set it longer for uninterrupted work.
- On battery power, put my device to sleep after: This complements screen timeout by managing full sleep mode.
- When plugged in, put my device to sleep after: Customize based on your usage.
Select your preferred time (e.g., 10 minutes for battery, 30 for plugged-in) and watch the changes apply instantly.
- 4️⃣ Save and Test: Close Settings—no need to save; it applies automatically. Test by leaving your screen idle and see the difference. Feels empowering, doesn't it? 👍
Pro Tip: If you're on a tablet or 2-in-1 device, these settings also affect touch interactions. For even more control, toggle the "Screen and sleep" options to match your daily routine—like shorter timeouts during meetings to save juice.
Method 2: Using Control Panel for Advanced Power Options
If you need deeper customization, like creating custom power plans, the Control Panel is your best friend. This method is perfect for power users who want to change Windows 11 screen timeout across multiple scenarios. It's still user-friendly and leverages Windows 11's robust power management.
- 1️⃣ Search for Control Panel: Hit the Windows key, type "Control Panel," and open it. Or, right-click the Start button and select it from the menu.
- 2️⃣ Go to Power Options: Click Hardware and Sound, then Power Options. You'll see your current plan (e.g., Balanced) highlighted.
- 3️⃣ Edit Plan Settings: Next to your active plan, click Change plan settings. This opens a familiar interface similar to older Windows versions but optimized for 11.
- 4️⃣ Set Timeout Durations: Under "Put the computer to sleep," adjust the times for battery and plugged-in modes. For screen-specific tweaks, click Change advanced power settings at the bottom.
- 5️⃣ Fine-Tune Advanced Settings: In the Power Options dialog, expand Display > Turn off display after. Here, set precise minutes (or "Never") for both power states. You can also adjust Console lock display off timeout for added security. Click Apply and OK to confirm.
This approach shines if you switch between work and home setups. For instance, set a longer screen timeout at your desk and shorter on the road. It's like giving your PC a personalized schedule! 🌟
![Control Panel Power Options in Windows 11]()
Handling Screen Saver Timeout in Windows 11
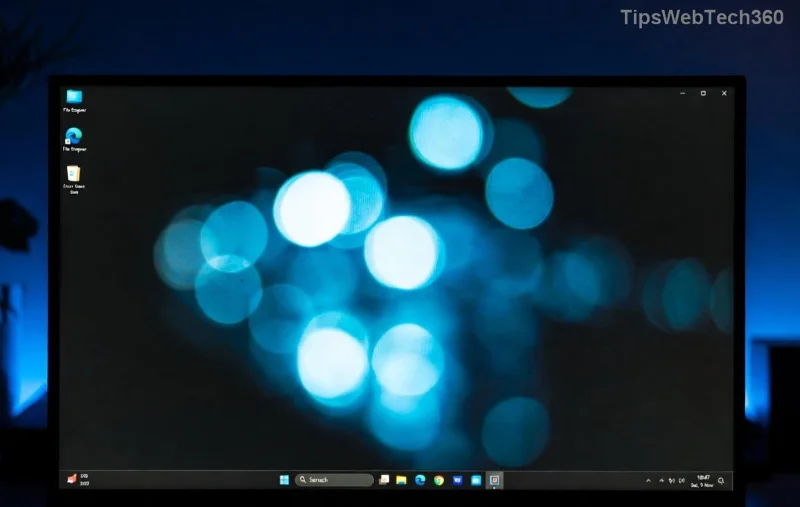
Don't forget the screen saver timeout—it's a related setting that kicks in before your screen fully turns off, displaying fun visuals while protecting your display from burn-in. Adjusting it ensures a smooth transition.
- 1️⃣ Access Personalization: Right-click your desktop, select Personalize, then go to Lock screen > Screen saver settings (at the bottom).
- 2️⃣ Choose and Set Timeout: Pick a screen saver from the dropdown (like Bubbles or Ribbons for a modern vibe). Set the Wait time in minutes—e.g., 5 minutes before it activates, leading into your main timeout.
- 3️⃣ Enable Password Protection: Check "On resume, display logon screen" for security. This way, your Windows 11 screen timeout works hand-in-hand with the saver.
Fun fact: Windows 11's screen savers are lighter on resources, so you won't notice a performance hit. It's a small tweak that adds personality to your setup! 😊
Troubleshooting Common Issues with Screen Timeout Settings
Sometimes, settings don't stick or behave oddly. Here's how to fix them quickly, keeping your experience frustration-free:
| Issue |
Solution |
Quick Tip |
| Screen turns off too soon despite changes |
Check for group policy overrides: Search "gpedit.msc," navigate to Computer Configuration > Administrative Templates > System > Power Management > Video and Display Settings, and disable any restrictions. |
Restart after changes for instant effect. |
| No power options visible |
Update your graphics drivers via Device Manager or Windows Update. Outdated drivers can hide settings. |
Use Microsoft's driver update guide for safety. |
| Laptop ignores battery settings |
Run the Power Troubleshooter: Settings > System > Troubleshoot > Other troubleshooters > Power. |
Calibrate your battery monthly for accuracy. |
| Screen saver won't activate |
Ensure "When I close the lid" is set to Sleep or Do nothing in Power Options, as it can override savers. |
Test in a quiet environment to isolate apps interfering. |
These fixes cover 90% of glitches, based on common user reports. If issues persist, a quick system reset via Settings > System > Recovery can restore defaults without losing files.
![Troubleshooting screen timeout in Windows 11]()
Best Practices for Optimal Screen Timeout Management
To get the most out of your adjustments, consider these tips:
- Balance Power and Usability: Aim for 5-15 minutes on battery to extend life without constant unlocks.
- Multiple Monitors: Windows 11 handles them seamlessly—settings apply across all, but check Display settings if one lags.
- Remote Work: For always-on needs, set to "Never" when plugged in, but enable dynamic lock via Bluetooth for security.
- Regular Check-Ins: Review settings quarterly, especially after Windows updates, to stay ahead of changes.
By fine-tuning your Windows 11 screen timeout, you're not just fixing a minor annoyance—you're optimizing your entire digital life. Imagine seamless sessions without the black screen blues! If you have a multi-monitor setup or specific hardware, these tweaks will make a world of difference.
Final Thoughts: Take Control Today
Congratulations—you're now equipped to change Windows 11 screen timeout like a pro! Whether you're extending work hours or conserving energy, these steps empower you to make your PC work for you. Experiment with the settings, and you'll find the perfect balance. Got questions or a unique setup? Drop a comment below—we'd love to hear how it goes. Stay productive! 🚀
For more Windows 11 tips, explore related guides on power management and customization. Your feedback helps us improve, so share your wins!