Home
» INTERNET
»
How to Clean a Brita Water Filter System Without Damaging the Cartridge
How to Clean a Brita Water Filter System Without Damaging the Cartridge
If your Brita pitcher looks cloudy, feels slick, smells stale, or has residue around the reservoir, the goal is not to scrub the filter cartridge harder. The better target is a clean pitcher system, a properly prepared or replaced cartridge, and no soap or debris left behind. Brita’s current U.S. guidance, checked in September 2026, tells users to remove the filter, hand-wash the pitcher or dispenser components periodically with mild dish soap, rinse well, and avoid abrasive cleaners and dishwashers for pitchers and dispensers.
That distinction matters because a Brita cartridge is a consumable filtration component. For pitcher and dispenser systems, Brita publishes procedures for rinsing or installing a new cartridge and for replacing it on schedule; it does not publish a method for scrubbing an old cartridge to restore its filtration life. In other words, “cleaning a Brita water filter” usually means cleaning the vessel and maintaining the cartridge correctly.
What a good cleaning result should look like
Before starting, define the result you want. A successful cleaning should leave the pitcher, lid, and reservoir visibly clean, free of slippery soap film, and free of stale odor. The pieces should fit back together normally, the cartridge should seat firmly, and the system should filter cold tap water without obvious leaking around the cartridge seal.
The pitcher and reservoir look clear and feel clean rather than greasy or slick.
There is no detergent smell after rinsing.
The cartridge is not covered in soap or cleaning chemicals.
The cartridge is seated correctly and water does not bypass it.
If a new filter was installed, its required preparation and initial flush were completed.
If your model has a filter-life indicator, it is reset according to that model’s instructions.
If those conditions are not met, repeat the appropriate cleaning or setup step rather than assuming more aggressive chemicals will solve the problem.
First, know what you should and should not clean
For Brita pitchers and dispensers, the washable parts are the pitcher or dispenser body, lid, and reservoir. Brita says to remove and set aside the filter before washing. Use mild dish soap, rinse well, and do not use abrasive cleaners. Brita’s pitcher support also says not to put the pitcher system in the dishwasher. You can verify the current instructions on the Brita pitcher FAQ and Brita replacement-filter FAQ.
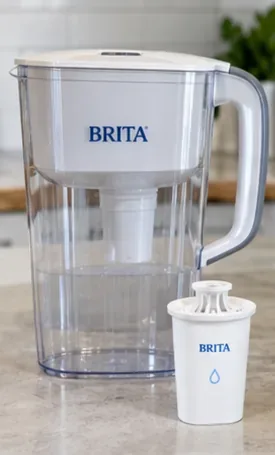
The cartridge is handled differently. A new white Brita Original filter is rinsed under cold water for 15 seconds before insertion. A blue Brita Elite filter does not require that pre-rinse. After installing either type in a pitcher, Brita instructs users to add cold tap water and discard the first three containers of filtered water, or use that water for plants. These are preparation steps, not a method for rejuvenating an old cartridge.
How to clean a Brita pitcher or dispenser
1. Remove the cartridge before any washing
Empty the pitcher and take the filter cartridge out of the reservoir. Set it on a clean surface away from dish soap, sprays, and dirty sink water. This prevents detergent from entering the filtration media and makes it easier to clean the reservoir thoroughly.
The cartridge should be removed and kept separate before the pitcher components are washed.
If the cartridge is already at or near its replacement interval, plan to replace it rather than trying to clean it. Brita lists the Original filter at 40 gallons, or about two months for most households, and the Elite filter at 120 gallons, or about six months. Brita also notes that hard water may require more frequent replacement.
2. Separate the removable pitcher parts
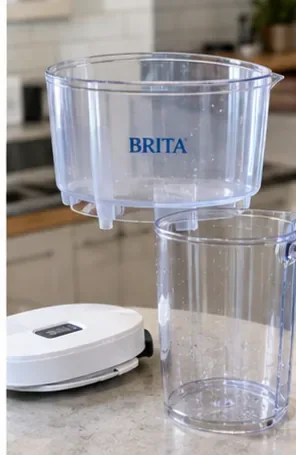
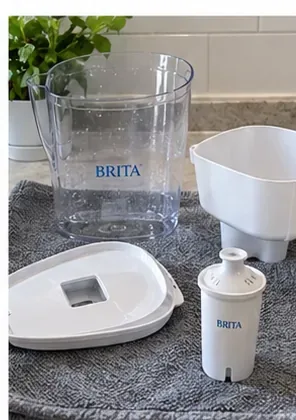
Remove the lid and reservoir so that water and soap can reach the surfaces where residue tends to collect. Do not force tabs or hinges; pitcher designs vary, so if a part resists, check the instructions for your exact model on Brita’s pitcher support page.
Separating the pitcher, reservoir, and lid exposes the surfaces that need hand-washing.
3. Hand-wash the lid and reservoir with mild dish soap
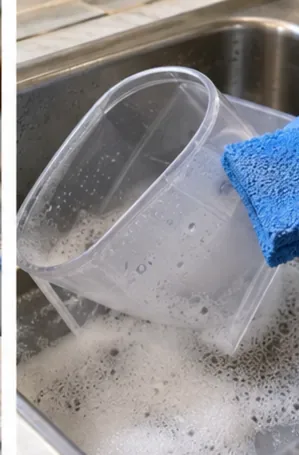
Use warm water, mild dish soap, and a soft cloth or nonabrasive sponge. Pay attention to corners, the underside of the lid, the filter opening, and areas that remain damp between refills. Brita’s published guidance calls for mild detergent and specifically warns against abrasive cleaners.
Use mild dish soap and a soft cleaning tool on the lid and reservoir; avoid abrasive cleaners.
You do not need a strong disinfectant for routine maintenance unless the manufacturer for your exact product directs you to use one. Strong cleaners can leave unwanted residue, and Brita’s routine care instructions center on mild soap and thorough rinsing.
4. Clean the pitcher body gently
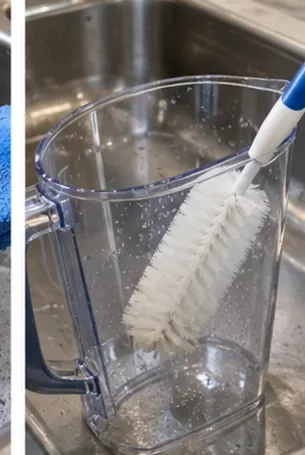
Wash the inside and outside of the pitcher body with the same mild-soap approach. A soft bottle brush can help reach the bottom without scratching the plastic. Avoid scouring pads, abrasive powders, or hard tools that can haze or damage the surface.
A soft brush can reach the bottom and corners of the pitcher without using abrasive scrubbing.
5. Rinse until no soap residue remains
Rinse every washed component with clean water. Rotate the parts so water reaches corners and openings. The quality check here is simple: there should be no visible suds, slippery film, or detergent smell. If any of those remain, rinse again.
Rinse the washed components thoroughly so no detergent film or suds remain.
6. Let the components dry before reassembly
Place the clean parts on a fresh towel or drying rack and allow trapped water to drain. Drying is especially useful around lid cavities and reservoir edges that can hold moisture. Brita’s user guide notes that certain pitcher designs should be allowed to air dry upside down if water becomes trapped under a sleeve.
Allow washed pitcher parts to drain and dry before putting the system back together.
The filter cartridge does not need to be washed with soap while the pitcher parts dry. If you are keeping the current cartridge, keep it separate and clean. If you are installing a new cartridge, follow its model-specific preparation step next.
7. Reinstall the current filter or prepare a new one correctly
For a new Brita Original filter, rinse the cartridge with cold water for 15 seconds before insertion. For a new Brita Elite filter, Brita says no pre-rinse is required. Align the cartridge groove with the reservoir notch or ridge and press firmly so it seals correctly.
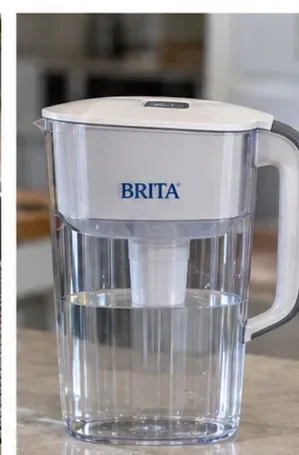
After the cleaned parts are reassembled, make sure the cartridge is seated firmly in the reservoir.
Do not use hot water to prepare an Original filter. Brita’s support page specifies cold tap water and lists a maximum of 85°F (29°C) for the Original filter.
8. Fill, flush if required, and evaluate the result
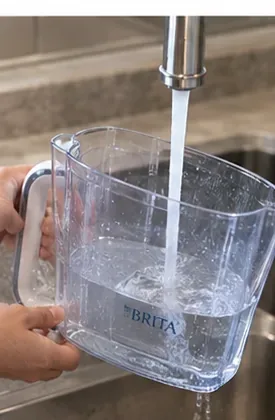
Fill the reservoir with cold potable tap water. When installing a new Original or Elite filter in a pitcher, Brita instructs users to discard the first three containers of filtered water or use them for plants. Then check the assembled system for normal fit and flow.
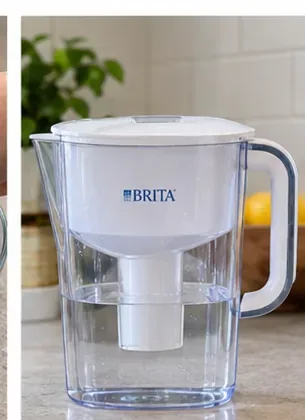
The finished system should be clean, correctly assembled, and ready for cold potable tap water.
After the initial flush, the result should be neutral-smelling, free from soap residue, and free from obvious bypass around the filter. A few carbon particles can occur with some filters; Brita notes that black carbon specks have been normal with older filters. If the cartridge is due for replacement, however, cleaning the pitcher will not reset the cartridge’s rated life.
When cleaning is not the right fix
Cleaning the pitcher helps with residue on the container, but it cannot solve every water-quality or performance issue. Change your approach in these situations:
The cartridge has reached its replacement interval. Replace it rather than trying to wash it back to new condition.
You have hard water and performance declines early. Brita says hard water may require more frequent filter changes.
The cartridge was exposed to dish soap, cleaning chemicals, juice, or other non-water liquids. Brita only directs users to filter potable drinking water. Because the company does not publish a cleaning procedure to remove such contamination from pitcher cartridges, replacing the cartridge is the conservative choice.
Your source water is microbiologically unsafe or of unknown quality. Brita states that its filters are not intended to purify such water without adequate disinfection. Cleaning the pitcher does not change that limitation.
The pitcher is cracked or damaged. Cleaning cannot restore a reliable seal or structural integrity; contact Brita support or replace the damaged component.
Original vs. Elite: the maintenance differences that matter
Filter
New-filter preparation
Typical replacement guidance
What cleaning can do
Brita Original (white)
Rinse with cold water for 15 seconds before insertion
40 gallons, about 2 months for most households
Cleaning the pitcher maintains the system; it does not renew cartridge capacity
Brita Elite (blue)
No pre-rinse required
120 gallons, about 6 months for most households
Cleaning the pitcher maintains the system; cartridge life still depends on use and replacement schedule
These figures come from Brita’s current U.S. replacement-filter guidance. The time estimates are approximate and depend on household use; hard water can shorten the practical replacement interval.
What if you meant a Brita bottle or faucet filter?
Brita uses different care rules for other product families, so do not automatically apply pitcher instructions to them. For a Premium Filtering Water Bottle, Brita says to remove the filter before cleaning the bottle; stainless-steel bottles are hand-washed, while hard-sided plastic bottle components can be top-rack dishwasher safe. The filter setup itself also varies. See the Brita bottle support page.
For a Brita faucet system, the cartridge is not cleaned like a pitcher body. Brita says that if the system has not been used for several days, run water through the filter for 30 seconds to wet and reactivate it. A new faucet filter is flushed for five minutes. Details are on the Brita faucet-system FAQ.
A final quality check before you drink
Once the system is back together, inspect it rather than judging success only by appearance. The pitcher should have no soap smell, the reservoir should sit correctly, and the cartridge should be firmly seated. If you installed a new filter, complete the required flush and reset the filter-life indicator if your model has one. If taste, odor, or flow still seems wrong and the cartridge is old or the indicator says replacement is due, replacing the cartridge is more appropriate than repeating the washing process.
The practical limit is straightforward: routine cleaning keeps the reusable Brita components clean; it does not restore exhausted filter media. Treat the pitcher and the cartridge as two different maintenance jobs, and you are much more likely to get a clean system without damaging the part that actually performs the filtration.