Home
» INTERNET
»
How to Remove a Drain Stopper From a Sink Without Damaging the Mechanism
How to Remove a Drain Stopper From a Sink Without Damaging the Mechanism
A sink stopper that will not lift out can feel deceptively simple: grab it, twist harder, and pull. That is also how people crack a plastic pivot nut, scratch a finish, or damage the linkage under the sink. The reason is straightforward: sink stoppers do not all attach the same way.
Current manufacturer support still reflects several designs rather than one universal removal method. Kohler's sink guidance says a traditional pop-up stopper may be held by a ball rod that enters the side of the drain. Delta's support for lift-rod pop-ups describes the same basic arrangement. Push-pop drains are less uniform: Delta's current product support shows that some versions unlock with a specific turn-and-lift motion, while other installations are not intended to release from the top. The durable rule is to identify the mechanism before applying force.
Action: Before using tools, look behind the faucet for a lift rod and then look under the sink for a horizontal rod entering the side of the drain body.
Quick identification: which sink stopper do you have?
What you see
Likely type
Typical removal approach
Lift rod behind the faucet plus a linkage and horizontal rod under the sink
Lift-rod pop-up
Release the horizontal pivot/ball rod if the stopper does not lift freely
No faucet lift rod; stopper opens and closes when you press the cap
Push-pop or touch-activated
Model-specific: some unlock from above; others require drain disassembly
Loose basket or strainer that simply sits in the drain
Removable basket
Lift it straight out
No visible moving stopper and the drain has a fixed grid
Grid drain
There may be no stopper to remove
Common misunderstanding: every stopper should unscrew from the top
That is not reliable. On a common lift-rod pop-up, the stopper can be retained by the horizontal ball or pivot rod. Kohler states that the ball rod must be removed first when it is holding the stopper in the drain. Delta likewise tells owners of its standard pop-up stopper to loosen the nut on the back of the drain and pull out the horizontal rod when the stopper will not come out.
There is another wrinkle: some lift-rod stoppers can be installed in a removable configuration, while others can be installed so the pivot rod passes through the stopper's lower loop. Delta describes its RP5648 stopper as capable of removable or non-removable installation.
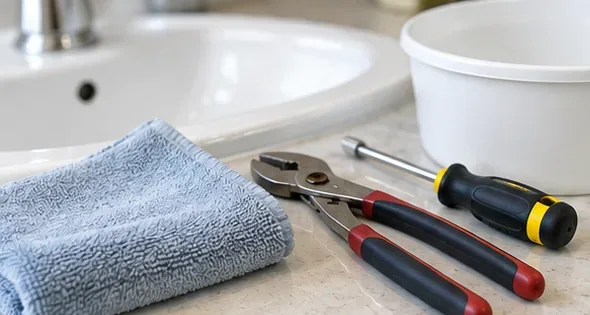
Adjustable pliers only if a hand-tight fitting will not move
A flashlight
A small brush or old toothbrush for cleaning
Mild dish soap and warm water for the removed stopper
Prepare the cabinet area with a towel and small container before touching the drain linkage; tools are usually only needed if a fitting is stuck.
How to remove a standard lift-rod sink stopper
1. Open the stopper and clear the cabinet
Raise the stopper to its open position. Remove stored items from below the sink, then place a towel and small bucket under the drain body. You normally do not need to shut off the faucet's water-supply valves for a stopper-only job because you are working on the drain side, not the supply side. Just make sure nobody turns on the faucet while the drain mechanism is apart.
Action: Put the faucet out of use temporarily and position the bucket directly below the side connection where the horizontal rod enters the drain.
2. Find the horizontal pivot rod and retaining nut
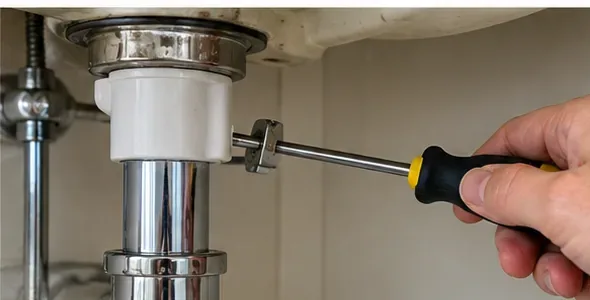
Follow the drain pipe downward from the sink. On a traditional pop-up assembly, a small horizontal rod enters the side of the drain body. Its outer end usually connects to the perforated linkage or clevis that runs up toward the faucet's lift rod.
You usually do not need to remove the P-trap just to take out the stopper. Kohler's removal procedure focuses on the rod nut and ball rod, and Delta's leak-testing instructions similarly tell users to remove the nut holding the horizontal rod and then lift the stopper out.
Action: Confirm that you have found the side-entry pivot rod before loosening anything else. If your drain has no such rod, skip to the push-pop section below.
A common lift-rod pop-up uses a horizontal pivot rod entering the side of the drain body; releasing this connection frees many retained stoppers.
3. Loosen the pivot-rod nut and slide the rod out
Try the retaining nut by hand first. Many are plastic and are intended to be hand-tightened. If it is stuck, use pliers carefully and avoid crushing or deforming the nut. As the nut comes loose, note the order of any ball seat, gasket, or washer so you can put the assembly back the same way.
Pull the horizontal rod straight out far enough to disengage it from the stopper. You may not need to disconnect the outer end from the linkage unless access is tight.
Action: Take a quick phone photo of the rod, nut, and linkage before removal. It gives you a reliable reference for reassembly.
4. Lift the stopper out from above
Return to the sink and lift the stopper straight up. Once the retaining rod is no longer passing through or beneath the stopper's lower stem, it should come out without major force.
If it still does not move, do not pry against the sink with a screwdriver. Check whether the rod was fully withdrawn and whether the stopper has a model-specific locking feature.
Action: If the stopper remains captive after the pivot rod is out, pause and identify the faucet or drain model before proceeding.
Once the correct retaining mechanism has been released, the stopper should come out with a controlled lift rather than forceful prying.
Push-pop stoppers: do not assume “turn counterclockwise”
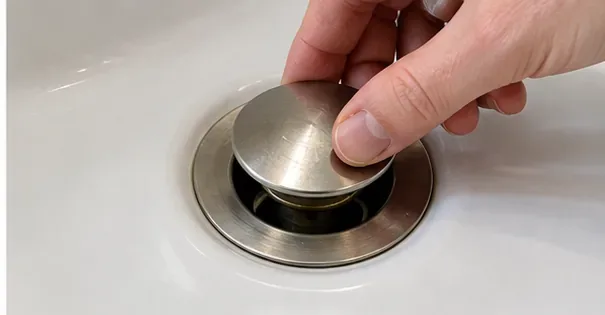
Push-pop drains open and close when you press the stopper cap, but their removal methods are not identical. This is one of the most important places to avoid a generic internet rule.
Delta's current support for the RP101630 family illustrates the problem: one official answer for an overflow-hole version says to turn the stopper 90 degrees to unlock it and then pull straight up, while another 2026 support answer for a specific Tetra installation says the stopper cannot be removed from the top and that drain disassembly is required for cleaning. That does not mean the product is defective; it means the exact assembly and installation matter.
Action: If there is no under-sink pivot rod, find the drain or faucet model number before twisting the cap with pliers. Check the maker's manual or product-support page. Delta's current example is available on the official RP101630 push-pop support page.
Common misunderstanding: you must remove the P-trap first
For the usual lift-rod pop-up stopper, no. The stopper is commonly released by removing the side-entry pivot rod. Taking apart the P-trap adds work and creates another leak-prone joint to reassemble.
Removing the P-trap can become useful if you are clearing a deeper clog, retrieving an object, or working on a drain assembly that cannot be serviced from above. It is not the normal first step for a basic pop-up stopper.
Action: Start with the stopper linkage. Remove the P-trap only when the obstruction or the exact drain design actually requires it.
Clean the stopper while it is out
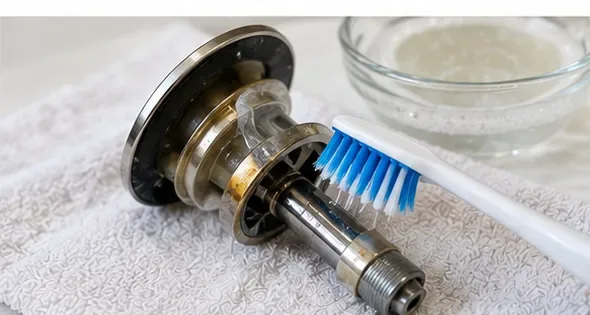
Hair, soap residue, toothpaste, skin oils, and mineral film often collect around the stopper stem and drain opening. Clean the removed stopper with warm water, mild dish soap, and a soft brush. Wipe accessible buildup from the drain opening without forcing debris deeper into the pipe.
If a strong chemical drain opener was recently poured into the sink, do not immediately reach into the drain or handle trapped liquid. Follow that product's safety and flushing instructions first.
Action: Remove loose hair mechanically, clean the stopper gently, and inspect its rubber seal and lower loop or stem for cracks before reinstalling it.
Clean hair and residue from the removed stopper and accessible drain parts before reinstalling the mechanism.
Reinstall the stopper correctly
Place the stopper back into the drain with its lower stem aligned so the pivot rod can engage it. Reinsert the horizontal rod through the side of the drain. Depending on the design and desired configuration, the rod may pass through the stopper's loop or sit beneath the stopper rod. Manufacturer instructions determine the correct arrangement.
Reinstall the ball seat, gasket, and retaining nut in the same order they came out. Hand-tighten the nut first. Reconnect or realign the outer linkage if you removed it.
Action: Operate the lift rod several times before running water. The stopper should rise enough to drain freely and lower far enough to seal.
Final self-check: did you put it back correctly?
Movement: The stopper opens and closes smoothly without binding.
Retention: A non-removable setup no longer lifts out unexpectedly.
Drainage: Water drains normally when the stopper is open.
Seal: The basin holds water when the stopper is closed.
Leaks: No water appears around the pivot-rod nut, drain body, or P-trap while the faucet runs.
If the pivot-rod connection leaks, stop using the sink and check whether a gasket or ball seat was reversed, displaced, or overtightened. If the stopper still will not move after correct reassembly, the linkage may need adjustment rather than more force.
When to stop and look up the exact model
Stop if the stopper does not match a standard lift-rod design, the push-pop cap will not release with the manufacturer's documented motion, the drain body begins rotating in the sink, or a plastic fitting starts to deform. Unknown hardware is not a reason to apply more torque.
The most reliable removal method is the one that matches the actual drain mechanism. Identify the type, release the correct retainer, clean what you removed, then test both movement and leaks. That approach is slower than yanking on the cap, but it is far less likely to turn a simple cleaning job into a drain repair.