Home
» INTERNET
»
How to Clean a Faucet Aerator: An 8-Step Guide for Better Flow
How to Clean a Faucet Aerator: An 8-Step Guide for Better Flow
A faucet that suddenly feels weaker, spits water sideways, or produces an uneven stream may not need a new cartridge or a plumber. The small aerator at the end of the spout can collect mineral scale, sediment, and other debris until its tiny passages become restricted.
To make the process concrete, imagine a hypothetical homeowner named Maya. Her bathroom faucet still turns on normally, but the stream has become ragged and noticeably weaker. This is only an illustrative example, not a real test result or customer story. We will follow Maya through the cleaning process while also covering the variations that matter in real homes.
What a Faucet Aerator Does—and Why It Gets Dirty
A faucet aerator is the small screen-and-housing assembly at the tip of many faucets. It breaks the water into many small streams and mixes in air, which can make the flow feel smoother while helping reduce splashing. Some aerators screw onto the outside of the spout, some are recessed inside the spout and require a small key, and some faucet designs use an integrated end device that is not meant to be removed casually.
Scale is the chalky mineral deposit left behind as water evaporates. Sediment can also collect in the screen. The U.S. Environmental Protection Agency's WaterSense program recommends periodically inspecting faucets for scaling or calcium buildup and cleaning deposits that restrict flow. The U.S. Centers for Disease Control and Prevention also advises cleaning faucet aerators when visible buildup appears. See the current EPA WaterSense home-maintenance guidance and CDC guidance on preventing waterborne germs at home.
Cleaning is especially worth considering after plumbing work or a water-service disruption, because disturbed sediment may reach the fixture. Public-health guidance from the City of Duluth, Minnesota, for example, recommends regular aerator cleaning and additional cleaning after plumbing-system work. Its Healthy Water Habits aerator-cleaning guide also shows both standard and recessed aerators.
What You Need
White distilled vinegar
A small bowl or cup
A soft toothbrush or other small, clean soft-bristle brush
A towel or washcloth
An adjustable wrench or pliers only if needed
A faucet-aerator key if your model uses a recessed or cache aerator
A small tray or clean towel for keeping parts in order
Avoid abrasive pads, aggressive scraping, and strong acids. Faucet finishes can be damaged by the wrong cleaner. Delta, for example, advises soft, nonabrasive cleaning and notes that hard-water deposits on a removable aerator can be treated with vinegar, while finished faucet surfaces may call for a diluted vinegar solution and thorough rinsing. Check Delta Faucet cleaning and care guidance or the instructions for your own faucet before applying vinegar directly to a decorative finish.
How to Clean a Faucet Aerator in 8 Steps
1. Check the Flow and Confirm the Aerator Is the Likely Problem
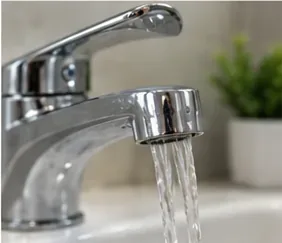
Turn the faucet on and look at the stream. A clogged aerator commonly shows up as reduced flow, a stream that fans to one side, or several small jets instead of one even pattern. In our hypothetical example, Maya sees that the faucet is not leaking at the handle or base; only the outlet stream looks irregular. That makes the aerator a sensible first place to inspect.
An uneven or weakened stream can be a sign that mineral scale or debris is restricting the faucet aerator.
If both hot and cold flow are weak at several fixtures, or if the pressure changed throughout the home, the aerator may not be the root cause. In that case, cleaning one screen may not solve the larger plumbing or supply issue.
2. Turn Off the Faucet, Protect the Drain, and Remove the Aerator
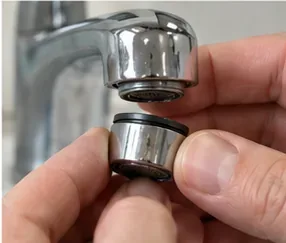
Close the faucet. Cover or close the drain so a washer or small insert cannot disappear into the trap. Try to unscrew a standard aerator by hand while looking up at the underside of the spout; many loosen counterclockwise from that viewpoint.
If it will not move, wrap the housing in a towel before using an adjustable wrench or pliers, and use only enough force to break it free. Recessed aerators usually need the matching plastic key. Do not force an integrated or unusual aerator simply because it resembles a removable one. Manufacturer instructions take priority.
A standard aerator can often be unscrewed by hand; protect the finish before using a tool.
3. Lay Out the Parts in the Exact Order They Come Apart
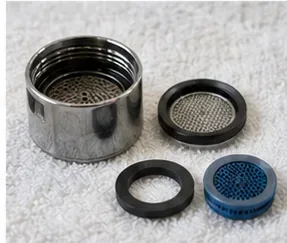
An aerator may contain a metal or plastic housing, one or more screens, a flow insert, and a rubber washer or gasket. As Maya removes each piece in our example, she places it left to right on a clean towel. That simple habit prevents the common mistake of reinstalling a screen backward or forgetting the gasket.
Do not pry apart components that appear permanently bonded. Some manufacturers specifically advise cleaning an assembly as a unit rather than separating an internal screen.
Lay removable aerator parts in order so the screens, insert, and gasket go back in the same orientation.
4. Soak the Removable Parts in White Vinegar
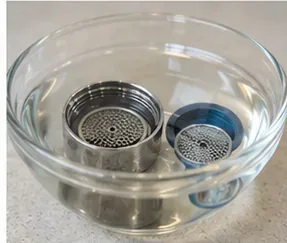
Place the removable metal and plastic aerator parts in a small bowl and cover them with white distilled vinegar. The City of Duluth guide uses a 20-minute vinegar soak before brushing and rinsing. Some manufacturer instructions allow longer soaking for stubborn mineral deposits, so the exact time can vary by product.
For a first cleaning, about 20 minutes is a practical starting point. If scale remains, repeat rather than attacking the screen with a sharp tool. If the aerator cannot be removed, some manufacturers permit wrapping the spout end with a cloth or bag containing a 50/50 white-vinegar-and-water solution, but only use that approach if it is compatible with the faucet finish.
A short white-vinegar soak helps loosen mineral scale on removable aerator parts.
5. Brush Away Loosened Scale and Debris
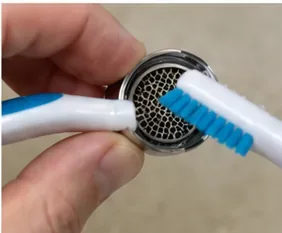
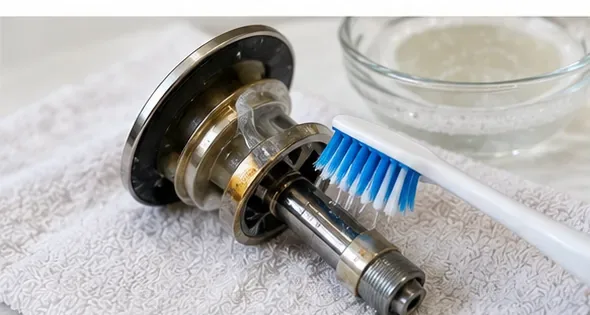
After soaking, use a soft toothbrush to work gently across both sides of the screen and around the small openings in the housing. The goal is to lift softened deposits, not enlarge the holes. Avoid needles, drill bits, metal picks, or aggressive wire brushes that can distort the screen or change the intended flow pattern.
In the hypothetical scenario, Maya sees small pale flakes release with light brushing. If a deposit remains hard and firmly attached, another soak is safer than increasing force.
Use a soft brush to remove loosened deposits without bending or enlarging the screen openings.
6. Rinse Every Part Thoroughly
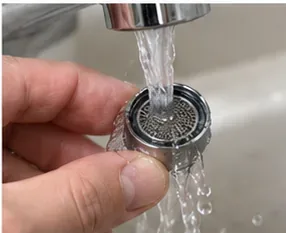
Rinse the housing, screen, insert, and washer with clean running water. Check the screen against the light. The openings should look clear, and loose particles should no longer be trapped between layers. Rinsing also removes vinegar residue before the aerator returns to service.
Inspect the rubber washer while it is out. If it is cracked, badly flattened, swollen, or brittle, replacing it can help prevent a drip around the aerator housing.
Rinse away loosened particles and vinegar, then inspect the screen and washer before reassembly.
7. Reassemble and Reinstall Without Overtightening
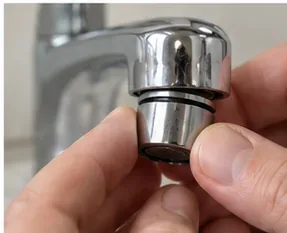
Put the pieces back in the same order and orientation they had before cleaning. Thread the aerator onto the faucet by hand first. This reduces the chance of cross-threading. Tighten until it is snug and the gasket seals; do not keep tightening simply because a wrench is available.
The Duluth guide specifically warns not to overtighten after reassembly. If a recessed aerator uses a key, use the key only to seat it securely according to the faucet instructions.
Start the cleaned aerator by hand and tighten only until it is secure and sealed.
8. Test the Stream and Check for Leaks
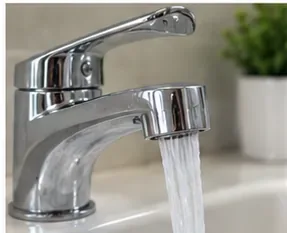
Turn on cold water gradually and inspect the stream. Then test the normal range of flow. A successful cleaning should produce a more even pattern without water escaping around the aerator threads. In Maya's hypothetical case, this is the point where she would compare the stream with what she saw in Step 1 rather than assuming the job worked.
After reinstallation, test for a smooth stream and check the aerator connection for leaks.
If the flow is still weak, remove the aerator once more and briefly test the faucet without it, taking care because the stream may splash. Strong flow without the aerator points back to the aerator or flow insert. Weak flow even with the aerator removed suggests the restriction is elsewhere, such as the faucet cartridge, supply stop, hose, or household plumbing.
What If the Aerator Will Not Come Off?
First identify the aerator type. A visible threaded housing is different from a recessed cache aerator, and both are different from an integrated outlet. A cache aerator usually has grooves for a matching key. Using the wrong tool can round the plastic tabs or scratch the finish.
If mineral buildup has effectively glued the aerator in place, use the manufacturer-approved soaking method before trying again. For some Delta models, current support guidance recommends a 50/50 white-vinegar-and-water soak around the spout for 30 to 60 minutes when buildup makes a cache aerator difficult to turn. That does not mean the same method is safe for every finish or every brand.
When Cleaning Is Not Enough
Replace the aerator rather than continuing to scrub if the screen is torn, the plastic insert is crumbling, the threads are damaged, or the housing is badly corroded. The EPA notes that aerators should be cleaned or replaced when scale restricts flow. A replacement should match the faucet's thread type, size, and intended flow rate.
Also consider professional help if the aerator is seized and forcing it could damage an expensive faucet, if the faucet body is corroded, or if low pressure affects several fixtures. Cleaning an aerator is a focused maintenance step; it cannot correct a failing pressure regulator, a partially closed supply valve, or a restriction deeper in the plumbing system.
How Often Should You Clean a Faucet Aerator?
There is no single interval that fits every household because water hardness, pipe condition, local construction, and fixture design vary. The CDC's practical trigger is visible buildup. The City of Duluth recommends at least twice-yearly cleaning and more often after plumbing work in its local water-quality guidance. For many homes, inspecting the aerator every few months and cleaning it when deposits or flow changes appear is a reasonable routine.
If a water utility issues instructions after a main break, lead-service-line replacement, or other disruption, follow those local directions. Aerators can trap sediment, so post-work cleaning may be part of the recommended flushing process.
Common Mistakes to Avoid
Forgetting the washer orientation: A misplaced gasket can cause leakage around the aerator.
Using bare pliers on a decorative finish: Metal jaws can scratch chrome, nickel, brass, or coated finishes.
Forcing a hidden aerator without the right key: Recessed plastic tabs are easy to damage.
Scraping screen holes with sharp metal tools: Enlarged or bent openings can change the spray pattern.
Overtightening during reinstallation: Snug is enough; excessive force can damage threads or the gasket.
Assuming every low-flow problem is the aerator: If flow remains weak with the aerator removed, investigate farther upstream.
The Bottom Line
Cleaning a faucet aerator is a small maintenance job with a clear way to judge the result: the screen should be visibly clear, the reinstalled connection should stay dry, and the water stream should be even at normal use. The most important technique is not aggressive cleaning but controlled cleaning—identify the aerator type, preserve the order of the parts, soften deposits with an appropriate vinegar treatment, brush gently, rinse thoroughly, and stop if the assembly is damaged or not designed for removal.
In our hypothetical example, Maya's process ends with a test, not a promise. If the stream improves and the connection does not leak, the cleaning addressed the restriction. If not, the next step is to look beyond the aerator rather than repeating the same treatment indefinitely.