Home
» INTERNET
»
How to Clean a Fish Tank Filter Sponge Without Stripping Away Beneficial Bacteria
How to Clean a Fish Tank Filter Sponge Without Stripping Away Beneficial Bacteria
A fish tank filter sponge should come out of maintenance less clogged, able to pass water freely, and still structurally intact—not scrubbed until it looks brand-new. The practical goal is to remove enough trapped waste to restore filtration while disturbing the biological community on the foam as little as reasonably possible.
That matters because aquarium sponge media usually does two jobs at once. It catches debris mechanically, and its porous surface also supports nitrifying bacteria that help process ammonia and nitrite. Fluval's support guidance specifically recommends rinsing foam pads in aquarium water to reduce the loss of those bacteria, while Tetra advises cleaning a sponge when dirt buildup begins to reduce flow. See the manufacturer's guidance from Fluval on rinsing Bio-Foam and Tetra on FilterJet sponge maintenance.
What should a properly cleaned filter sponge look like?
A good result is not a spotless sponge. After cleaning, the foam may still be stained or slightly discolored. That is normal. What matters is that loose sludge has been removed, the pores are no longer packed with debris, and the sponge springs back instead of staying compressed.
Flow improves: water output should return close to the filter's normal level after reassembly.
The sponge remains intact: it should not tear, crumble, flatten permanently, or shed pieces.
Loose debris is reduced: a few gentle squeezes should stop releasing heavy clouds of waste, even though the rinse water may remain dirty.
The tank remains biologically stable: routine sponge cleaning should not be followed by unexplained ammonia or nitrite increases. If it is, test the water and review what else was changed at the same time.
This outcome-focused approach is more useful than trying to make the sponge look new. A stained but open, resilient sponge can still work well; a spotless sponge that has been aggressively washed, chemically cleaned, or damaged may not.
What you need before you start
A clean bucket or container used only for aquarium maintenance
Water removed from the aquarium during a partial water change
A towel for drips around the filter
Your filter's manual if the sponge is part of a multi-stage cartridge or media stack
An aquarium test kit if the tank is new, heavily stocked, or has recently shown water-quality problems
Do not use a bucket that has held soap, household cleaners, pesticides, or other chemicals. Fluval's filter-maintenance manual warns against soap and detergents on aquarium media and recommends using water removed from the aquarium. The same manual also advises against replacing all filter media at once. You can review the Fluval filter maintenance manual.
How to clean a fish tank filter sponge
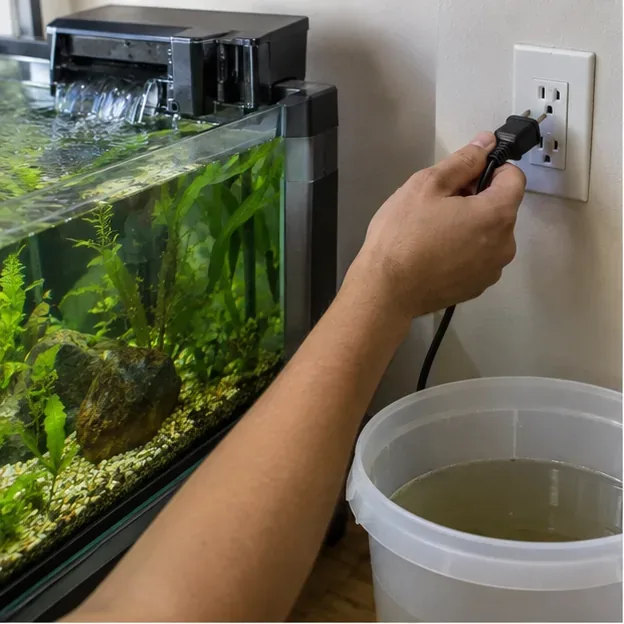
Step 1: Unplug the filter and save some aquarium water
Disconnect the filter from power before opening it or putting your hands near the intake, impeller, or wet electrical equipment. During a water change, collect enough removed tank water in a clean bucket to fully submerge the sponge.
An aquarium owner unplugs the filter before opening it, with a bucket of removed tank water ready for rinsing the sponge.
Using removed aquarium water is a conservative default because the sponge's bacterial biofilm has already adapted to the tank's chemistry. It also avoids exposing the media to untreated tap water. If your filter manufacturer gives different, model-specific instructions, follow those instructions for that product.
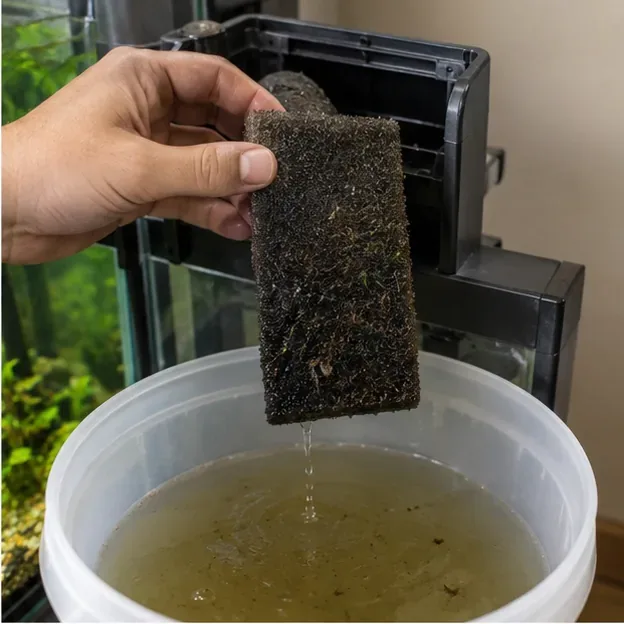
Step 2: Remove the sponge and inspect it before washing
Lift the sponge out gently so trapped debris does not dump back into the aquarium. Look for heavy sludge, flattened foam, tears, crumbling edges, or channels where water may be bypassing the media.
A debris-loaded foam sponge is held over removed aquarium water before cleaning; this is the point to check for tears, collapse, or permanent deformation.
If the sponge is only dirty, cleaning is usually appropriate. If it is breaking apart or no longer holds its shape, cleaning may not restore reliable filtration and replacement is more sensible.
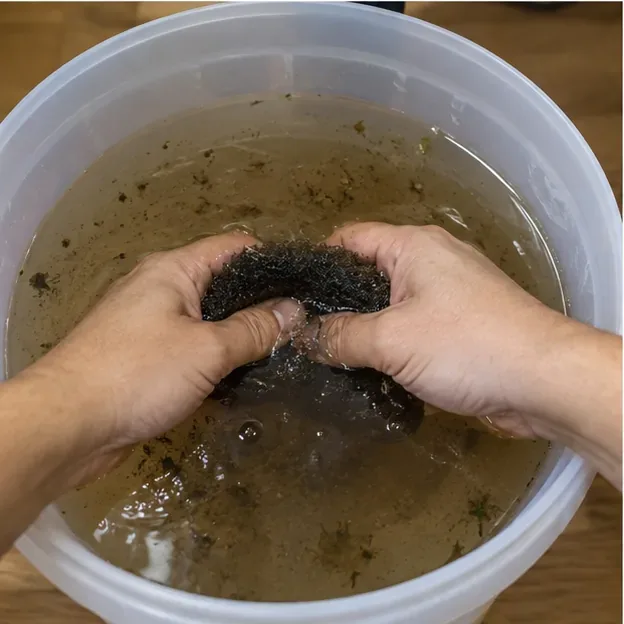
Step 3: Swish and gently squeeze the sponge in tank water
Submerge the sponge in the bucket. Swish it through the water, then compress and release it several times with your hands. The water will often turn brown as fish waste, food particles, plant debris, and mulm leave the pores.
Gentle squeezing under removed aquarium water releases trapped debris without trying to strip the foam perfectly clean.
Do not scrub the foam with detergent, bleach, dish soap, or household disinfectant for routine maintenance. Do not chase a perfectly clean appearance. JBL's manufacturer guidance for routine filter maintenance similarly describes kneading and washing sponge media in removed aquarium water rather than polishing it clean; see JBL's filter maintenance guidance.
Step 4: Stop when the sponge is open and flexible—not spotless
After several squeezes, inspect the foam again. You are looking for open pores and a sponge that rebounds when released. If squeezing still produces thick clouds of debris and the sponge feels packed, repeat the rinse in a second container of removed aquarium water if you have enough available.
Change your approach if the sponge remains clogged despite rinsing. Check whether fine sediment has hardened inside it, whether the foam has collapsed, or whether a second prefilter is overloaded. If the sponge is physically worn out, replace it rather than forcing more aggressive cleaning.
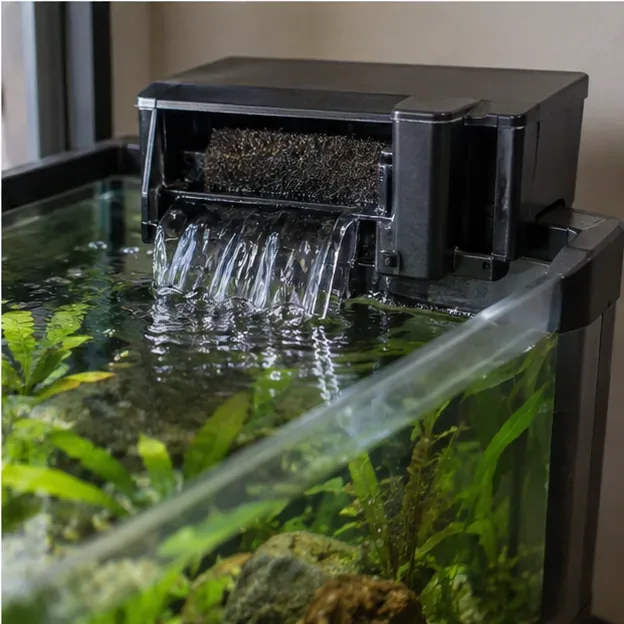
Step 5: Reinstall the sponge, restart the filter, and verify the result
Put the sponge back in its original orientation, reassemble the filter, make sure any intake tubes or baskets are seated correctly, then restore power according to the filter manual. Some hang-on-back or canister filters need priming before they resume normal operation.
After the sponge is reinstalled, the filter should restart with a steady return flow close to its normal output.
Watch the filter for a few minutes. A successful cleaning should improve flow without new rattling, leaking, or obvious bypass around the sponge. If flow is still weak, the problem may be elsewhere—for example, a clogged intake, dirty impeller, kinked hose, blocked spray bar, or worn pump.
How do you know whether cleaning actually worked?
What to check
Good result
When to change your approach
Water flow
Clearly stronger and close to the filter's usual output
Still weak after cleaning; inspect intake, impeller, tubing, or pump
Sponge texture
Flexible and springy with open pores
Collapsed, brittle, torn, or shedding foam
Debris release
Heavy sludge is gone after a few rinse cycles
Dense debris remains trapped even after repeated gentle rinsing
Tank water
No persistent new cloudiness or odor linked to the maintenance
Cloudiness persists, fish show distress, or water tests worsen
Filter sound
Normal hum or operating sound
Grinding, rattling, air-lock noise, or intermittent flow
If water quality is questionable after maintenance, test ammonia and nitrite rather than relying only on how clear the tank looks. Aqueon notes that beneficial bacteria colonize filter media and other aquarium surfaces and are central to the nitrogen cycle; its overview is available at Aqueon's beneficial bacteria guide.
How often should you clean the filter sponge?
There is no single interval that fits every aquarium. Fish size, feeding, plant debris, substrate dust, tank volume, sponge pore size, and filter design all affect how quickly the foam clogs. Manufacturer schedules also vary by product.
A useful trigger is declining flow combined with visible debris loading. Tetra's FilterJet guidance says the sponge should be cleaned when accumulated dirt reduces the flow rate. Fluval has published model-specific maintenance schedules and also notes in general filter-media guidance that waning flow is a sign that media may need cleaning.
For a lightly stocked aquarium, that may be less frequent than for a tank with large messy fish or heavy feeding. Instead of cleaning by calendar alone, record the date and note how much the flow changed. After two or three maintenance cycles, you will usually have a better tank-specific interval.
When should you replace the sponge instead of cleaning it?
Replace a foam sponge when its physical condition no longer supports reliable filtration, not simply because it looks brown. Common replacement signs include tears, crumbling, permanent compression, large sections that will not reopen after rinsing, or a fit so loose that water can bypass the media.
If the filter contains several biological media elements, avoid replacing all of them at the same time unless the manufacturer or a specific disease-treatment protocol requires it. Staggering media changes preserves more established biofilm. Fluval explicitly recommends staggering media replacement in its maintenance instructions.
Replacement intervals printed by manufacturers are product-specific. A coarse reusable foam may last much longer than a fine polishing pad, cartridge, or specialty insert. Use the schedule for your exact filter as a baseline, then judge the foam's condition and the filter's performance.
What should you avoid?
Do not use soap or detergent. Residues can be harmful to aquatic life and are unnecessary for routine sponge maintenance.
Do not scrub until the foam looks new. The target is restored flow, not cosmetic whiteness.
Do not use very hot water. Heat can damage foam and is unnecessary for normal cleaning.
Do not replace every biological medium at once unless a specific, justified treatment procedure calls for complete sanitation.
Do not ignore the rest of the filter. A clean sponge cannot compensate for a blocked intake or dirty impeller.
What sponge cleaning cannot fix
Cleaning the filter sponge is maintenance, not a cure for every aquarium problem. It cannot by itself correct overstocking, chronic overfeeding, an undersized filter, a dead fish hidden behind decor, a cycling problem, poor oxygenation, or unsuitable water chemistry. It also will not remove every dissolved contaminant; mechanical sponge media mainly traps particles while its biofilm contributes to biological filtration.
If the aquarium remains cloudy, develops odor, or shows ammonia or nitrite after the sponge is cleaned, investigate the broader system. Check feeding, livestock load, decaying material, water-change routine, filter capacity, and whether other media or the impeller need attention. In a new aquarium, avoid unnecessary deep cleaning while the biofilter is establishing unless flow is actually restricted.
A quick maintenance checklist
Unplug the filter before opening or handling it.
Save removed aquarium water in a clean, chemical-free bucket.
Inspect the sponge before cleaning.
Swish and gently squeeze it in tank water.
Stop when heavy debris is removed and the pores are open.
Replace the sponge only when damage or permanent clogging makes cleaning ineffective.
Reinstall it correctly and restart or prime the filter as required.
Confirm that flow improves and the filter runs normally.
Test ammonia and nitrite if the tank behaves abnormally afterward.