Home
» INTERNET
»
How to Clean a Mechanical Keyboard Safely: From Dusty Keys to a Deep Clean
How to Clean a Mechanical Keyboard Safely: From Dusty Keys to a Deep Clean
The safest way to clean a mechanical keyboard is to start dry: power it off or unplug it, remove loose debris, and only then move to removable keycaps and carefully controlled moisture. If the board is merely dusty, you may not need to remove anything. If the keycaps are greasy or crumbs are packed around the switches, a deeper clean makes sense. And unless your keyboard is explicitly hot-swappable, do not pull the switches just to clean it.
That order matters because a mechanical keyboard contains exposed switches, a printed circuit board (PCB), sockets or solder joints, stabilizers, LEDs, and sometimes a battery. Cleaning the wrong part with too much liquid can turn a cosmetic problem into an electrical one. Manufacturer guidance also differs: Corsair, Keychron, and Logitech all recommend minimizing moisture, but their advice on alcohol concentration and removable parts is not identical. Your exact keyboard manual therefore takes priority over any generic method.
Choose the Cleaning Level Before You Start
What you see
Best starting point
Do you need to remove keycaps?
Light dust, hair, a few crumbs
Power off, turn the board over gently, brush, then use controlled compressed air
Usually no
Greasy keycaps or visible grime between keys
Remove compatible keycaps, clean them separately, then clean the exposed plate
Usually yes
One sticky key after a small spill
Disconnect immediately, remove the affected keycap if supported, and clean only after the area is dry
Often just the affected key
Liquid reached the PCB, battery area, or USB electronics
Stop using the keyboard and follow model-specific service or disassembly instructions
General surface cleaning is not enough
For a quick clean, manufacturers such as Logitech recommend powering down first, shaking out loose particles gently, and using compressed air carefully. For a deeper mechanical-keyboard clean, Keychron's mechanical-keyboard cleaning guidance describes removing keycaps, cleaning the base with a brush or compressed air, washing removable keycaps separately, and allowing everything to dry fully.
What You Need
A keycap puller that fits your keycaps
A soft, clean brush
A microfiber or other lint-free cloth
Compressed air or a manual air blower
A bowl or container for washable keycaps
Warm water and a small amount of mild dish soap, but only for removable keycaps your manufacturer allows you to wash
Cotton swabs for tight areas
Isopropyl alcohol only if your keyboard manufacturer allows it, using the concentration it specifies
Do not spray cleaner directly onto the keyboard. Corsair's keyboard-cleaning instructions say to keep moisture to a minimum and prevent liquid from reaching the PCB. Logitech also warns against bleach, acetone or nail-polish remover, strong solvents, and abrasives.
How to Clean a Mechanical Keyboard Step by Step
1. Disconnect the keyboard, photograph the layout, and remove compatible keycaps
Unplug a wired keyboard. For a wireless model, switch it off and disconnect the charging cable. If the keyboard has a removable battery and the manual tells you to remove it for service, do that as well.
Before taking off keycaps, photograph the entire layout. This is especially useful on compact boards with unusual function keys. Corsair specifically recommends taking a picture before cleaning so you have a reference for reassembly.
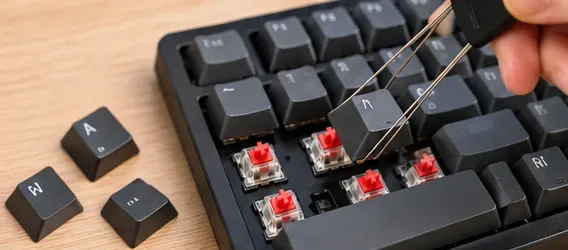
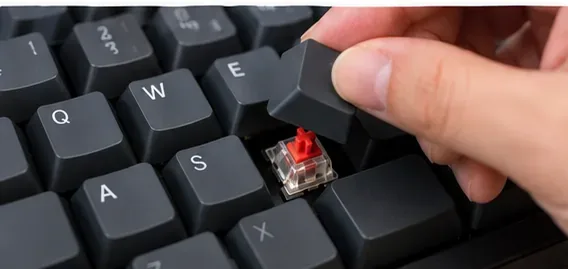
Use a keycap puller and lift straight up with controlled pressure. Be more careful with the spacebar, Enter, Shift, Backspace, and other larger keys because they may use stabilizers. If a cap resists unusually strongly, stop and check the model documentation rather than forcing it.
Use a proper keycap puller and lift removable keycaps straight up. Photograph the layout first so every key returns to the correct position.
2. Wash removable keycaps separately when the manufacturer permits it
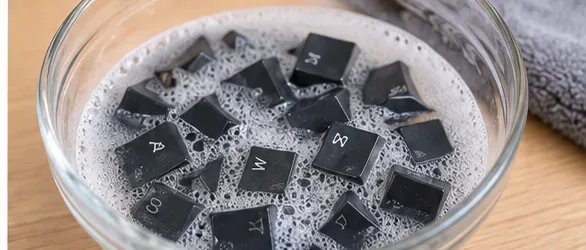
For ordinary removable keycaps that the manufacturer says are washable, place them in warm, soapy water. Corsair's published process calls for soaking keycaps for 30 to 60 minutes, rinsing them, towel-drying them, and then leaving them to air-dry overnight. Keychron also recommends warm, soapy water for a deep clean.
This is not permission to submerge the keyboard itself. Also use a more conservative method for unusual keycaps, specialty coatings, wood, resin, displays, or any cap set whose maker gives different cleaning instructions. When you cannot verify that soaking is safe, wipe the cap rather than guessing.
Wash only removable keycaps that are safe to soak. Keep the keyboard, switches, electronics, and cables out of the water.
3. Brush dust and crumbs from the exposed plate
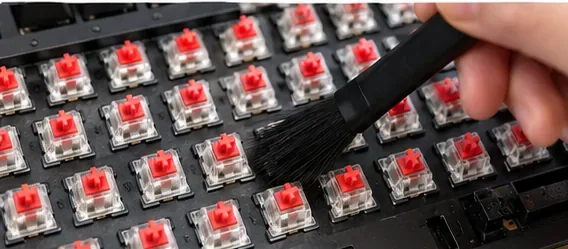
With the keycaps removed, use a soft brush to loosen hair, dust, crumbs, and dried debris from the plate and the spaces around each switch. Work gently so you do not bend switch stems, snag stabilizer wires, or push debris deeper into openings.
If your keyboard only had dry debris, this step may do most of the work. A deep chemical clean is not automatically better; it simply introduces more moisture and more opportunities to damage a finish or electronic component.
Brush loose debris away from the switches and plate before introducing any damp cloth or cleaning solution.
4. Blow out loosened debris with controlled air
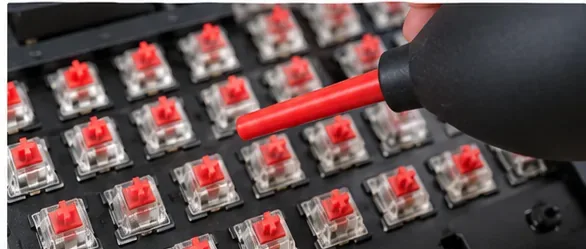
Use short, controlled bursts of compressed air, or a manual electronics blower, to move loosened dust out of recesses. Aim so the debris can escape rather than being driven under switches.
If you use canned compressed air, keep the can upright. Logitech's cleaning guidance warns that tilting a can can release its contents in liquid form. Avoid holding a high-pressure nozzle extremely close to delicate parts.
Use controlled air after brushing. Direct debris out of the keyboard instead of forcing it farther into the switch area.
5. Spot-clean stubborn grime with minimal moisture
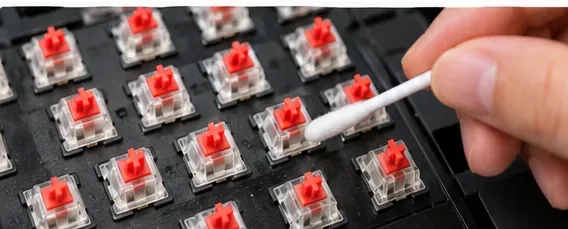
For residue that dry cleaning does not remove, lightly dampen a microfiber cloth or cotton swab with the cleaning method approved for your model. The applicator should be damp, not dripping. Wipe the plate, case edges, and exposed external surfaces; do not flood switch openings.
Do not assume one alcohol concentration is safe for every keyboard. Keychron's general mechanical-keyboard guide discusses 70% or higher isopropyl alcohol for stubborn grime, while Logitech's general keyboard guidance lists alcohol swabs below 25% among its approved options for certain products. Corsair recommends IPA while emphasizing minimal moisture. Those differences are a good reason to check your own manufacturer's instructions instead of applying a universal formula.
Spot-clean only stubborn residue and keep the swab barely damp. Liquid should never pool around a switch or reach the PCB.
6. Let the keycaps and keyboard dry completely
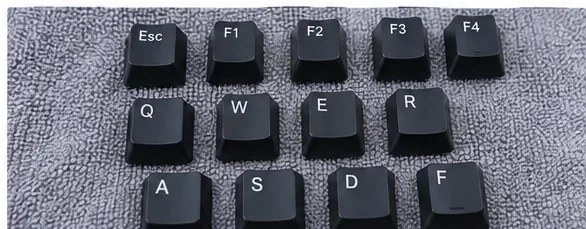
Spread washed keycaps on a clean towel in a single layer and let them air-dry fully. Corsair's published instructions specify air-drying keycaps overnight. The board itself should also be completely dry before power is restored.
Do not reinstall damp keycaps simply because their outer surfaces feel dry. Water can remain inside the cross-shaped stem cavity. Give them enough time for hidden moisture to evaporate.
Arrange washed keycaps so air can circulate around them, and wait until the stem cavities are fully dry before reassembly.
7. Reinstall the keycaps without forcing them
Use your reference photo and place each keycap over the matching switch stem. Press straight down until it seats normally. For stabilized keys, make sure the stabilizer mechanism is correctly aligned before applying pressure.
If a key sits crooked, binds, or feels different from its neighbors, remove it and check the alignment. Forcing a misaligned cap can damage the stem or stabilizer.
Align each keycap with its switch stem and press straight down. Recheck stabilizers on the larger keys before forcing anything into place.
8. Reconnect the keyboard and test every key
Once everything is dry and reassembled, reconnect or power on the keyboard. Open a plain text editor and test letters, numbers, modifiers, arrows, function keys, and any media controls. Make sure keys return normally and do not double-register or remain stuck.
If one key is still sticky, disconnect the board again and inspect that keycap and the area around its switch. If several keys fail after a spill or after liquid reached the electronics, stop repeated cleaning attempts and use the manufacturer's repair or service procedure.
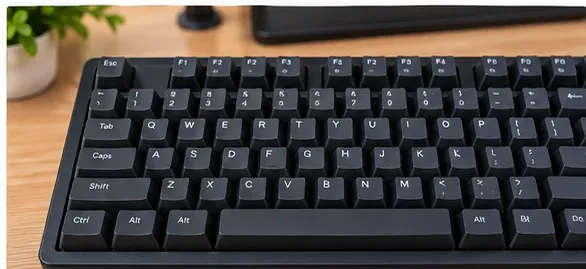
After the board is completely dry, reconnect it and test every key. A clean-looking keyboard is not finished until the keys also behave normally.
Should You Remove the Switches Too?
Only when the keyboard is designed for it. A hot-swappable keyboard has sockets that allow compatible switches to be removed without soldering. Keychron's current mechanical-keyboard FAQ defines hot-swappable this way and notes that switch removal can expose the plate for deeper cleaning. On a soldered keyboard, pulling a switch can damage the PCB or switch legs.
Even on a hot-swap board, switch removal is usually unnecessary for routine dust and keycap cleaning. Consider it only when debris is trapped beneath the switches, you are already performing switch maintenance, or the model's instructions tell you to remove them. Use a switch puller rather than a keycap puller, and confirm the board's switch type first. Magnetic and low-profile keyboards may use different mechanisms and compatibility rules.
A spill is different from normal cleaning. Disconnect power immediately. Do not keep pressing keys to “see if it still works,” and do not reconnect the keyboard while moisture may be inside.
If the spill stayed on removable keycaps and never reached the switch openings, you may be able to clean the affected caps and surface using the steps above. If liquid passed into the case, reached the PCB, entered a battery compartment, or contained sugar, milk, or another residue-forming ingredient, model-specific disassembly and cleaning may be required. At that point, a generic surface-cleaning guide is not enough.
Common Mistakes That Cause More Trouble Than the Dirt
Cleaning while the board is powered. Disconnect it first.
Spraying cleaner directly onto the keys. Apply approved liquid to a cloth or swab instead.
Soaking the whole keyboard. Only removable, manufacturer-approved keycaps belong in wash water.
Reinstalling damp keycaps. Moisture can hide inside keycap stems.
Forcing the spacebar or other stabilized keys. Large keys may need a different removal and reinstallation technique.
Pulling switches from a soldered board. Switch removal is for supported hot-swap designs, not every mechanical keyboard.
Using bleach, acetone, abrasive pads, or strong solvents. These can damage plastics, coatings, legends, and finishes.
Using an air can at the wrong angle. Keep it upright and use controlled bursts.
How Often Should You Clean a Mechanical Keyboard?
Use condition rather than a rigid calendar. A keyboard in a food-free home office may only need occasional dusting, while a board used every day around snacks, pets, or a shared workstation may need light cleaning much more often. Keychron's general guidance suggests frequent light cleaning and less frequent deep cleaning; the practical signal is visible dust, gritty key movement, sticky residue, or debris under the caps.
A good maintenance pattern is simple: brush or blow out dry debris before it builds up, wipe oils from the keycaps when needed, and reserve full keycap removal for the times when you can actually see grime below them. That keeps cleaning proportionate to the problem.
How to Check Your Work
When you finish, look for four things: no visible debris around the switches, dry keycap stems, even keycap alignment, and normal key response. Type a few sentences, hold each modifier while pressing another key, and test the larger stabilized keys for smooth return.
If the keyboard looks clean but a key still chatters, misses presses, or feels mechanically rough, dirt may not be the cause. The switch, stabilizer, hot-swap socket, cable, firmware, or PCB may need separate troubleshooting. Cleaning is the right fix for contamination; it is not a cure for every electrical or mechanical fault.