Home
» INTERNET
»
How to Clean a Sink Faucet Head: Choose the Right Method for Scale, Low Flow, or Spray Problems
How to Clean a Sink Faucet Head: Choose the Right Method for Scale, Low Flow, or Spray Problems
A sink faucet head can look clean from the outside and still spray unevenly, lose pressure, or develop white crust around the nozzles. The right fix depends on what is actually wrong. Light mineral scale on flexible spray nozzles may need only a wipe. A removable aerator with hard-water buildup may benefit from a vinegar-and-water soak. Low flow that continues after the head is removed points to a different restriction farther upstream.
That distinction matters because faucet manufacturers do not design every head the same way. Some pull-down wands are meant to unscrew from the hose but not be taken apart internally. Some fixed spouts use removable aerators, sometimes with a special key. Some spray faces use flexible rubber nozzles designed to shed scale when rubbed with a finger.
This guide was checked against current manufacturer guidance available on September 13, 2026, including Delta, Kohler, Moen, and Pfister support information. The practical rule is simple: start with the least aggressive method that matches the symptom, and escalate only if the flow problem remains.
Quick choice: which cleaning method fits your faucet?
Problem
Best first method
Why it works
Main tradeoff
Light white scale on soft spray nozzles
Rub or wipe the nozzle face
Flexible nozzles can release surface mineral deposits without chemicals
Does not reach debris trapped inside the head
Hard-water crust on a removable aerator or spray head
50/50 white vinegar and warm water, if the manufacturer permits it
Helps dissolve calcium and mineral buildup
Requires removal or controlled contact; not every finish or internal part should be soaked indefinitely
Uneven flow after plumbing work
Remove the aerator and flush the faucet
Clears sand, pipe chips, and loose debris that may be trapped in the screen
Will not fix scale bonded inside a clogged spray head
Low flow only when the spray head is attached
Clean or soak the removable head
Good flow from the hose with the head removed isolates the restriction to the head
Some heads are not designed to be disassembled internally
Low flow even with the head removed
Stop cleaning the head and troubleshoot upstream
The restriction may be in the hose, cartridge, supply line, or valve
May require a model-specific repair rather than cleaning
What you need
A soft microfiber cloth
A soft toothbrush or other non-abrasive brush
Warm water
White vinegar, if your faucet manufacturer permits it
A small bowl for removable parts
The aerator key or removal tool supplied with the faucet, if required
A towel to protect the sink and countertop
Before using vinegar or any cleaner, check the care instructions for your exact finish. Delta's current faucet finish care guidance allows a 50/50 white-vinegar-and-water solution for hard-water stains and says to rinse thoroughly afterward, while also warning against abrasive, bleach-based, strongly acidic, and caustic cleaners. Kohler's general care information emphasizes mild soap, warm water, and a soft cloth for routine finish care. The safest approach is to keep stronger descaling treatment focused on the removable aerator or spray head rather than exposing the entire faucet unnecessarily.
How to clean a sink faucet head in 5 steps
1. Identify the type of buildup before removing anything
Turn on the faucet and watch the spray pattern. If a few jets shoot sideways while the overall flow is strong, surface scale is the likely problem. If the entire stream is weak, the aerator or internal screen may be clogged. If the flow pulses, stops, or remains weak after cleaning, the restriction may be elsewhere.
Look closely at the spray face. White or chalky deposits usually indicate hard-water minerals. Brown grit or small particles suggest sediment. A soft rubber nozzle field is different from a metal mesh aerator, so the cleaning method should match the construction.
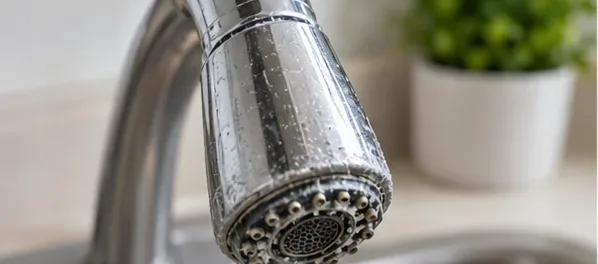
Start by identifying where the restriction is. White crust around the spray face points to mineral buildup; an uneven stream can also come from debris inside the aerator or spray head.
Best choice for light buildup: if your faucet uses flexible cleaning nozzles, try rubbing them first. Delta's Touch-Clean cleaning guidance says mineral deposits can be loosened by wiping the spray holes. This is faster and gentler than soaking.
2. Remove the aerator or spray head only if it is designed to come off
For a pull-down kitchen faucet, the wand may unscrew from the hose. For a fixed faucet, the aerator may unthread by hand or require a small model-specific key. Put a towel in the sink so a small aerator, washer, or screen cannot disappear down the drain.
Do not assume the entire spray head can be opened. Delta's official product support for several pull-down wands states that the wand can be removed from the hose but is not designed to be taken apart internally. Forcing a sealed head apart can damage the mechanism and may affect warranty coverage.
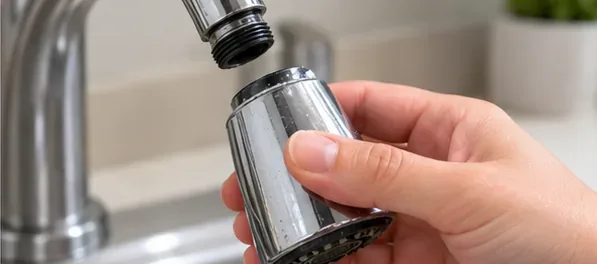
Remove the spray head only if the manufacturer says it is designed to unscrew. Some wands have removable heads or aerators; others are not meant to be disassembled.
If you have a removable aerator and the problem appeared after plumbing work, flushing may be more useful than soaking. Moen's official faucet flushing instructions direct users to remove the aerator, run hot and cold water for 15 seconds, then reinstall it. That approach targets loose construction debris rather than mineral scale.
3. Use a 50/50 vinegar soak for stubborn mineral buildup when approved
For a removable head or aerator with visible hard-water deposits, mix equal parts white vinegar and warm water. Kohler's current low-flow troubleshooting guidance recommends soaking a clogged spray head in a 50/50 white-vinegar-and-warm-water solution when good flow returns with the head removed.
Delta also recommends a 50/50 vinegar-and-water mixture for difficult mineral deposits on appropriate products. The tradeoff is exposure time: manufacturer advice varies by faucet and part, so do not assume that an overnight soak is universally safe. If your manual specifies a time, use that. If it does not, use a conservative soak, check progress, and avoid soaking decorative or electronic components that were not meant to be immersed.
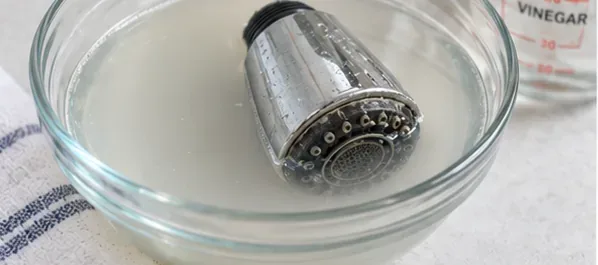
For mineral buildup on a removable head, several manufacturers recommend a 50/50 solution of white vinegar and warm water. Keep the soak limited to what your faucet maker allows.
When not to soak: skip the bowl if the head contains electronics, the manufacturer says it is non-removable, or the finish-care instructions conflict with vinegar exposure. In those cases, use the model-specific cleaning procedure or contact the manufacturer.
4. Brush gently, rinse, and flush out loosened debris
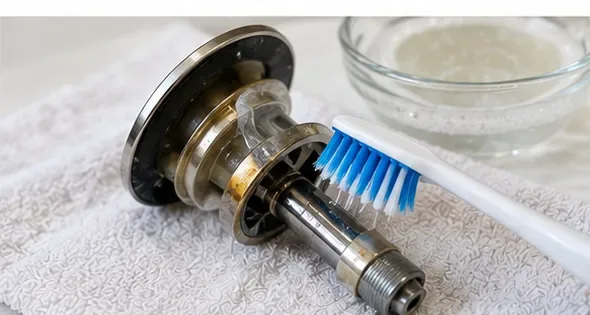
Once the deposits soften, use a soft toothbrush to lift scale from the aerator screen or spray face. A soft brush gives you more control than an abrasive sponge and is less likely to scratch chrome, stainless, black, bronze, or coated finishes.
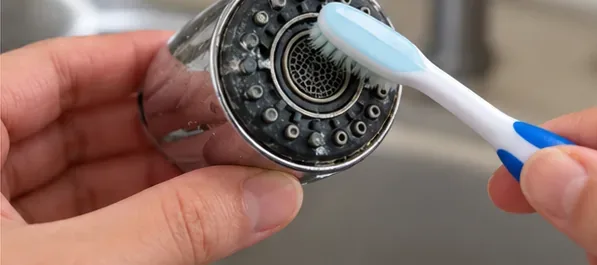
After the deposits soften, use a soft brush on the spray face or screen. Avoid abrasive pads that can scratch the finish or damage flexible nozzles.
Rinse the part thoroughly with clean water. If the head has a removable debris screen, clean that screen according to the product instructions. Some Delta pull-down heads have a screen at the hose connection that can be rinsed without opening the sealed wand.
Rinse away loosened scale and vinegar before reinstalling the head. If the model has a removable debris screen, rinse that component as directed by the manufacturer.
Avoid pushing needles, pins, or metal picks deep into spray holes. Even if the hole looks blocked, rigid tools can deform rubber nozzles, damage a flow regulator, or push debris farther inside.
5. Reinstall the head and use the flow test to decide what comes next
Reattach the aerator or spray head without cross-threading it, then run the faucet. The spray pattern should be more even and the flow should return toward its normal level.
Test the faucet after reassembly. A normal, even stream suggests the head was the restriction; persistent low flow may point to debris in the hose, supply, or valve.
If the flow is still weak, remove the head again and briefly test the hose or spout without it, following the manufacturer's procedure. Kohler's troubleshooting logic is especially useful here: good flow without the spray head indicates the head is restricted; poor flow without the head points to an upstream problem.
That upstream problem may involve sediment in the hose, a clogged cartridge, partially closed supply stops, or another model-specific component. At that point, repeatedly soaking the head is unlikely to help.
Cleaning in place vs. removing the head
Approach
Best for
Advantages
Tradeoffs
Wipe in place
Light scale and flexible nozzles
Fast, no disassembly, lowest risk
Cannot reach internal debris
Wrap with a vinegar-damp cloth
Exterior hard-water spots
Keeps treatment localized
Less effective for internal screens; protect nearby porous stone
Remove and soak
Removable aerators and clogged spray heads
Reaches more mineral buildup
Requires correct removal and finish-safe treatment
Flush with the head removed
Sediment or unexplained low flow
Helps diagnose where the restriction is
Does not dissolve bonded mineral scale
What if the faucet head will not unscrew?
Do not immediately reach for pliers. First confirm whether the head is actually removable. A recessed aerator may require the original key, while some spray heads are sealed assemblies. Search the model number on the manufacturer's support site before applying force.
If a threaded part is stuck because of hard-water deposits, Kohler's mineral-buildup guidance recommends using a towel soaked in a 50/50 white-vinegar-and-warm-water solution to soften mineral deposits around affected faucet parts. A rubber jar opener or strap wrench is safer for finishes than bare metal pliers when a manufacturer-approved tool is needed.
When vinegar is useful—and when a milder cleaner is better
Vinegar is useful for calcium and mineral scale. It is not automatically the best cleaner for grease, fingerprints, soap film, or routine finish care. For ordinary dirt on the faucet exterior, mild dish soap and water followed by a soft-cloth dry is often the better choice.
That tradeoff matters especially on specialty finishes. Delta permits diluted vinegar for hard-water stains on its finishes, but also warns against aggressive acids, bleach, abrasives, and heavy-duty scrub pads. Kohler's care materials similarly prioritize mild soap and soft cloths for routine cleaning. If you do not know the faucet brand or finish, start with soap and water and reserve vinegar for the removable mineral-clogged component after verifying compatibility.
Common mistakes to avoid
Taking apart a sealed spray wand: removing the wand from the hose is not the same as disassembling its internal mechanism.
Using abrasive pads: they can scratch metal and coated finishes.
Soaking for an arbitrary long period: manufacturer recommendations vary, so longer is not automatically better.
Forcing a recessed aerator without the right key: this can damage the aerator or spout.
Ignoring the hose-only flow test: if flow is weak with the head removed, the head may not be the real problem.
Using harsh bathroom cleaners: strong acids, bleach, and abrasive formulas can damage faucet finishes.
How to prevent the buildup from returning
Mineral deposits form as water evaporates on the faucet surface. Delta recommends blotting water from the faucet rather than letting it dry in place. A quick wipe after heavy sink use is more effective for prevention than repeated deep descaling later.
If your home has very hard water, the aerator or spray face may need periodic cleaning even when the faucet is functioning normally. There is no universal cleaning interval because water hardness and faucet design vary. Clean when you first notice sideways jets, a visibly crusted spray face, or a gradual reduction in flow.
Final recommendation by symptom
If the faucet sprays sideways but still has strong pressure, start by rubbing or gently brushing the nozzles. If the head is removable and visibly scaled, use a manufacturer-approved 50/50 vinegar-and-warm-water soak. If the problem looks like loose sediment, remove the aerator and flush the faucet. If the faucet remains weak with the head removed, stop cleaning the head and troubleshoot the hose, valve, or cartridge instead.
That symptom-based approach uses the mildest effective method first, protects the finish, and prevents wasted effort on a faucet head that was never the real restriction.