Home
» INTERNET
»
How to Clean a Stained Dry Erase Board Without Damaging the Surface
How to Clean a Stained Dry Erase Board Without Damaging the Surface
You erase the meeting notes, but pale blue lines are still visible. A red heading leaves a shadow. One corner looks gray no matter how many times you rub it. A stained dry erase board can be frustrating because the next instinct—scrub harder or reach for a strong household cleaner—is also the move most likely to damage some board surfaces.
Illustrative example: imagine an office team returning to a conference room after a long project. The whiteboard still shows faint “ghost” marks from old dry-erase notes, plus one darker line that may have been made with the wrong marker. This is a hypothetical example used to explain the process below, not a report of a real cleaning test.
The safest approach is to work from least aggressive to more targeted methods: identify the board surface, remove loose ink, use a soft damp cloth, apply a manufacturer-approved whiteboard cleaner if needed, dry the surface completely, and only then try a dry-erase-marker-over-marker technique on stubborn ink. Manufacturer guidance matters because melamine, painted steel, porcelain, and glass boards do not all have the same coating or resistance to cleaners.
First, decide whether you are dealing with ghosting, old ink, or surface damage
“Stain” can describe several different problems. Ghosting is the faint image left after dry-erase ink has been erased. Old dry-erase ink can become harder to remove after sitting on the board for a long time. Permanent marker may leave a darker, sharper line. A worn or scratched surface can also hold residue in a way that cleaning cannot fully fix.
Quartet notes that stain removal depends partly on the board surface and that some marks may not be removable when ink has been left on the board for an excessive period. Its product guidance also distinguishes common surfaces: melamine is intended for lighter use, while porcelain and glass are more durable, non-porous options. See the Quartet product FAQ. Guidance in this article was checked in September 2026.
Start by looking at the pattern of the stain. Faint shadows suggest ghosting or old dry-erase residue; darker isolated marks may indicate a different ink.
What you need
A clean dry-erase eraser or soft microfiber cloth
One microfiber cloth lightly dampened with clean water
A manufacturer-approved whiteboard cleaner, if water alone is not enough
One or two clean, dry microfiber cloths
A fresh black dry-erase marker for stubborn old marks or accidental permanent-marker lines
Avoid starting with a general household cleaner. Quartet specifically says it does not recommend general household cleaners on its whiteboards or glass boards, and it directs users to board-specific products. Ghent likewise recommends a soft wet cloth for general cleaning and whiteboard cleaner when further cleaning is needed. Those two manufacturers also emphasize drying the surface after cleaning. You can review the official Quartet board maintenance instructions and Ghent cleaning and disinfecting guidance.
How to clean a stained dry erase board, from easiest to more targeted
Step 1: Inspect the surface before using any liquid
In the hypothetical office example, the team first checks whether the board is melamine, painted steel, porcelain, or glass. If the model or manufacturer is known, use its care instructions rather than assuming every whiteboard tolerates the same chemical. This matters most when you are considering alcohol, disinfectants, or other stronger products.
Also run your eyes across the board at an angle. A smooth but faint colored haze is usually residue. Visible scratches, dull patches, peeling coating, or rough areas suggest physical wear. Cleaning can remove ink from a sound surface; it cannot restore a coating that has been abraded away.
Step 2: Remove loose dry-erase ink before deep cleaning
Erase the entire board with a clean dry-erase eraser or clean microfiber cloth. Do not focus only on the dark stain. Quartet's maintenance instructions put complete erasing first because loose ink dust can otherwise smear during wet cleaning.
If your eraser is saturated with old pigment, replace or clean it before continuing. A dirty eraser can redistribute residue across the board instead of lifting it.
After dry erasing, a soft microfiber cloth can lift loose residue without the aggressive abrasion of a scouring pad.
Step 3: Try a lightly damp microfiber cloth
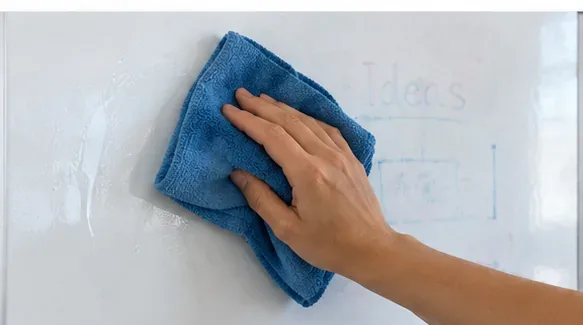
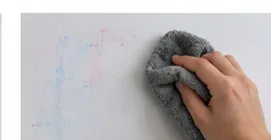
For light ghosting, dampen a soft microfiber cloth with clean water and wipe a small section using gentle, overlapping passes. Do not flood the board or let water collect around the frame. Ghent recommends a soft wet cloth for general cleaning, with whiteboard cleaner used when further cleaning is necessary.
In our example, this is the point where the pale blue haze improves but does not disappear completely. That tells the team that loose surface residue has been removed and a board-specific cleaner may be justified.
Step 4: Use a manufacturer-approved whiteboard cleaner, then wipe it off completely
If water does not remove the remaining ghosting, apply a whiteboard cleaner that is approved for your board type. Follow the product directions rather than soaking the surface. Quartet recommends spraying its board cleaner evenly and wiping it off with a dry towel. For glass boards, it recommends a glass-board-specific cleaner rather than its standard whiteboard cleaner.
This is also where surface type matters. A cleaner that is suitable for porcelain, melamine, or painted steel may not be the manufacturer's first choice for glass. If the board's brand is unknown, use the least aggressive product labeled for dry-erase boards and test a small, inconspicuous area first.
Wipe away cleaner and residue rather than leaving a wet film on the board.
Step 5: Dry the board thoroughly before writing again
Do not skip drying. Quartet's care routine is “erase, clean, dry,” and it recommends a second dry towel to make sure no cleaning solution remains. Residual cleaner can mix with marker ink during the next use and make erasing harder.
In the hypothetical office, the team uses one clean cloth to remove the cleaner and a second dry cloth to finish the surface. Then they wait until the board feels completely dry.
A properly cleaned and dried surface should look even, without wet streaks or a cloudy cleaning film.
Step 6: For stubborn old marks, write over them with fresh dry-erase marker
If a specific line remains, a useful next step is to cover that line with a fresh dry-erase marker. Quartet recommends this method for accidental permanent marker: trace over the permanent mark with a fresh dry-erase marker, wait a few minutes, then wipe it away. Ghent also advises marking over stubborn old marks with a black erasable marker.
Use this technique only on the affected line rather than coloring a large section of the board. In the illustrative example, the team covers the single darker stroke with fresh black dry-erase ink and leaves the rest of the already-cleaned board alone.
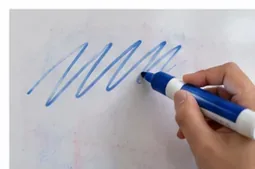
For a stubborn line, cover the old mark with fresh dry-erase ink so it can be lifted during the next erase.
Step 7: Erase the fresh overlay and clean the spot once more
After the fresh dry-erase ink has had a moment to sit, erase the marked area with a clean eraser or microfiber cloth. If a trace remains, use the board-approved cleaner on that spot and dry it again.
Do not keep escalating pressure. Repeated hard scrubbing may turn a removable stain into surface damage, especially on lower-cost coated boards. The goal is to lift ink while preserving the writing surface.
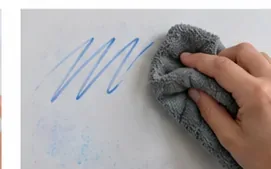
Erase the fresh overlay gently; the old mark should lift with it if the surface is still in good condition.
Step 8: Perform a final wipe and test the board
Finish with a clean, dry microfiber cloth. Then make one short test line with a dry-erase marker in the cleaned area, allow the ink to dry, and erase it normally. The test should come off cleanly without spreading a greasy film or leaving a new shadow.
Check the board from the front and from an angle under room light. If the stain is still present but no residue transfers to the cloth, the remaining discoloration may be embedded in or caused by a worn surface rather than loose ink.
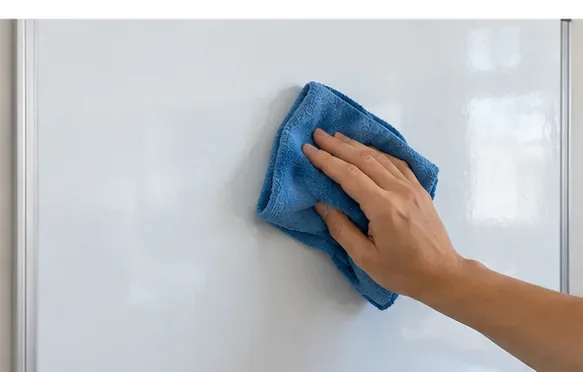
Use a light final wipe to remove any last residue before testing the board with fresh dry-erase ink.The end point is a dry, even writing surface that can be written on and erased normally again.
Should you use rubbing alcohol, vinegar, or a Magic Eraser?
There is no single household-cleaner rule that applies to every board. Quartet says it does not recommend general household cleaners on its boards. Ghent lists isopropyl alcohol as compatible for certain products and cleaning situations, including some glassboard guidance. That difference is exactly why the board manufacturer's instructions should control the decision.
If you know the brand and model and the manufacturer explicitly allows isopropyl alcohol, use it only as directed. If you do not know the surface or coating, a board-specific cleaner is the safer general choice. The same caution applies to vinegar, bleach solutions, disinfecting wipes, melamine foam “magic” sponges, toothpaste, baking soda, and abrasive pads: do not treat internet popularity as proof that the method is safe for your particular coating.
For the hypothetical office board, the team stops after the approved cleaner and dry-erase-marker technique because the remaining marks are gone. If they had still seen discoloration, the next step would have been checking the board maker's care instructions—not automatically moving to a stronger chemical.
What if the stain will not come off?
Stop when additional cleaning no longer changes the appearance. Quartet's FAQ acknowledges that some stains cannot be removed, particularly when ink has been left for a long time, and that results vary by surface type. A board with worn coating, deep scratches, or permanent discoloration may need resurfacing or replacement rather than more aggressive cleaning.
What you see
Best first action
When to stop
Light gray or colored haze
Erase fully, then use a damp microfiber cloth
If the haze does not improve after approved cleaner and drying
One stubborn old line
Cover with fresh dry-erase marker, then erase
If repeated gentle treatment does not change it
Accidental permanent marker
Try the dry-erase-marker overlay method recommended by the board maker
Before using a stronger solvent not approved for the surface
Scratched, dull, or peeling area
Clean gently and inspect the coating
If the defect is physical rather than ink residue
How to keep the board from staining again
Erase the board after use rather than leaving writing up for long periods. Keep dry-erase markers capped so the ink stays fresh and easier to erase. Clean or replace erasers when they start spreading colored dust. For frequently used boards, schedule periodic cleaning with the product recommended for that surface instead of waiting until ghosting becomes severe.
These maintenance steps are consistent with both Quartet and Ghent guidance: regular erasing, soft cleaning materials, and appropriate board cleaner reduce the buildup that makes old marks harder to remove.
Self-check: did the cleaning actually work?
The board is completely dry, with no slick or cloudy cleaner film.
A fresh dry-erase test line writes normally and erases cleanly.
No colored residue transfers to a clean dry cloth after the final wipe.
Ghosting is gone or clearly reduced without visible scratching or dulling.
You did not need to use an unapproved household cleaner or abrasive scrubber.
If discoloration remains, you can distinguish it from removable residue and know to check the manufacturer's care guidance before escalating.
For most stained dry erase boards, the practical lesson is simple: cleaning harder is not the same as cleaning better. Start with dry erasing and a soft cloth, move to a board-specific cleaner, dry thoroughly, and reserve the fresh-marker overlay technique for stubborn individual marks. If those steps stop producing improvement, the surface—not your effort—may be the limiting factor.