Home
» INTERNET
»
How to Clean a Traeger Pellet Grill: A Practical Deep-Cleaning Guide
How to Clean a Traeger Pellet Grill: A Practical Deep-Cleaning Guide
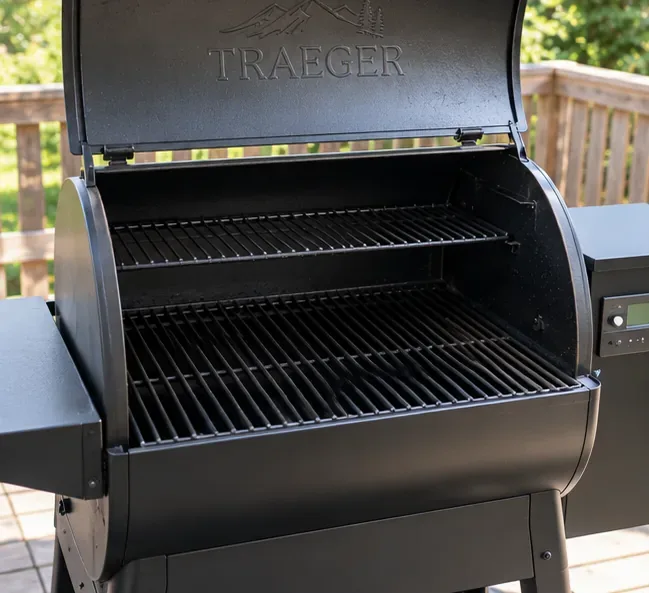
If your Traeger is running smoky, collecting grease, or leaving ash around the firepot, a proper cleaning is more useful than simply brushing the cooking grates. Traeger's current pellet-grill maintenance guidance, updated April 14, 2026, treats cleaning as a system: grates, drip tray, heat baffle, firepot, grease path, hopper, and exterior all need attention on different schedules.
This guide is for Traeger pellet grills. Traeger flat-top models such as the Flatrock have a different cooktop and maintenance routine; use Traeger's separate flat-top cleaning instructions for those products.
Traeger cleaning schedule at a glance
Traeger's official pellet-grill cleaning guide gives a useful baseline. Adjust it sooner when you cook long sessions or high-fat foods such as brisket or pork belly.
When
What to clean
After each cook
Wipe spills and scrape food residue from the grates.
Every 2–3 cooks or about 20–24 cooking hours
Deep-clean the interior, remove grease buildup, and vacuum the firepot and barrel.
Monthly
Empty pellets from the hopper and vacuum accumulated sawdust.
About every 3 months
Clean the exterior, or more often if the grill is uncovered.
About every 6 months
Clean the grease chute and the chimney, backpack, or downdraft path used by your model.
After seasonal storage
Inspect the grill for mold or mildew before cooking again.
What you need
A nylon-bristle grill brush, wooden scraper, or another non-wire grate-cleaning tool
A stiff non-metallic scraper for the drip tray and grease buildup
Heavy-duty paper towels or disposable cleaning cloths
An all-natural grill cleaner or mild degreasing method approved by Traeger
A shop vacuum or dedicated vacuum for completely cold ash
Heat-resistant gloves for cleaning warm grates or grease areas
Fresh drip-tray and grease-bucket or grease-and-ash-keg liners when your model uses them
Traeger specifically warns against wire grill brushes because loose wire bristles can break off and end up in food. Its maintenance guidance instead recommends nylon-bristle brushes, cloths, heavy-duty paper towels, wooden scrapers, and other non-wire tools. Traeger's official maintenance reference also lists diluted dish soap, water, and vinegar as an alternative mild cleaning mixture.
Five-step deep-cleaning process
Step 1: Shut down, cool, unplug, and inspect
Finish the grill's normal shutdown cycle first. Once the grill is off, let it cool completely, then disconnect the power cord before deep cleaning. This is especially important before you work around the firepot, auger area, hopper, or internal electrical components.
Traeger notes one useful distinction: grease is easier to wipe when the grill is still warm, but ash removal and vacuuming must wait until the grill and ash are fully cold. Do not put a vacuum near live embers or warm ash.
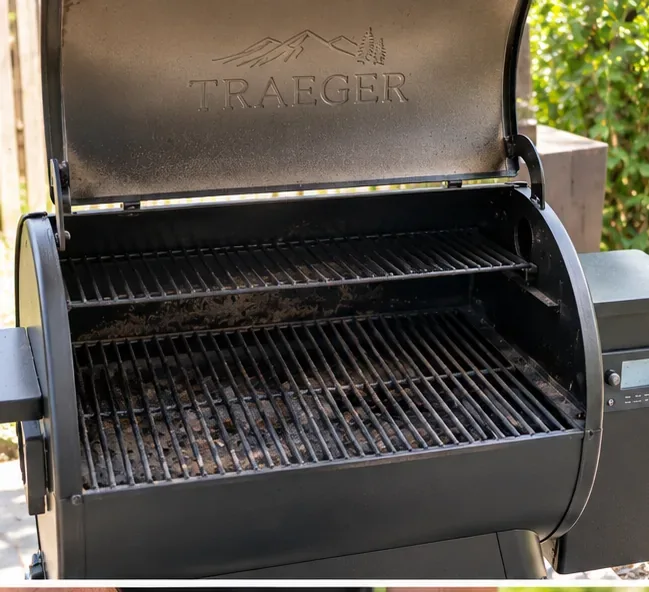
Start by inspecting the cooled grill for grease, ash, food debris, and heavy buildup before removing the internal parts.
Before taking anything apart, note how the grill grates, drip tray, heat baffle, grease cap, or other removable pieces are installed. Component names and layouts vary across older non-WiFIRE grills, D2 WiFIRE models, touchscreen Timberline and Ironwood grills, and the Woodridge series, so your owner's manual should take priority if the arrangement differs from this guide.
Step 2: Remove and clean the grates
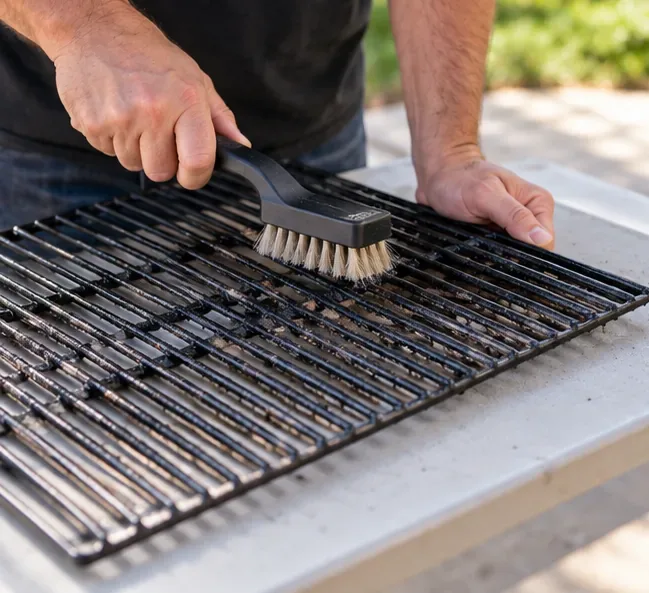
Take out the grill grates after the grill is safe to handle. Scrape or brush away cooked-on food from both sides. For routine cleaning immediately after a cook, Traeger says grate cleaning is easiest while the grate is still warm; use heat-protective gloves and keep your hands away from hot metal.
Use a nylon-bristle or other non-wire cleaning tool on the grates rather than a wire brush.
If grease remains, use a soft cloth or paper towel with an all-natural grill cleaner. Avoid harsh abrasives that can damage coatings or leave debris behind. The goal is to remove food and grease without grinding the surface.
Step 3: Clean the drip tray, heat baffle, and grease route
Discard an old drip-tray liner or foil if your particular model is designed to use one. Remove the drip tray and heat baffle. Use a stiff non-metallic scraper to lift baked-on food and grease, then apply a non-chemical degreaser and wipe the surfaces clean.
Traeger's dedicated drip-tray support page recommends a stiff non-metallic scraper and non-abrasive cleaning tools. Steel wool and metal scrapers are poor choices for coated or corrosion-sensitive surfaces.
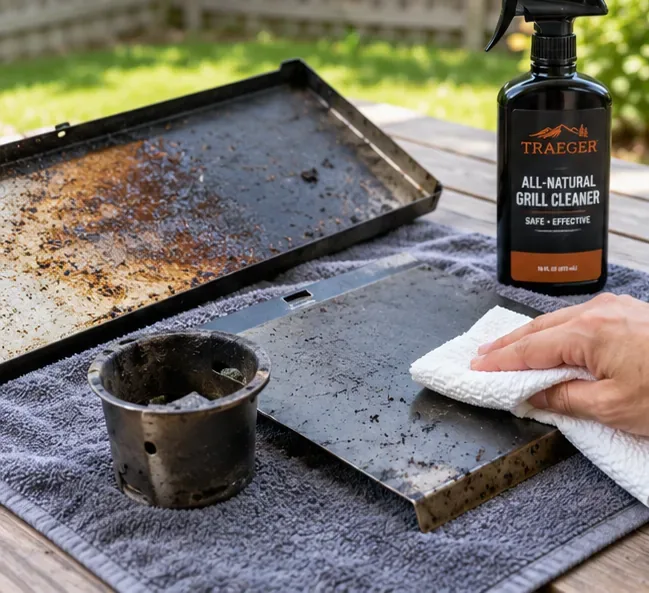
Clean removed internal panels on a stable work surface, focusing on grease and cooked-on residue without using abrasive metal tools.
Next, check the grease trough, grease chute, grease bucket, or grease-and-ash keg used by your model. Remove thick deposits and replace a full liner. A blocked grease path can contribute to pooling, leaks, smoke, and fire risk.
On models with a chimney, wipe soot and grease from inside the chimney as well. Models without a chimney may route exhaust through a backpack or downdraft system. Traeger recommends cleaning that route periodically rather than assuming the visible cooking chamber is the only area that collects residue.
Step 4: Vacuum cold ash from the barrel and firepot
With the grates, drip tray, and heat baffle out of the way, vacuum loose ash and debris from the bottom of the barrel and the firepot. Use a shop vacuum or a vacuum reserved for this type of work, and only vacuum when the grill is completely cold and all ash is extinguished.
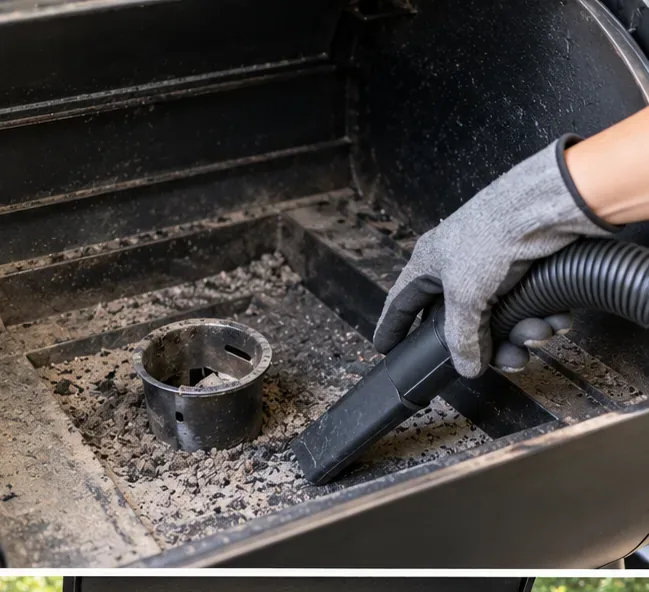
Vacuum cold ash from the firepot and lower cooking chamber only after the grill and ash are completely cool.
Do not aggressively scrub the temperature sensor. Traeger's guidance says not to clean the thermocouple or RTD unless there is visible buildup that needs to be removed.
When the monthly hopper cleaning is due, empty the pellets and vacuum sawdust from the bottom of the hopper and the accessible auger-tube area as directed for your model. Pellet dust can accumulate even when the cooking chamber looks clean.
Step 5: Wipe surfaces, reassemble, and verify the grease path
After scraping and vacuuming, wipe the interior cavity and removable parts with an approved mild cleaner. Traeger's All-Natural Grill Cleaner instructions describe spraying the cleaner on grill surfaces, allowing it to work, then scrubbing and wiping away residue. Follow the product label and your grill's manual rather than soaking electrical parts.
Wipe the exterior with a soft damp cloth and cleaner as needed. Keep liquid away from electrical connections, the controller, pellet-feed components, and other areas not intended to be washed.
Reinstall the heat baffle, drip tray, fresh liners where applicable, and grates in their correct positions before the next cook.
Reinstall the heat baffle, drip tray, liner if appropriate for your model, grill grates, grease bucket or keg liner, and any caps or shields you removed. Make sure the drip tray sits in the correct direction so grease can flow toward the chute or collection system.
Quick cleaning checklist
Finish shutdown and disconnect power before deep cleaning.
Let the grill and ash cool completely before vacuuming.
Brush food from the grates with a non-wire tool.
Replace old drip-tray and grease-collection liners when applicable.
Scrape the drip tray with a non-metallic tool.
Vacuum the firepot, barrel, and cold loose ash.
Clear grease from the trough, chute, bucket, or grease-and-ash keg.
Empty the hopper and vacuum sawdust on the monthly schedule.
Wipe internal and external surfaces with a mild approved cleaner.
Reassemble components in the correct position before use.
Important model differences
Traeger does not use one identical grease and ash system across every generation. Traditional pellet grills may use a drip tray that slopes toward a grease bucket. Newer touchscreen Timberline and Ironwood models use an EZ Clean-style system with a grease tube and grease-and-ash keg. Woodridge-series maintenance instructions also differ in component order and cleaning cadence.
That means generic advice such as “line every drip tray with foil” is not safe to apply to every Traeger. Check your model's support guide before adding liners, removing the firepot, or changing how the grease system is assembled.
What not to do
Do not vacuum warm ash. Hidden embers can create a fire risk.
Do not use a wire grill brush. Traeger recommends non-wire alternatives.
Do not attack the drip tray with steel wool or an abrasive metal tool. Use a non-metallic scraper or nylon cleaning tool.
Do not soak the controller or electrical components. Spray cleaner onto appropriate surfaces and wipe it away rather than flooding the grill.
Do not ignore grease accumulation. Grease can pool, leak, smoke, or ignite if the flow path is blocked.
Do not treat every Traeger as the same model. The exact removable parts, liners, grease route, and firepot access vary.
How clean is clean enough?
A Traeger does not need to look factory-new after every cook. For routine maintenance, the practical target is a clear grease path, grates without heavy food buildup, a firepot free of excess ash, no deep layer of loose debris in the barrel, and no large grease deposits waiting to ignite.
If you cook fatty foods frequently or run long smoking sessions, clean sooner than the baseline schedule. If you notice grease pooling, unusual dirty smoke, ash blowing onto food, difficulty reaching temperature, or large temperature swings, inspect and clean the grill before assuming the issue is electronic.
Regular maintenance is mostly about preventing buildup rather than removing months of it at once. A quick grate scrape after each cook, a deeper interior clean every few cooks, monthly hopper dust removal, and periodic grease-path cleaning keep the workload manageable and align with Traeger's current published maintenance recommendations.