Home
» INTERNET
»
How to Clean a Vacuum Filter: Wash, Tap, or Replace It?
How to Clean a Vacuum Filter: Wash, Tap, or Replace It?
Cleaning a vacuum filter can mean three different things: tapping off loose dust, rinsing a washable filter, or replacing a filter that should not be washed. The best choice depends on the filter material and the vacuum model, not on a universal cleaning rule. Manufacturer guidance checked in September 2026 shows why that distinction matters: Dyson tells owners of its cordless vacuums to wash designated filters with water and dry them for at least 24 hours, while BISSELL says the washable pre-motor filter on some CleanView models can be washed but the post-motor filter must not be washed. That makes the model manual the first decision point, not the sink.
Start by choosing the right cleaning method
Before you remove anything, identify the vacuum model and the specific filter you are dealing with. A single vacuum may have more than one filter, and those filters can have different care rules. For example, BISSELL's CleanView filter guidance describes a washable pre-motor foam filter and a non-washable post-motor filter in the same machine family.
Method
Best fit
Main advantage
Main tradeoff
Dry tapping or gentle brushing
Unknown filters, non-washable filters, or light surface dust
Lowest moisture risk and fastest turnaround
May not remove embedded fine dust or oily residue
Water rinse
Filters specifically identified as washable
Removes more embedded dust than dry cleaning alone
Requires long drying time and can ruin a filter that is not water-safe
Mild detergent
Only models whose instructions explicitly allow it
Can help with greasy soil on compatible foam or media
Wrong detergent or incomplete rinsing may damage the media or leave residue
Replacement
Damaged, deformed, persistently clogged, or replace-only filters
Restores filtration without risking damaged media
Costs more and creates waste, so replacement should follow condition and manufacturer guidance
Practical recommendation: if you cannot confirm that the filter is washable, begin with a dry method and look up the model-specific instructions before adding water. The word “HEPA” by itself is not a washing instruction.
How to clean a vacuum filter safely
1. Turn off the vacuum, disconnect power, and locate the filter
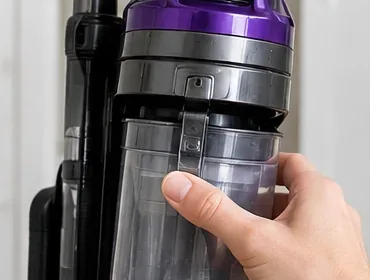
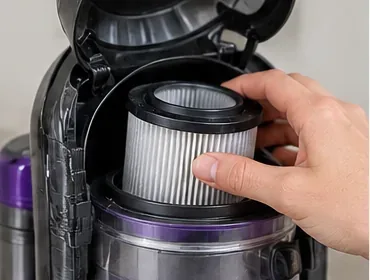
For a corded vacuum, unplug it. For a cordless model, switch it off and follow the manufacturer's maintenance instructions; if the battery is removable and the manual calls for removal during service, do that as well. Open the dust cup or filter compartment and note how the filter is seated before pulling it out. This reduces the chance of reinstalling it backward or leaving a seal out of position.
Turn the vacuum off and disconnect power before opening the filter compartment.
Some manufacturers are explicit about power isolation. BISSELL's support instructions say to unplug the vacuum before maintenance, and model-specific Shark owner guides likewise place filter cleaning in the maintenance procedure. If your filter location is not obvious, stop here and use the manual rather than forcing a cover.
2. Remove loose dust before deciding whether water is necessary
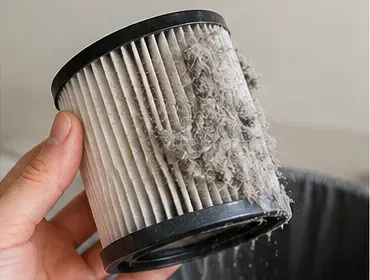
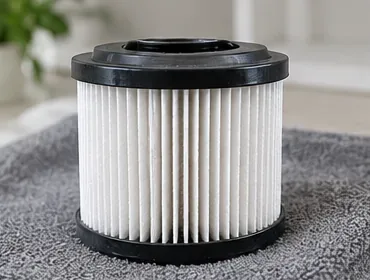
Take the filter outdoors or hold it over a trash can and tap it gently to release loose debris. A soft brush can help on robust surfaces if the manufacturer permits it, but avoid scraping, crushing pleats, or using sharp tools. This dry step is often enough for light maintenance and avoids the drying delay of a full wash.
Loose dust can often be removed without water, which is the lowest-risk first step for an unknown filter.
This option is especially useful when you have a non-washable post-motor filter. BISSELL's CleanView support page specifically recommends gently tapping its non-washable post-motor filter to remove light dust and debris.
3. If the filter is washable, rinse it using the temperature and method in the manual
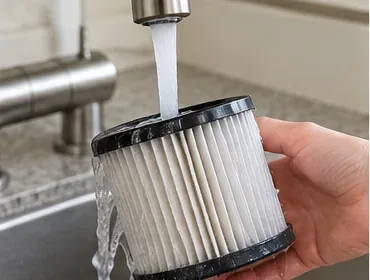
Once washability is confirmed, rinse the filter as directed. The details vary. Dyson's current cordless filter-care guidance says to use cold tap water and not to use detergent. A Shark CH900-series owner guide similarly instructs owners to hand-rinse the filter in cold water and air-dry it for at least 24 hours.
Rinse only filters that the manufacturer identifies as washable; water can damage a replace-only filter.
Do not assume warmer water is automatically better. The safest water temperature is the one specified for your model. Rinse until the visible dirt has cleared and avoid aggressive twisting or wringing unless the manufacturer explicitly tells you to squeeze a foam element.
4. Use detergent only when your model allows it
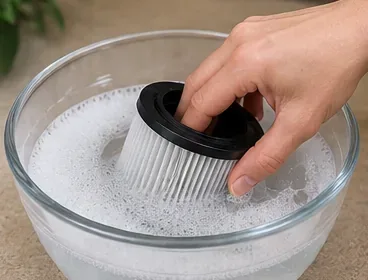
Detergent is a genuine tradeoff. It can help remove greasy grime, but some filter materials depend on surface treatments or structures that should not be exposed to soap. Dyson explicitly says not to use detergent on the cordless filters covered by its current guide. In contrast, BISSELL says a mild detergent can be used on the washable pre-motor filter in the CleanView example cited above.
Use detergent only when the model-specific instructions permit it; some manufacturers specify water only.
So the useful rule is not “soap is good” or “soap is bad.” It is: use it only when the manufacturer permits it, use a small amount, and rinse thoroughly. If the instructions call for water only, follow that direction even when the filter still looks stained.
5. Air-dry the filter completely
Drying is not a cosmetic step. Reinstalling a wet filter can restrict airflow, carry moisture into the vacuum, promote odor, or damage components. Many official instructions specify a full day or more. Dyson says at least 24 hours and requires the filter to be completely dry before reinstalling. BISSELL support pages for some models specify 24 to 48 hours, while Hoover's FAQ for the model family it covers says to let the washed filter dry for 24 hours.
Air-dry a washable filter completely before reinstalling it; many manufacturer instructions specify at least 24 hours.
Set the filter in a well-ventilated place and let air move around it. Do not speed the process with an oven, microwave, tumble dryer, open flame, or other high-heat source. If the filter still feels cool or damp deep in the media, keep drying it.
6. Inspect the filter and decide whether cleaning was enough
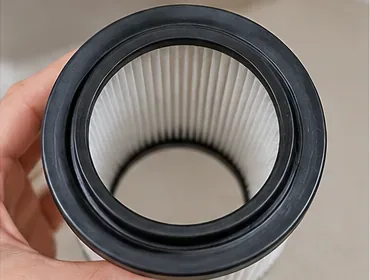
A clean-looking filter is not automatically a serviceable filter. Check for torn media, holes, cracked frames, separated seals, severe distortion, or contamination that does not come out with the approved cleaning method. Also compare the filter with a new one if you have a spare: media that remains heavily loaded or compressed may no longer be worth cleaning.
Inspect the filter media and sealing surfaces before reuse; cracks, holes, distortion, or persistent clogging favor replacement.
Replacement intervals vary by model and use. The Shark guide cited above recommends replacing that specific hand-vacuum filter every 6 to 9 months for best results. BISSELL guidance for some CleanView models also gives replacement intervals for certain filters. These numbers should not be copied to every vacuum; your manual and actual filter condition matter more than a generic calendar.
7. Reinstall only when the filter is fully dry and correctly seated
Put the filter back in the same orientation it came out, close the cover or dust cup, and make sure all latches and seals engage normally. A filter installed crooked or with a housing left partly open can allow dust bypass or reduce airflow even if the filter itself is perfectly clean.
Reinstall the completely dry filter in the correct orientation and make sure the housing closes securely.
If the filter resists seating, do not force it. Confirm that it is the correct filter, that no gasket is folded, and that the surrounding compartment is free of debris.
8. Test the vacuum and judge the result
After reassembly, run the vacuum briefly. Listen for unusual sounds and check whether airflow and pickup feel normal. Also look for dust escaping around the bin or filter housing. Cleaning should improve a restriction caused by a dirty filter, but it cannot fix every suction problem.
After reassembly, test the vacuum briefly and confirm normal airflow, suction, sound, and dust containment.
If performance is still poor, inspect the hose, wand, brush roll, air passages, dust bin, and seals for blockages or leaks. A clean filter with weak suction points to a different part of the airflow path or to a filter that needs replacement rather than more washing.
How often should you clean a vacuum filter?
There is no reliable one-size-fits-all schedule. Usage, pet hair, fine dust, home size, and filter design all change how fast a filter loads. Manufacturer recommendations also differ by model. Dyson's current cordless guide recommends washing the covered filters at least once a month. Hoover's FAQ likewise gives a monthly washing interval for the filter in the vacuum family described there, while BISSELL's CleanView guidance says to check filters monthly and wash or replace them every 3 to 6 months or when dirty.
A practical approach is to combine the manual's schedule with condition checks. If suction falls, the vacuum sounds strained, the filter is visibly coated, or the machine displays a filter alert, inspect it sooner. Homes with pets, renovation dust, or frequent fine-particle pickup may need more frequent maintenance.
Wash or replace: which choice makes more sense?
Washing saves money when the filter is designed for repeated cleaning and the media is still intact. It also avoids unnecessary waste. The cost is downtime: a properly washed filter may need 24 hours or more to dry, and reinstalling it early is a poor trade. If you rely on the vacuum every day, a manufacturer-approved spare filter can be useful while the first one dries.
Replacement is the better choice when the filter is non-washable, damaged, permanently clogged, misshapen, or past a model-specific service interval. It can also be preferable when odor or contamination remains after the approved cleaning process. Do not try to “save” a replace-only filter by washing it unless the manufacturer explicitly changes that guidance for your exact part.
Common mistakes that shorten filter life
Washing every filter: some pleated post-motor filters are replace-only. Confirm washability first.
Using soap by default: some manufacturers permit mild detergent; others require water only.
Reinstalling while damp: complete air-drying is a recurring requirement across manufacturer instructions.
Using high heat to dry faster: this can deform or damage filter media and is explicitly discouraged in manufacturer guidance.
Cleaning a torn filter instead of replacing it: holes and damaged seals defeat the purpose of filtration.
Assuming a dirty filter is the only cause of weak suction: clogs, full bins, blocked brush rolls, and leaks can create similar symptoms.
What result should you expect?
A successful filter service leaves the approved filter clean enough for normal airflow, fully dry, undamaged, and seated correctly. The vacuum should operate without a filter warning, abnormal noise, or visible dust bypass. If those signs are not present after cleaning, switch from “clean again” to diagnosis: check for airflow blockages, inspect seals, and consider replacing the filter.
The most important tradeoff is simple: a thorough wash can restore a washable filter, but an unnecessary wash can ruin a filter that was never designed to get wet. Start with the model's instructions, choose the least aggressive method that solves the problem, and replace the filter when condition or manufacturer guidance makes cleaning the weaker option.