Home
» INTERNET
»
How to Clean a Washing Machine Filter Without Flooding the Floor
How to Clean a Washing Machine Filter Without Flooding the Floor
A washer that suddenly takes longer to drain, leaves clothes wetter than usual, or shows a drain-related error may have something as simple as a clogged pump filter. The catch is that “washing machine filter” can mean different things on different machines. Many front-load washers have a user-accessible drain pump filter near the bottom front of the cabinet, while other models do not. Some top-load designs use different lint or inlet screens, and some drain systems are not meant to be opened by the owner.
That model difference matters more than any generic cleaning schedule. Before removing a panel or turning a filter cap, find the model number and check the owner’s manual. For example, current U.S. support from Samsung says the pump filter described in its cleaning guide applies to front-load washers and that its top-load washers do not have that pump filter. Whirlpool likewise notes that the drain pump filter is accessible on only some front-load models. LG’s current U.S. guidance says its drain pump filter is present on front-load washers and combo units, not its top-load washers. These manufacturer pages were reviewed on September 12, 2026.
Start by confirming that your washer actually has a user-accessible drain pump filter, then power it off and unplug it before opening the service panel.
First, make sure you are cleaning the right filter
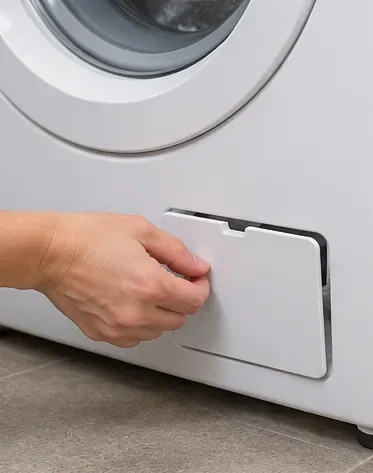
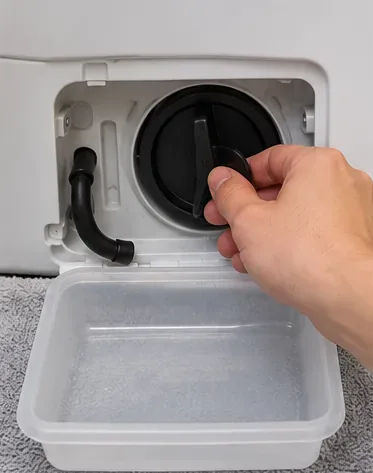
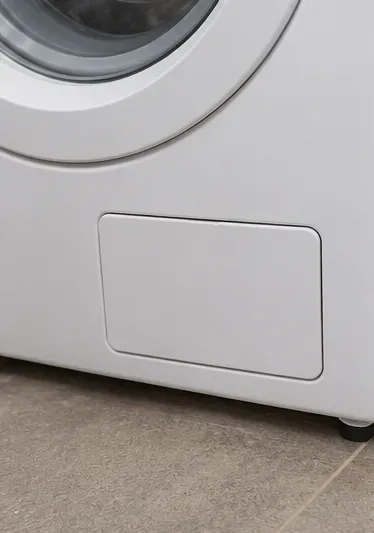
If your washer has a small service door close to floor level, the component behind it may contain a drain hose and a round pump-filter cap. That is the filter this guide focuses on. If there is no access door and your manual does not describe a user-cleanable drain pump filter, do not remove cabinet panels just to look for one.
What you see
Most likely action
Why it matters
Lower front service flap with a pump-filter cap
Follow the model-specific drain pump filter procedure
This is the common user-cleanable setup on many front-load machines
No lower access flap
Check the manual before doing anything else
The pump may be elsewhere or not intended for routine owner service
Small screens where fill hoses connect
Treat them as water-inlet screens, not the drain pump filter
They affect filling, not the normal drain path
Drain problem remains after a clean filter
Check the drain hose, suds, pump obstruction, and service guidance
A clean filter does not rule out other drainage faults
Why the filter gets clogged
A drain pump filter catches objects and fibers before they reach or damage the pump. LG lists items such as loose change, buttons, and lint; Samsung describes lint and other debris; Whirlpool notes dirt, lint, and other items. Hair, pet fur, tissue fragments, and small clothing items can also end up around the filter depending on the washer and load.
As debris accumulates, water has less room to pass. The result can be slow draining or a no-drain condition. A dirty filter can also hold damp residue that contributes to unpleasant smells, although odor can also come from the door gasket, detergent buildup, standing water, or the tub. Cleaning the filter is therefore a reasonable first maintenance step, but it is not a guaranteed cure for every odor or drain problem.
How to clean a washing machine drain pump filter
1. Empty the washer, turn it off, and unplug it
Remove laundry and make sure the machine is not running. Turn the washer off and disconnect it from power before opening the service area. If you just ran a hot cycle, wait until the water is cool enough to handle safely. Samsung specifically advises allowing hot water to cool before pump-filter service, and LG warns that residual water may be hot.
Gather a low, broad pan, several absorbent towels, and a soft-bristle brush or old toothbrush. Avoid using a deep bucket if the service opening sits only a few inches above the floor; a shallow pan is easier to slide underneath.
2. Open the service panel and prepare for residual water
Open the lower access flap according to the manual. Put towels under the opening and place the shallow pan as close to the pump area as possible.
Do not assume every washer drains the same way. Many LG, Samsung, and Whirlpool models have a small emergency or residual-water hose that should be pulled forward, uncapped, and drained into the pan before the filter is removed. Some compact Whirlpool models instead instruct the user to loosen the filter slowly until water begins to flow, then retighten it while the pan is emptied and repeat until the water is gone. Use the procedure for your exact model.
After draining residual water exactly as your model's manual directs, keep a shallow pan and towel under the opening before loosening the filter.
3. Remove the pump filter only after the water is drained
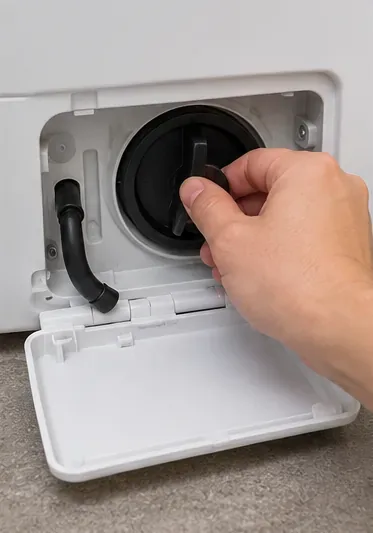
Once residual water has been removed, keep a towel under the housing because a small amount may still spill. On many machines the filter turns counterclockwise to come out, but the exact cap design can differ. Samsung notes that some of its filters use a push-and-turn action. If the filter does not move with reasonable hand pressure, stop and recheck the manual rather than forcing it with pliers.
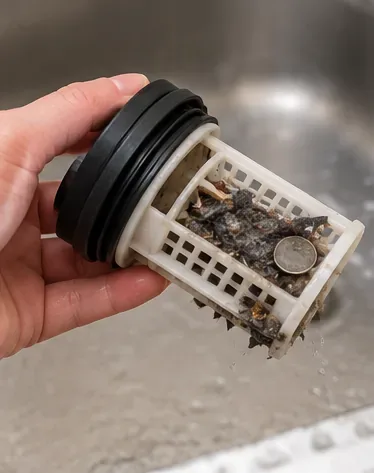
Lint, hair, coins, buttons, and other small items can collect in the pump filter and restrict drainage.
4. Remove loose debris first
Pull out visible lint, hair, coins, buttons, pins, or other objects. Look closely at the filter basket, the cap seal, and the threads. A damaged O-ring, cracked cap, or distorted filter deserves attention because simply cleaning it may not restore a watertight seal.
Dispose of solid debris in the trash rather than pushing it down the sink. This is also a useful moment to notice what caused the clog: a coin suggests pockets need checking; heavy lint may point to very linty loads; repeated small-item clogs may justify using a mesh laundry bag for socks or delicate pieces.
5. Rinse the filter and use a soft brush if needed
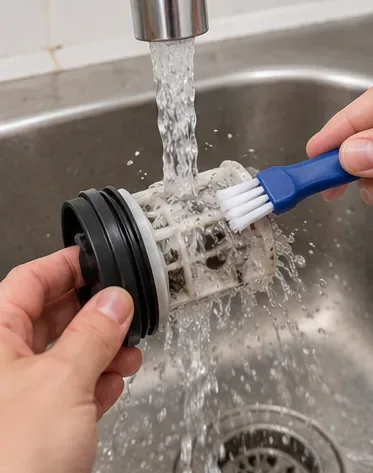
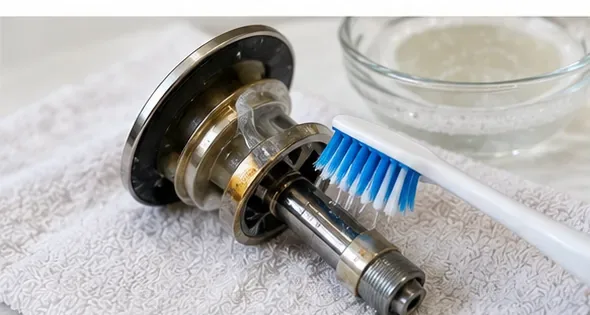
Rinse the removable filter under running water. Use a soft brush for residue caught in the screen or ribs. LG’s current support specifically recommends a soft-bristle brush with warm water for its pump filter and says not to wash the filter in a dishwasher. A gentle approach is safer than scraping hard plastic or seals with metal tools.
Rinse the removable filter and use a soft brush for residue that does not release with water alone.
6. Clean the accessible filter opening
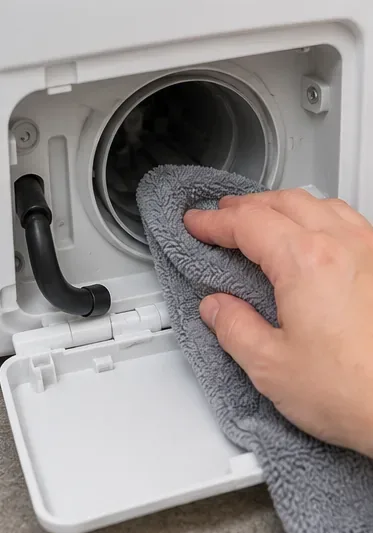
With the filter out, use a cloth or soft brush to remove lint you can easily reach around the opening. Do not push long tools deep into the pump. Bosch recommends checking for foreign objects that may inhibit the pump and notes that if the impeller cannot turn freely, an object may be jammed; if it cannot be removed carefully, contact support rather than forcing the mechanism.
Wipe accessible debris from the filter opening, but do not force tools deep into the pump housing.
If your manual tells you to inspect the impeller, verify only that it is not obviously blocked. A little magnetic or stepped resistance can be normal on some pump designs, so “spins completely freely” is not a universal test. The safer standard is whether the manufacturer’s instructions say the impeller should move and whether you can see an obvious obstruction.
7. Reinstall the filter, hose, and cap securely
Return the clean filter to the housing and tighten it in the direction specified by the manual, usually clockwise, until it is fully seated. Do not cross-thread it. If your washer has an emergency drain hose, replace its stopper firmly and clip the hose back into position. LG warns that leaks can occur after cleaning when the residual hose cap or pump filter is not closed securely.
Reinstall the clean filter securely in the correct orientation so the seal can seat properly.
Close the service flap only after everything is back in its original position. Wipe up any spilled water so a later leak is easier to spot.
Return the drain hose, cap, clips, filter cover, and service panel to their original positions before restoring power.
8. Restore power and perform a controlled test
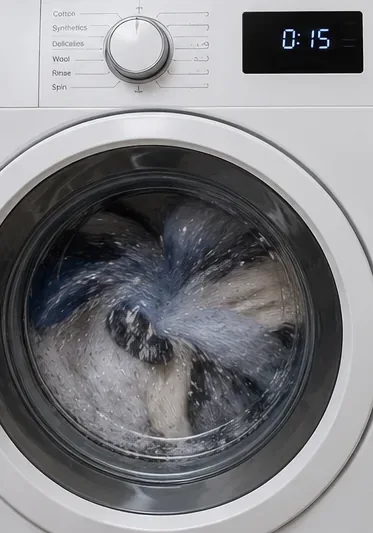
Plug the washer back in. Run a short drain, rinse-and-spin, or manufacturer-recommended test with the machine empty or lightly loaded. Stay nearby for the first few minutes. Confirm that water drains normally and look at the floor around the service panel for drips.
Run a short drain or rinse cycle and watch for normal drainage, error messages, and any water leaking around the service area.
How to tell whether the cleaning worked
A successful result is more than finding lint in the filter. Use these checks:
The washer drains within its normal cycle behavior instead of leaving obvious standing water.
A previous drain-related warning does not return during the test cycle.
You do not see water around the pump-filter access area after reassembly.
The filter cap remains fully seated and the residual drain hose, if present, stays capped and clipped in place.
Clothes are not unusually wet because the washer failed to complete the drain-and-spin portion of the cycle.
If drainage is still poor, do not repeatedly open the filter while the machine contains water. Move to the next easiest checks: inspect the external drain hose for kinks or an improper installation, verify that the household drain is not backing up, and make sure excessive detergent or suds are not interfering with pumping. LG’s drain-error guidance notes that excessive suds can contribute to drain errors even when the filter is clear.
When cleaning the filter is not enough
Stop troubleshooting and consider manufacturer support or appliance service if the pump does not run, the filter is clean but the washer still will not drain, the filter cap is cracked or will not seal, water leaks after careful reinstallation, or an object appears lodged beyond safe reach. A persistent drain error can involve the pump, wiring, pressure sensing, hose routing, or the home drain rather than the filter itself.
Also stop if the instructions for your model do not match the parts in front of you. Service doors, hose locations, filter shapes, and maintenance intervals vary enough that forcing a generic procedure can create a leak or damage a cap.
How often should you clean it?
There is no single interval that fits every washing machine. LG’s U.S. front-load guidance recommends monthly cleaning. Samsung’s U.S. support recommends at least monthly or about every 40 washes for the front-load pump filter described on its page. Whirlpool says every few months or as needed for some front-load models, while some Whirlpool all-in-one instructions specify every six months. The practical rule is to follow your model’s manual and clean sooner if drainage slows or debris-heavy loads are common.
Official references
For model-specific details, use the manufacturer instructions rather than assuming the access location or drainage method is universal:
The best endpoint is simple: the washer drains normally, the service area stays dry, and no drain warning returns during a controlled test. If those checks fail after the filter is clean and correctly installed, switch from repeated filter cleaning to hose, pump, or service diagnostics.