Home
» INTERNET
»
How to Clean AirPods Pro Ear Tips Safely: Water-Only Cleaning, Drying, and Replacement
How to Clean AirPods Pro Ear Tips Safely: Water-Only Cleaning, Drying, and Replacement
The safest way to clean AirPods Pro ear tips is simpler than many online cleaning routines: remove the ear tips from the AirPods, rinse the detached tips with clean water only, wipe them with a soft lint-free cloth, let them dry completely, then align the oval connector and click them back into place. Apple specifically says not to use soap or other household cleaners on the ear tips.
That water-only method is the best default when the tips have earwax, sweat, or visible residue. A dry wipe is faster when you only need to remove surface moisture, while replacement makes more sense if a tip is torn, permanently misshapen, or no longer attaches securely. The important tradeoff is that more aggressive cleaning is not necessarily better: the ear tips contain model-specific materials and mesh, so solvents, brushes, picks, and improvised cleaners add risk without being part of Apple’s ear-tip procedure.
This guide follows Apple’s current AirPods Pro cleaning instructions published February 2, 2026 and its ear-tip fit guidance published January 9, 2026. The steps apply to AirPods Pro 1, AirPods Pro 2, and AirPods Pro 3 ear tips, while model-specific fit and mesh details are noted where they matter.
Which Cleaning Option Should You Choose?
Situation
Best first choice
Tradeoff
Light moisture or loose surface residue
Soft, dry, lint-free cloth
Fast and low risk, but may not remove stuck earwax.
Earwax, sweat, or visible buildup on the ear tip
Remove the tip and rinse it with water
Matches Apple’s cleaning method, but the tip must be completely dry before reattachment.
Poor seal after cleaning
Check the fit and try another size
The problem may be sizing rather than dirt; left and right ears can need different sizes.
Torn, deformed, or insecure ear tip
Replace the tip
Costs more than cleaning, but cleaning cannot repair physical damage.
Dirty AirPod mesh rather than dirty ear tip
Use Apple’s separate mesh-cleaning procedure
AirPods Pro 2 and Pro 3 have a different, more specific mesh procedure; do not treat it as an ear-tip cleaning method.
Apple’s AirPods Pro cleaning guide is the source to prioritize if your model or condition differs from the examples here.
Before Cleaning: Know What You Are Removing
AirPods Pro ear tips are not interchangeable across every generation. Apple says each AirPods Pro model has ear tips designed specifically for that model. AirPods Pro 1 tips have denser mesh than AirPods Pro 2 tips, while AirPods Pro 2 tips are stiffer than the silicone-foam tips used with AirPods Pro 3. The number of included sizes also varies by generation.
This matters because a cleaning method that seems harmless on a generic silicone earbud tip may not be appropriate for an AirPods Pro tip with its integrated mesh and model-specific construction. Keep the process limited to the steps Apple provides, and keep the AirPod body separate from the water-rinsing step.
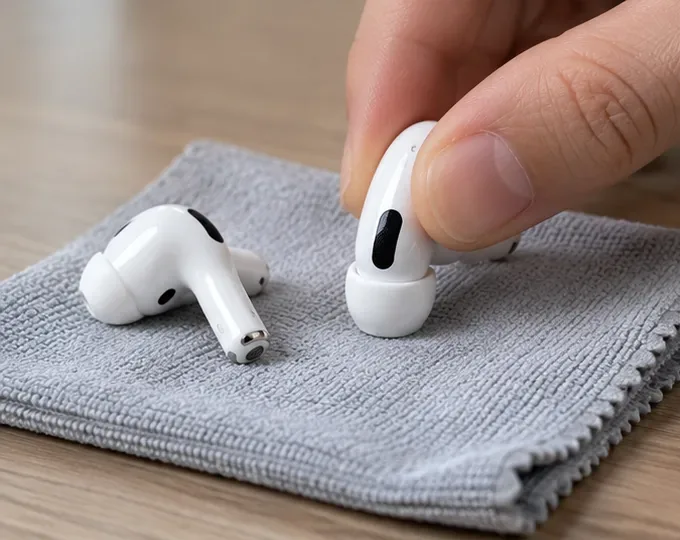
Start on a clean, dry surface with a soft lint-free cloth. Keep the AirPods body away from running water while you work on the removable ear tips.
How to Clean AirPods Pro Ear Tips Step by Step
1. Drain any trapped water first
If water has collected inside an ear tip, Apple recommends tapping the AirPod on a soft, dry, lint-free cloth with the ear-tip opening facing downward. This uses gravity to move moisture out before you detach the tip.
If the tips are simply dirty and not wet, you can move directly to removal. Avoid poking through the opening with a pin, toothpick, or other sharp object; there is no need to mechanically scrape the internal mesh during routine ear-tip cleaning.
2. Remove the ear tip by gripping the base
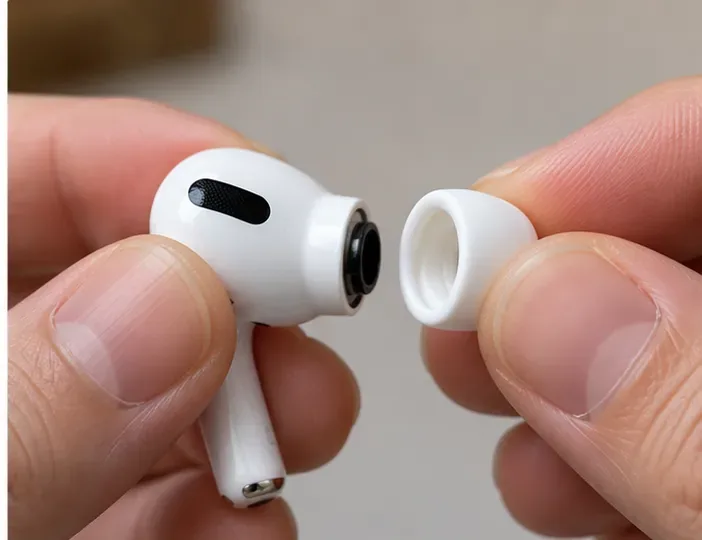
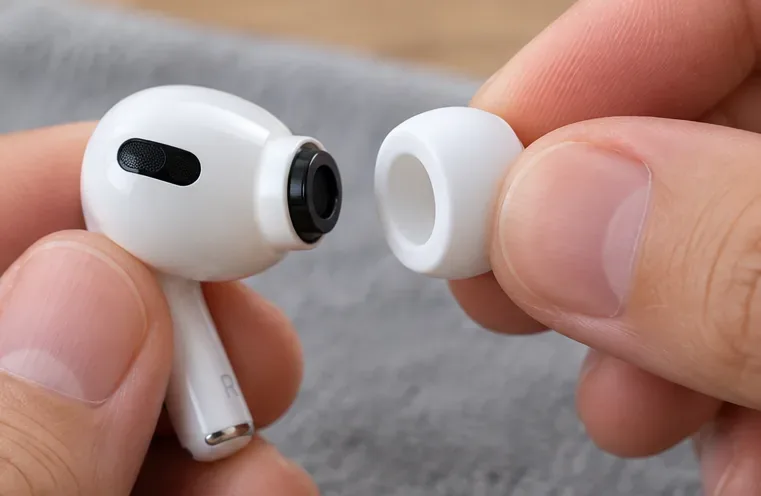
Hold the AirPod securely, then grip the ear tip close to its base where it connects to the AirPod. Pull straight outward using steady pressure. If the smooth surface is difficult to hold, Apple suggests using a clean lint-free cloth for extra grip or rolling the soft edge inside-out so you can hold the base more firmly.
Do not pull only on the thin outer edge. Pulling from the base gives you better control and reduces unnecessary stretching.
Grip the ear tip near its base and pull straight outward with steady pressure. A lint-free cloth can provide extra grip if needed.
3. Rinse the detached ear tips with water
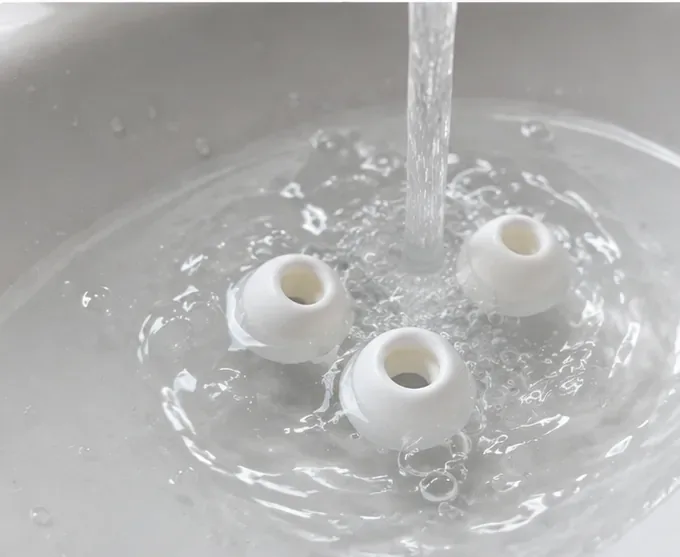
Once the tips are off the AirPods, rinse the ear tips with clean water. Apple explicitly says not to use soap or other household cleaners on AirPods Pro ear tips. That makes water-only cleaning the better choice even when a stronger cleaner might seem faster.
The key distinction is that the removable tips may be rinsed after they are detached, but Apple says not to run the AirPods Pro body under water. Keep the earbuds themselves on a dry surface while the tips are being rinsed.
Rinse only the detached ear tips with clean water. Apple’s ear-tip instructions say not to use soap or other household cleaners.
4. Wipe away water with a soft lint-free cloth
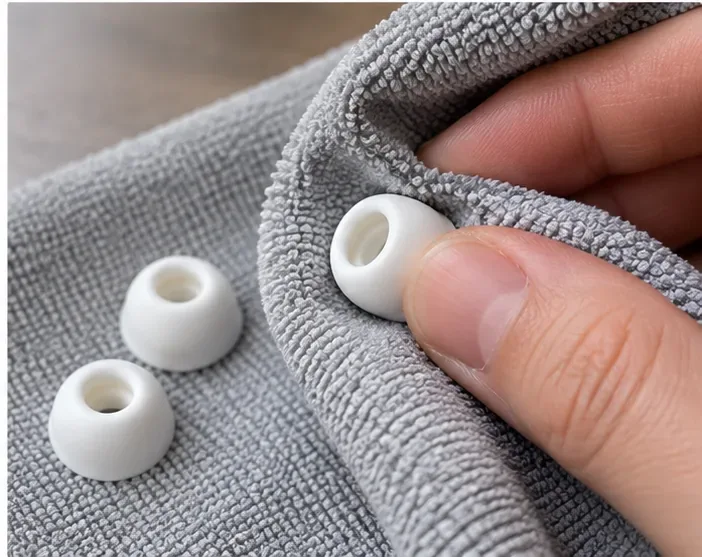
After rinsing, wipe each ear tip with a soft, dry, lint-free cloth. Turn the tip so you can dry the outside, base, and opening without pressing a tool through the internal mesh.
This step removes surface water, but it does not replace full drying. Moisture can remain in recesses even when the exterior looks dry.
Blot and wipe the rinsed ear tip with a soft, dry, lint-free cloth, then allow additional drying time before reattachment.
5. Let the ear tips dry completely
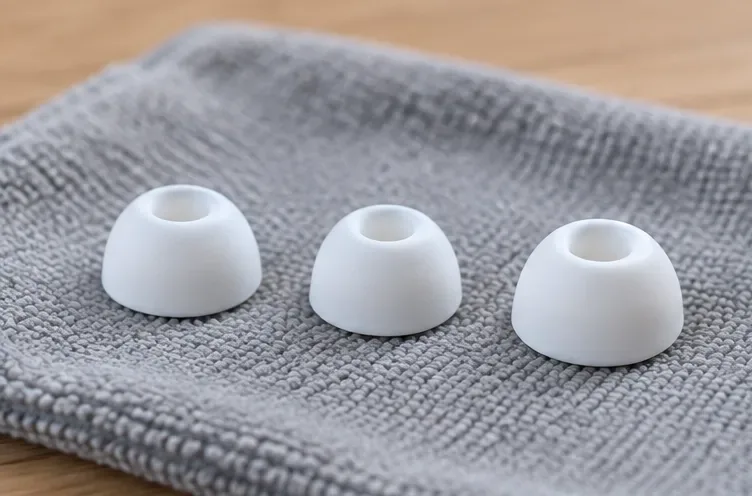
Place the cleaned tips on a dry lint-free cloth and leave them until they are completely dry. Apple does not give a fixed number of minutes for detached ear tips; the requirement is that they be fully dry before they go back on the AirPods.
This is an important place to favor certainty over speed. Reattaching a damp tip saves a little time but creates unnecessary moisture exposure at the connector. If you are unsure whether water remains in the opening or mesh, keep drying.
Leave the ear tips on a clean, dry cloth until there is no remaining moisture. Use this time to inspect the tips for tears, deformation, or other physical damage.
6. Check the size and condition before reattaching
Cleaning is also a useful moment to decide whether the current tip is still the right one. Apple says a proper ear tip should feel comfortable and secure and should create a good acoustic seal. If the tip feels loose, you may need a larger size; if it feels compressed or uncomfortable, a smaller size can be better.
Do not assume both ears need the same size. Apple notes that different sizes may work better in the left and right ears. If a cleaned tip is physically damaged or will not stay attached, replacement is more sensible than repeated cleaning.
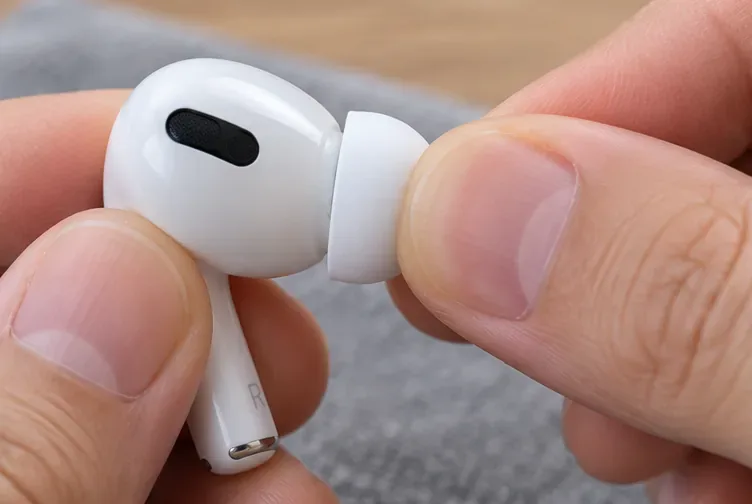
AirPods Pro ear tips and their connectors are oval, so orientation matters. Hold the dry ear tip close to the AirPod and align the opening with the oval connector before pressing it into place.
If the tip does not line up naturally, rotate it rather than forcing it. Proper alignment is easier on the connector and makes the next step more predictable.
Align the dry ear tip with the oval connector before pressing. Do not force a misaligned tip onto the AirPod.
8. Press until the ear tip clicks into place
Push the ear tip onto the connector from its base until you feel or hear it click into place. Apple’s fit instructions use that click as the normal indication that the tip has seated on the connector.
Press at the base until the ear tip clicks into place. The tip should sit evenly on the connector rather than hanging at an angle.
After attachment, give the tip a gentle check at its base to confirm that it is secure. You should not need to twist, glue, or otherwise modify the attachment.
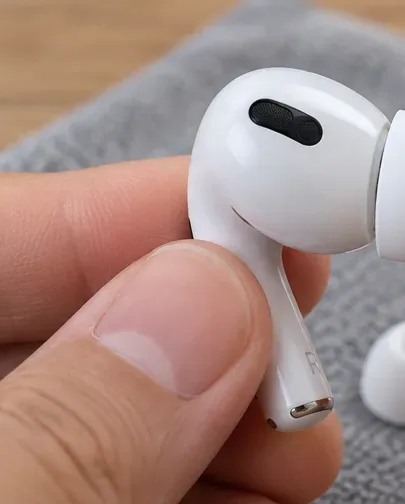
The finished ear tip should be fully seated, clean, dry, and secure before the AirPod goes back in your ear or charging case.
Water Only vs. Soap, Alcohol, and Other Cleaners
For the ear tips themselves, water is the clear choice because it is the method Apple specifies. Soap and other household cleaners are explicitly excluded from the ear-tip procedure.
It is easy to get confused because Apple gives different cleaning instructions for other AirPods Pro parts. For example, the charging case can be wiped with a cloth slightly dampened with isopropyl alcohol if necessary, and AirPods Pro 2 and AirPods Pro 3 meshes have a separate procedure involving specific micellar water, distilled water, and a soft-bristled children’s toothbrush. Those instructions do not replace the simpler water-only procedure for removable ear tips.
If your problem is actually clogged microphone or speaker mesh on the AirPod body, follow the mesh section of Apple’s cleaning guide rather than scrubbing the detached ear tips more aggressively.
Should You Wipe, Rinse, or Replace?
Choose a dry wipe when the issue is minor
A dry lint-free cloth is enough when the tip only has a little surface moisture or loose residue. The benefit is speed: there is no rinse-and-dry cycle. The limitation is that a dry cloth may not clear residue inside the opening.
Choose a water rinse for visible buildup
Rinsing the detached tips is the most useful choice for routine earwax and sweat buildup because it follows Apple’s official cleaning sequence without introducing soap or household chemicals. The tradeoff is downtime while the tips dry completely.
Choose replacement when cleaning cannot fix the problem
Cleaning can remove contamination, but it cannot repair a torn edge, a permanently distorted tip, or an attachment that no longer holds securely. Apple sells replacement AirPods Pro ear tips and notes that tips are model-specific, so match the replacement to your AirPods Pro generation.
How to Check the Result After Cleaning
A clean-looking tip is only part of the result. After reattachment, check three things: the tip should be dry, it should be securely clicked onto the connector, and it should create a comfortable seal in your ear.
If bass sounds weaker than before, Active Noise Cancellation seems less effective, or the tip feels loose, the problem may be fit rather than cleanliness. Apple provides an Ear Tip Fit Test for AirPods Pro 1 and AirPods Pro 2. For AirPods Pro 3, Apple provides the Acoustic Seal Test on iOS or iPadOS 26 or later. The current support instructions also note that you may need different sizes for each ear.
For AirPods Pro 3, fit has one additional tradeoff: Apple says the best tip size for heart-rate sensor contact may not be the same size that gives the best acoustic seal. If you use heart-rate tracking, evaluate both comfort/seal and sensor contact rather than assuming one size optimizes everything.
Common Mistakes to Avoid
Rinsing the entire AirPod under running water. The water rinse in Apple’s standard ear-tip procedure applies to the detached tips, not the AirPods Pro body.
Adding soap because the tips look oily. Apple explicitly says not to use soap or other household cleaners on the ear tips.
Using a pick or sharp tool inside the tip. Routine cleaning does not require probing the internal mesh.
Reattaching while damp. The tips should be completely dry before they are clicked back on.
Forcing the tip at the wrong angle. The connector is oval; align it first.
Assuming a cleaning problem is always a dirt problem. Poor noise cancellation or weak bass can also come from the wrong tip size or seal.
Mixing tips from different AirPods Pro generations. Apple says the ear tips are designed specifically for their AirPods Pro model.
How Often Should You Clean AirPods Pro Ear Tips?
Apple does not prescribe a universal weekly or monthly interval. A practical trigger-based approach is more useful: clean the tips when you can see buildup, when they feel less comfortable because of residue, or after workouts and exposure to sweat or other substances that may irritate skin. Apple specifically recommends cleaning and drying AirPods Pro after workouts or exposure to liquids such as sweat, soap, shampoo, makeup, sunscreen, and lotions.
Frequent users may therefore clean more often than occasional users, but there is no advantage to repeatedly removing and washing already-clean tips. Clean when there is a reason, handle the attachment carefully, and replace a physically worn tip instead of trying increasingly aggressive cleaning methods.
Quick Final Check
The detached ear tips were rinsed with water only.
No soap or household cleaner was used on the ear tips.
The tips are completely dry.
The oval tip and connector were aligned before installation.
Each tip clicked into place and feels secure.
The fit is comfortable and the acoustic seal sounds normal.
If the seal is still poor, you will try another size or Apple’s fit/seal test instead of over-cleaning.