Home
» INTERNET
»
How to Clean an Air Fryer Heating Element Safely: A Practical Guide
How to Clean an Air Fryer Heating Element Safely: A Practical Guide
Quick answer: unplug the air fryer, let it cool completely, remove the basket and pan, brush away loose debris with a soft to medium bristle brush, then wipe the accessible heating element and surrounding interior with a soft, damp sponge or cloth. Do not spray water or cleaner into the appliance, do not use steel wool or a hard wire brush, and do not reassemble or plug it in until everything is dry. If your model has quartz tubes, exposed wiring, or a heating assembly that the manual says not to touch, follow that model-specific instruction instead.
This guide is written for common household air fryers, especially basket-style models with an upper heating element. Designs vary significantly, so the user manual for your exact model takes priority. The recommendations below were checked against current manufacturer guidance from Philips, Ninja, and Breville on September 13, 2026.
Air fryer heating element cleaning: quick reference
Task
Recommended approach
Avoid
Loose crumbs and baked-on bits
Soft or medium bristle brush
Wire brush, metal scraper, knife
Greasy film on an accessible metal element
Soft sponge or cloth dampened with warm water
Spraying liquid directly into the appliance
Removable basket and pan
Warm water and dish soap, if allowed by the manual
Assuming every coated part tolerates abrasive pads
Quartz heating tubes
Use only the method specified for that model
Treating them like a metal coil without checking the manual
Drying
Air-dry thoroughly before reconnecting power
Plugging in while moisture remains
What you need
A soft microfiber cloth or nonabrasive sponge
A soft to medium bristle cleaning brush; a flexible brush can help behind a coil on models that allow access
Warm water
A clean towel to protect the countertop if your manual permits turning the unit over
Dish soap for removable parts, not automatically for the heating element
Philips specifically recommends a soft sponge with hot water for the interior and heating element and says stuck food can be removed with a soft to medium bristle brush. Its support page also warns against steel wire and hard bristle brushes because they can damage the heater coating. See the Philips Airfryer cleaning instructions. Ninja's AF100 owner guide likewise says to unplug before cleaning and use a cleaning brush on the heating element to remove food residue; see the Ninja AF100 Series Owner's Guide.
How to clean an air fryer heating element in 5 steps
1. Unplug the air fryer, cool it completely, and remove the basket
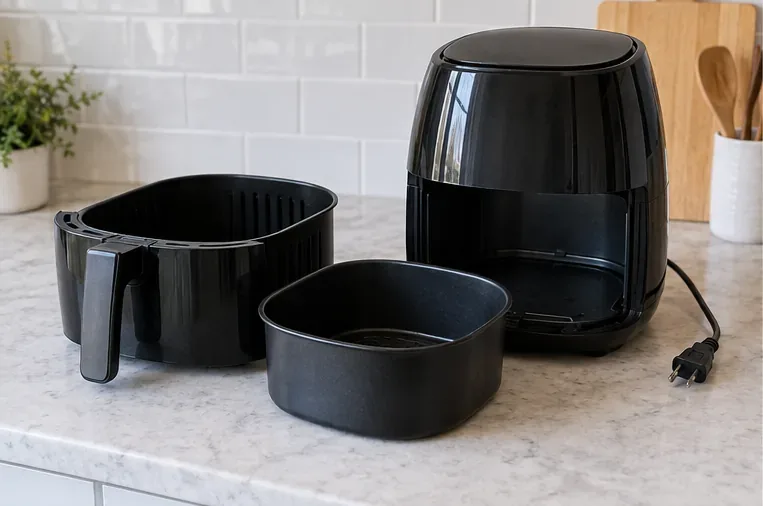
Turn the appliance off, unplug it from the wall, and wait until the heating element and interior are fully cool. Remove the basket, pan, crisper plate, and other removable accessories so you can see the upper interior clearly. Never clean the element while it is warm.
An unplugged basket-style air fryer with its removable basket and pan set aside before cleaning the upper heating area.
Clean removable parts separately according to the manual. Many baskets and pans can be washed with warm water and dish soap, and some are dishwasher-safe, but that does not mean the main appliance or heater can be immersed.
2. Position the appliance so the element is easy to reach
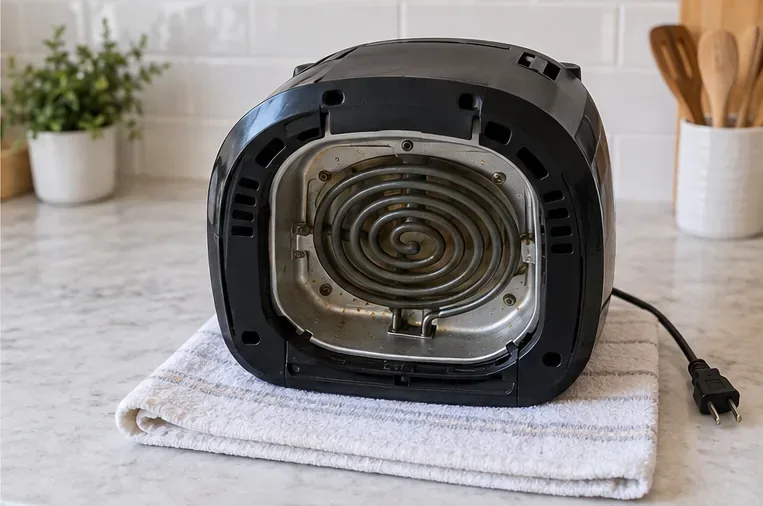
For a basket-style air fryer, first look up the cleaning section in the manual. Philips instructs owners of many of its models to place a soft cloth down and carefully turn the appliance upside down to reach the heating element. That is a model-specific access method, not a universal rule. If your manual does not say the unit may be inverted, leave it upright and reach the element from the basket opening instead.
A basket-style air fryer positioned on a folded towel to expose the heating element; only use this orientation when the manufacturer allows it.
Keep the power cord and plug dry. Do not place the appliance in a sink, and do not pour water into the cavity.
3. Inspect the element and brush away dry debris
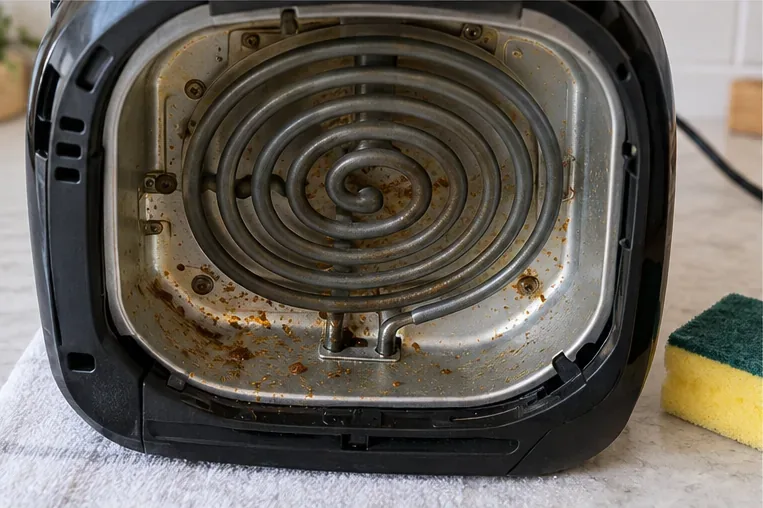
Look for crumbs, breading, grease flecks, or food splatter around the coil and nearby metal surfaces. Start with the least aggressive method: use a soft or medium bristle brush to loosen dry particles. Work gently around supports, bends, and the area behind the element without forcing or bending the heater.
Baked-on specks around a cooled heating element show the kind of residue that should be loosened gently rather than scraped with metal tools.
This matters because residue can contribute to smoke during later cooking. Philips notes that greasy residue from previous use can produce white smoke and advises cleaning the pan, basket, and heating element thoroughly; see its official white-smoke troubleshooting guidance.
4. Wipe the accessible element and surrounding interior
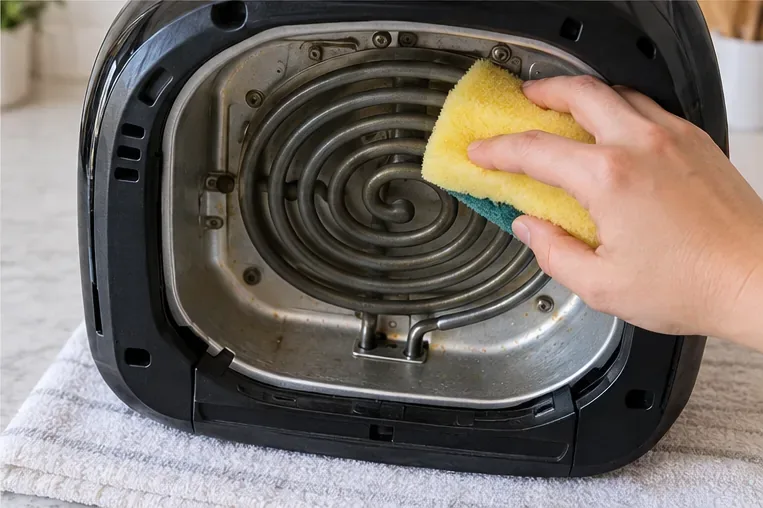
Dampen a soft sponge or microfiber cloth with warm water, then wring it out well. Wipe the accessible heater surface and nearby interior where the manual allows. The cloth should be damp, not dripping. Do not spray water, degreaser, or oven cleaner directly toward the heating element, fan, vents, controls, or electrical connections.
Use only the soft, nonabrasive face of a damp sponge on an accessible metal heating element; keep abrasive scrubber material away from the coating.
If grease does not release with gentle wiping, stop before escalating to a harsh chemical or abrasive pad. Check the exact manual. Heater materials differ. For example, Breville's Joule Oven Air Fryer Pro manual says its quartz heating elements should be rubbed gently with a soft, damp sponge or cloth and specifically says not to use cleanser on those elements. See the Breville Joule Oven Air Fryer Pro instruction book.
5. Dry thoroughly, reassemble, and follow the model's finish-up procedure
Return the appliance to its normal upright position if you moved it. Wipe away visible moisture, then let the interior air-dry completely. Reinstall only clean, dry removable parts. Do not reconnect power while moisture remains inside.
Some manufacturers include a model-specific final step. Philips, for example, instructs owners of many Airfryer models to run the appliance for a few minutes without food after cleaning so loosened residue falls into the pan. Do that only if your own manual tells you to. If the manual does not specify an empty run, simply allow the unit to dry and use it normally at the next cooking session.
What not to use on the heating element
Steel wool, wire brushes, knives, or metal scrapers: these can scratch coatings or damage the element.
Hard bristle brushes: Philips explicitly warns against them on its heating elements.
Direct sprays: liquid can travel into the fan, electronics, vents, or connections.
Oven cleaner or harsh degreasers unless the manual explicitly allows them: heater and interior materials vary by model.
Soaking or immersing the main unit: the housing contains electrical components.
Be especially cautious with toaster-oven-style air fryers. Some use quartz heating tubes rather than the coated metal coil commonly seen in basket models. Breville documentation varies by model: one manual permits gentle wiping of quartz elements, while another cleaning guide tells users to avoid touching them. That difference is exactly why the model number matters.
How often should you clean the heating element?
There is no single interval that fits every air fryer. A useful practical rule is to inspect the upper interior after greasy, breaded, or splatter-heavy foods and clean visible residue once the appliance is cool. Some manufacturer manuals call for cleaning the appliance after every use. Ninja's AF100 guide says the unit should be cleaned thoroughly after every use, while Philips also links grease residue with white smoke and recommends thorough cleaning after use.
If you mainly cook dry foods and the element stays visibly clean, a gentle inspection may be all that is needed. Do not repeatedly scrub a clean element just to satisfy a calendar schedule.
When cleaning is not enough
Stop using the air fryer and contact the manufacturer or an authorized service provider if you see a cracked or distorted heating element, exposed wiring, loose heater supports, melted plastic, repeated electrical tripping, persistent arcing, or smoke that continues after visible food and grease residue have been removed. Cleaning cannot repair an electrical or structural fault.
A strong odor during the first few uses can also have model-specific explanations, so check the manual before assuming the heater is dirty. Conversely, if an older unit suddenly develops a burning smell, inspect for trapped food only after unplugging and cooling it.
Final checklist
The plug is disconnected before cleaning.
The appliance is completely cool.
Removable parts are out of the way.
Loose debris is brushed away gently.
The element is wiped only with materials allowed by the manual.
No liquid has been sprayed into the housing.
No wire brush, steel wool, or metal scraper touched the element.
The air fryer is fully dry before it is plugged in again.
For most basket-style units, the safest default is simple: dry brushing first, then a well-wrung soft sponge or cloth with warm water. The moment your air fryer uses a different heater design or its manual gives different instructions, follow the manufacturer-specific method instead.