Home
» INTERNET
»
How to Clean Oven Trays Without Damaging the Finish
How to Clean Oven Trays Without Damaging the Finish
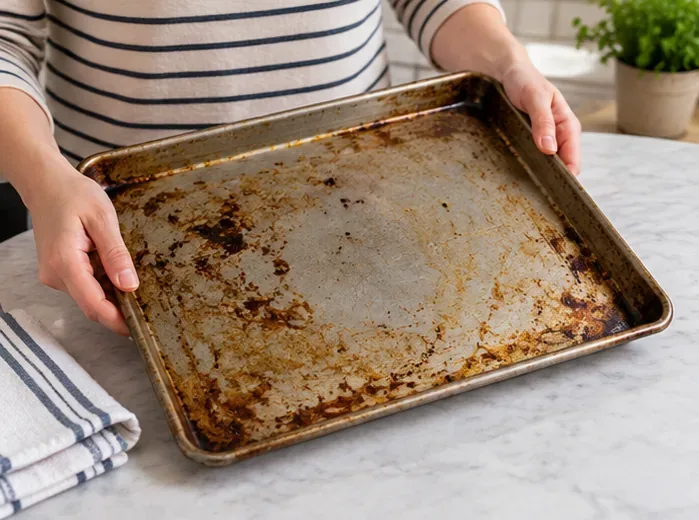
You pull an oven tray out after roasting dinner and find the usual problem: a sticky brown film around the edges, blackened food welded to one corner, and grease that seems to survive a normal wash. The temptation is to reach for the roughest scrubber in the kitchen. That can work on the residue, but it can also scratch bare metal, damage a nonstick coating, or warp a hot tray if you cool it too aggressively.
The safest way to clean oven trays is to start with the least aggressive method, check what the tray is made of, and increase cleaning strength only where the residue actually needs it. In most cases, warm water, dish soap, soaking time, a soft sponge, and a nonmetal scraper do most of the work. Burnt-on deposits may need a second treatment, but the tray's material should decide what comes next.
Why oven trays become so difficult to clean
Oven heat changes ordinary splatters into tougher deposits. Fat spreads into a thin film and bakes repeatedly onto the surface. Sugary sauces can caramelize and then char. Small crumbs may carbonize into hard black spots. If a tray goes back into the oven before those residues are fully removed, each heating cycle can make them more stubborn.
That is why the right question is not simply “What is the strongest cleaner?” It is “What is the mildest method that will remove this particular mess without harming this particular tray?”
Before you start: identify the tray surface
If you still have the packaging or model information, check the manufacturer's care instructions first. Cleaning rules can differ even when two trays look similar.
Tray type
Safest starting point
Main caution
Bare aluminum
Warm soapy water, soft or textured nonmetal sponge
Dishwashers and acidic cleaners can discolor or react with some aluminum surfaces
Nonstick-coated metal
Warm soapy water and a soft, nonabrasive sponge
Abrasive pads and harsh cleansers can damage the coating
Enamel-coated tray
Warm soapy water and a soft sponge
Dishwasher and high-heat cleaning compatibility depends on the specific tray
Stainless steel
Warm soapy water, soaking, then a nonabrasive scrub
Aggressive abrasives can leave visible scratches
For example, Nordic Ware recommends hand washing its natural aluminum bakeware and notes that automatic dishwasher detergent can discolor the aluminum. Calphalon tells users of its nonstick bakeware to let pans cool before washing and to avoid abrasive pads and cleansers. Some specific Bosch enamel trays are explicitly labeled dishwasher suitable, which is a useful reminder that care instructions are product-specific rather than universal.
Inspect the tray first so you can distinguish loose burnt food, sticky grease, and permanent cosmetic discoloration before choosing a cleaning method.
Step 1: Let the tray cool, then remove loose debris
Wait until the tray is cool enough to handle safely. Do not plunge a very hot tray into cold water. Calphalon specifically warns that immersing hot bakeware in cold water can cause permanent warping.
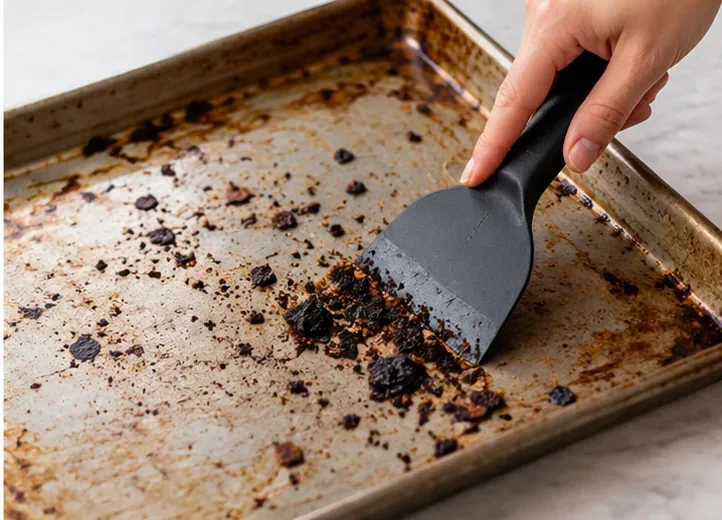
Once cool, tip loose crumbs into the trash or compost as appropriate. For food that is stuck but raised above the surface, use a plastic, silicone, nylon, or wooden scraper. Hold it at a low angle and push gently. The goal is to lift the bulky material without gouging the tray.
This simple dry-removal step matters because it keeps charred pieces out of the sink and lets the dish soap reach the greasy film underneath.
A nonmetal scraper can remove raised burnt-on food before washing without bringing a sharp metal edge into contact with the tray.
Step 2: Wash with warm water and dish soap
Start with ordinary dish soap and warm water. Spread the soap across the greasy areas with a soft sponge or dishcloth, paying extra attention to corners, rolled rims, and the shallow channel around the edge where grease tends to collect.
Use light pressure first. If the film begins to release, keep going rather than switching to a harsher abrasive. For many trays, the combination of surfactant, warmth, and a little time is enough to remove cooking grease without risking the finish.
If the tray is too large for your sink, wash one half at a time and rotate it. Avoid balancing a slippery tray where it can fall or bend.
Step 3: Soak stubborn residue instead of scrubbing harder
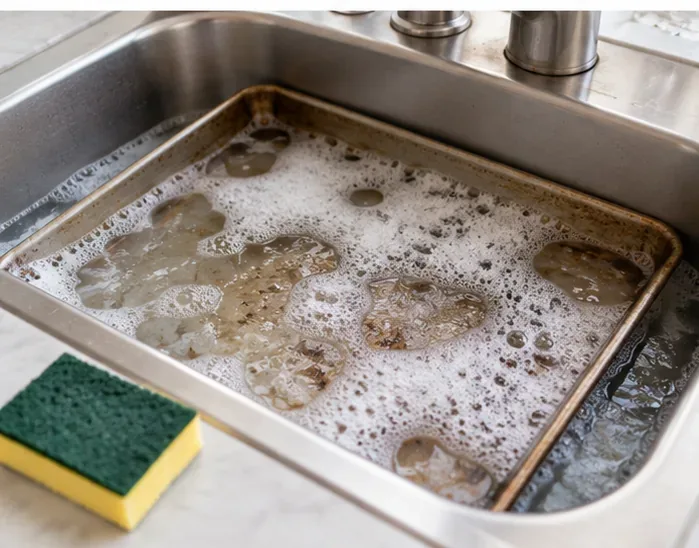
If the first wash leaves a sticky or dark patch, add warm soapy water to the tray or let the affected area soak in the sink. Soaking softens food residue and gives detergent time to work, which is usually safer than immediately reaching for steel wool.
Do not assume that “longer is always better.” Some manufacturers of aluminum bakeware advise against extended soaking. If you know the brand, follow its stated limit. If you do not, use a moderate soak, check the residue, and repeat if necessary rather than leaving an unknown metal tray submerged for hours.
Soaking with warm soapy water can loosen baked-on grease and food before a second gentle scrub.
Step 4: Escalate only on the spots that remain
After soaking, scrub again with a soft or manufacturer-approved nonabrasive pad. Work on the remaining spots rather than scouring the entire tray. If the residue is still present, choose the next method according to the surface.
For bare natural aluminum
Keep the treatment gentle. Nordic Ware's current care guidance recommends warm soapy water and a nonmetal brush or textured sponge for its natural aluminum trays. The company also notes that baking soda can be used to brighten natural aluminum. If your own tray manufacturer permits it, a damp baking-soda paste can be worked gently on a stubborn spot and then rinsed away. Do not automatically substitute vinegar or another acid: Nordic Ware also warns that acidic ingredients can darken, pit, or corrode aluminum after prolonged contact.
For nonstick trays
Do not treat a nonstick tray like bare metal. Calphalon and Wilton both advise against abrasive cleaning pads or cleansers on their nonstick bakeware. Use a soft sponge and liquid dish detergent, repeat the soak if necessary, and accept that a cosmetic stain may be preferable to damaging the coating. If the coating is peeling, blistered, deeply gouged, or flaking, stop aggressive cleaning and follow the manufacturer's replacement guidance.
For enamel or stainless steel trays
Warm soapy water, soaking, and a nonabrasive scrub remain the safest default. Some enamel accessories are dishwasher suitable, but that is not a property you should infer from appearance alone. Check the oven or tray model information before using a dishwasher, a specialty cleaner, or any high-heat cleaning process.
Step 5: Rinse, dry, and inspect the result
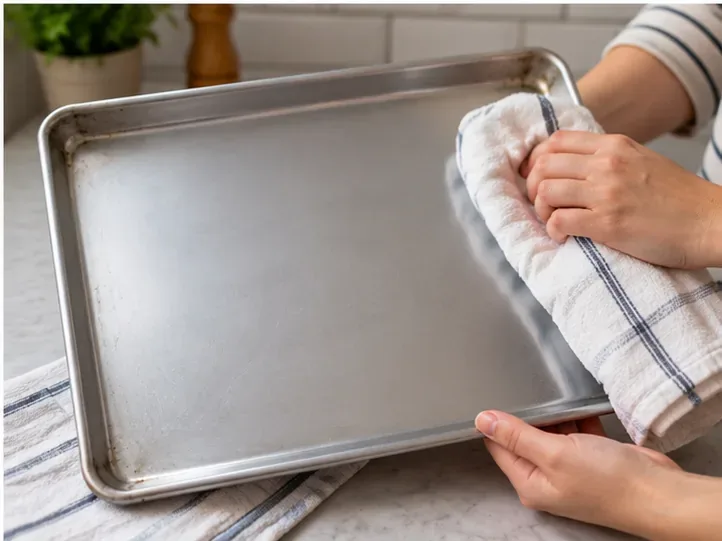
Rinse away all soap and loosened residue, then dry the tray thoroughly with a clean towel or let it air-dry completely before storage. Drying is especially useful around folded rims and seams where water can sit unnoticed.
Do not judge success only by whether the tray looks brand new. Bare aluminum often develops cosmetic color changes with use, and some manufacturers explicitly state that dishwasher discoloration can be cosmetic rather than a safety or performance problem. Your real target is a tray that is clean, nonsticky, free of loose burnt material, and structurally sound.
Dry the tray fully, then check for sticky film, loose residue, coating damage, or warping before putting it away.
What to do when the tray still looks dirty
If it feels sticky but does not look heavily burnt
Repeat the warm-water-and-detergent wash. Sticky residue is often grease rather than carbon, so more detergent contact and gentle agitation can be more useful than a coarse abrasive.
If there are hard black chunks
Soak again, then use a nonmetal scraper. Removing thickness mechanically with a safe scraper is usually better than grinding the entire surface with a harsh pad.
If the tray is clean but permanently stained
Decide whether the stain is cosmetic. On bare aluminum, a darker patina does not necessarily mean the tray is dirty. On coated bakeware, chasing a stain with abrasives can shorten the life of the finish.
If the coating is damaged
Cleaning will not restore a failed coating. If the finish is peeling, flaking, or exposing damaged layers, consult the manufacturer for replacement advice rather than continuing to scrub.
Cleaning methods to avoid unless the manufacturer explicitly allows them
Steel wool or metal scrapers on coated trays: these can scratch or remove the finish.
Cold water on a very hot tray: sudden temperature change can warp some bakeware.
Automatic dishwasher use by assumption: some products are dishwasher safe, while natural aluminum trays may discolor and some brands still recommend hand washing.
Acidic soaking on aluminum: acids can react with aluminum and may cause darkening, pitting, or corrosion with prolonged contact.
Using the oven's self-clean cycle as a tray cleaner: Whirlpool's current self-clean guidance says to remove broiler pans, cookware, and bakeware before the cycle. Unless your oven and tray manuals specifically say otherwise, keep oven trays out.
How to make the next cleanup easier
Clean the tray soon after it has cooled rather than letting grease bake on during the next cooking session. When the recipe allows it, parchment paper or a silicone baking mat can reduce direct contact between food and the tray. Nordic Ware specifically lists parchment and silicone mats as options for its natural aluminum pans.
For roasting, avoid letting sugary glazes or marinades burn dry at the edges when the recipe does not require it. After cooking, move food off the tray, let the tray cool safely, and deal with spills before they become part of the next bake.
Final self-check: is the oven tray actually clean?
Run a clean fingertip over the surface after drying. It should not feel tacky or greasy.
Look along the rim and corners for loose black flakes or trapped food.
Confirm there is no visible soap film or strong detergent residue.
Check that a nonstick or enamel coating is intact, without new scratches, blisters, or flaking.
Set the dry tray on a flat surface. Severe new rocking can indicate warping.
Distinguish permanent discoloration from removable residue before repeating a harsh cleaning cycle.
If the tray passes those checks, it is ready to store and use again even if it no longer looks factory-new.
Manufacturer guidance checked for this guide
Manufacturer instructions were checked on September 13, 2026. Because care rules vary by product, use these as examples and verify your own model when possible: