Home
» INTERNET
»
How to Get Deodorant Off a Black Shirt Without Fading the Fabric
How to Get Deodorant Off a Black Shirt Without Fading the Fabric
The safest way to get deodorant off a black shirt is to start with the mildest treatment that matches the stain. For a fresh, chalky white transfer mark, brush off the excess and rinse the area with cold running water. If the mark has become a stubborn underarm buildup, pretreat it with a color-safe laundry product or a tested baking-soda paste, wash according to the care label, and air-dry until you know the stain is gone.
The important beginner lesson is that not every white mark is the same. A fresh streak left while pulling on a shirt is usually easier to remove than a crusty patch that has accumulated through repeated wear and washing. Dark fabric also makes color loss more obvious, so aggressive bleaching or untested acids are a poor first move.
First, Know What Kind of Deodorant Mark You Have
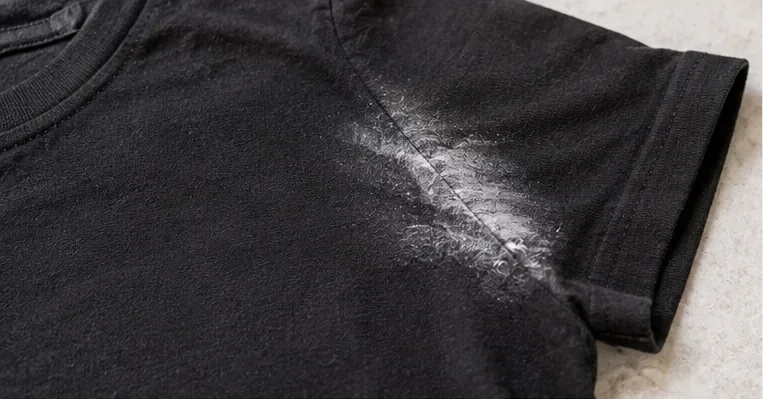
Fresh transfer marks are the powdery or waxy white streaks that appear when deodorant rubs against the shirt while you dress. These often sit near the side seam, chest, or underarm and may lift with simple brushing and rinsing.
Underarm buildup is residue that has worked deeper into the fibers over time. Deodorant or antiperspirant can combine with sweat, body oils, and repeated washing to create a stiff, gray-white, or crusty patch. Whirlpool notes that sweat and deodorant ingredients can interact and create stains that need more than ordinary washing. Clorox similarly describes old underarm buildup as a combination of deodorant residue, sweat, and body soil that does not dissolve easily in water.
Antiperspirant is a product designed to reduce sweating, while deodorant primarily targets odor. Many products combine both functions. For stain removal, you do not need to identify every ingredient; you mainly need to know whether you are dealing with a fresh surface transfer or a set-in buildup.
A fresh deodorant mark on black fabric often looks powdery or chalky and is easier to treat before it goes through a dryer.
What You Need Before You Start
Your shirt's care label
Cold running water
A soft-bristled toothbrush or other soft laundry brush
A color-safe laundry detergent or stain-removal product
Optional baking soda for stubborn buildup
A clean sink, basin, or washing machine
A hanger or drying rack for air-drying
The care label is the small tag sewn into the garment that lists fiber content and washing instructions. Read it before choosing water temperature or a cleaning product. Tide and Whirlpool both tell users to follow the garment care label when treating deodorant stains.
If the shirt is delicate, dry-clean-only, vintage, heavily embellished, or especially valuable, home stain removal may not be the best first choice. Tide notes that delicate, antique, or precious garments may require professional cleaning.
Step 1: Brush Off Excess Deodorant and Rinse the Mark
Start by gently brushing or lifting away loose deodorant. Do not grind the residue deeper into the fabric. Tide's official deodorant-stain guide recommends brushing off excess material and rinsing the garment under cold running water.
For a new white streak, this may be enough. Rinse from both sides of the fabric if practical so water can carry loosened residue away instead of pushing it farther through the fibers. Keep the rubbing gentle, especially on knit shirts that can stretch or pill.
If the white mark disappears, wash the shirt normally when convenient. If a pale patch remains after rinsing, move to pretreatment rather than scrubbing harder.
Step 2: Pretreat a Stubborn Mark
Pretreating means applying a cleaning product directly to a stain before the main wash. This gives the detergent time to loosen residue that an ordinary wash cycle may not remove on its own.
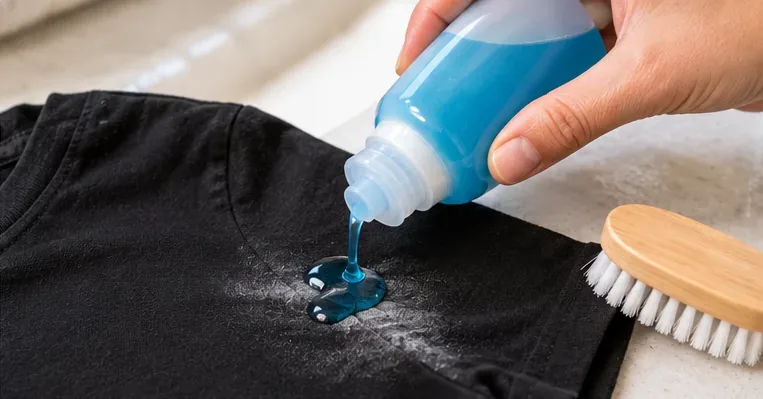
Tide provides a black-clothing method that uses its color-safe oxygen powder mixed with warm water into a paste, worked gently into the stain with a soft-bristled toothbrush, then left for five minutes before washing. If you use a commercial stain-removal product, follow that product's dosing instructions rather than improvising a stronger mixture.
Whirlpool offers another option specifically for black shirts: mix equal parts baking soda and water into a paste, apply it with a soft toothbrush, let it sit for about 20 minutes, and then wash according to the care label. Whirlpool also advises testing treatments on a small, less-visible area first. See Whirlpool's deodorant stain removal guide.
For beginners, a hidden-area test is especially useful on deep black, garment-dyed, or fashion-finish fabrics. Apply a tiny amount of your chosen pretreatment to an inside seam, wait as directed, rinse, and check for lightening or texture change before treating the visible underarm area.
For a persistent mark, use a color-safe laundry pretreatment and work gently rather than scrubbing aggressively at dark fabric.
Step 3: Rinse or Wash According to the Care Label
Once the stain has been pretreated for the recommended time, wash the shirt according to its care instructions. Tide advises using the hottest wash temperature that the garment's care label allows. That does not mean automatically choosing hot water for every black shirt. If the label specifies cold water, cold is the correct choice.
Dark clothing can fade for several reasons, including heat, harsh chemicals, and repeated abrasion, so the care label is the practical limit. Use the normal dose of detergent for your washer and load size. Do not compensate for a stubborn stain by pouring in excessive detergent; too much can leave its own residue.
If you are hand-washing, rinse until the water no longer feels soapy and the treated area no longer feels coated. Avoid twisting or wringing delicate black fabric.
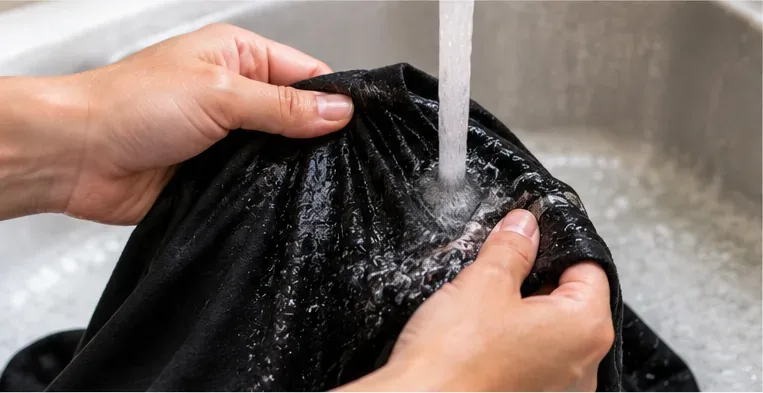
Rinse away loosened deodorant and pretreatment, then wash the shirt using the temperature and cycle allowed by its care label.
Step 4: Air-Dry and Inspect Before Using a Dryer
This is one of the most useful habits in stain removal: do not put the shirt into a hot dryer until you have checked that the mark is gone. Tide warns that drying can set a remaining deodorant stain and make it harder to remove. Whirlpool likewise recommends line or air drying so you can inspect the result and repeat treatment if necessary.
Hang the shirt or lay it flat as appropriate for the fabric. Once dry, check the underarm area in bright light. If the black color looks even and the chalky residue is gone, you are finished. If you can still see a gray-white film or feel stiffness in the fibers, repeat the pretreatment and wash rather than escalating immediately to a harsher chemical.
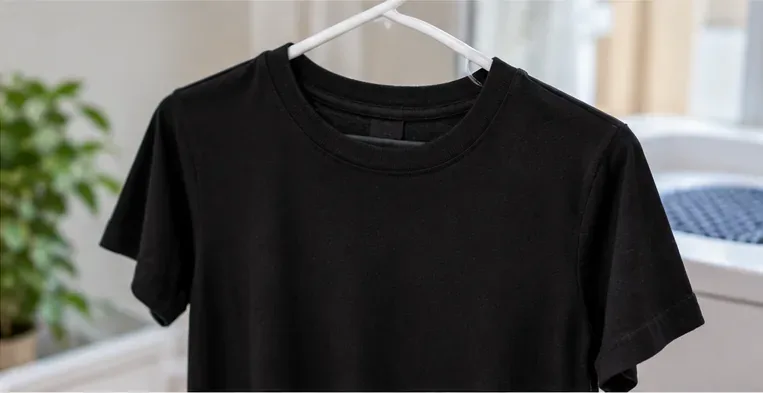
Air-drying lets you inspect the black fabric before heat has a chance to set any remaining deodorant residue.
What Should You Avoid on a Black Shirt?
Do Not Reach for Chlorine Bleach
Chlorine bleach can remove or alter dye in dark fabric. The Clorox underarm-buildup procedure that uses chlorine bleach is explicitly presented for white items, not black shirts. Its deodorant buildup guide clearly states that the peroxide/baking-soda/bleach solution described there should only be used on white items.
Be Careful With Hydrogen Peroxide
Hydrogen peroxide is commonly used in laundry advice for whites, but Whirlpool specifically notes that it can discolor darker clothing and recommends its peroxide method only for white clothes. That makes it a poor default for a black shirt.
Do Not Scrub Until the Fabric Looks Fuzzy
More pressure is not necessarily more cleaning. Aggressive brushing can roughen knit fibers, create a lighter-looking patch, or distort the underarm area. Use a soft brush and work only hard enough to distribute the pretreatment.
Do Not Mix Random Household Cleaners
A deodorant mark is usually a laundry-cleaning problem, not a reason to combine multiple chemicals. Stick to one tested treatment at a time and rinse it out before switching approaches. Never mix chlorine bleach with acids, ammonia, or other household cleaners.
What If the Mark Is Only a Fresh White Streak and You Cannot Wash the Shirt Yet?
If the shirt has not been worn long and the mark is clearly sitting on the surface, start with the least disruptive option: gently brush off the excess with a clean soft cloth or brush. If you can use water without creating a visible wet spot problem, rinse the affected area with cold water and let it air-dry.
Do not assume a no-wash shortcut will remove old underarm buildup. Once residue has accumulated inside the fibers, a proper pretreatment and wash is more reliable than repeatedly rubbing the dry fabric.
How to Prevent White Deodorant Marks on Black Shirts
Tide recommends allowing deodorant to dry completely before dressing and washing clothing promptly after wearing. Those two habits address both common forms of the problem: fresh transfer and long-term buildup.
Apply deodorant in a thin, even layer instead of repeatedly over-applying.
Give the product time to dry before pulling on a black shirt.
If possible, put the shirt on first and apply deodorant carefully afterward without touching the fabric.
Wash sweaty shirts reasonably soon rather than letting underarm residue sit for days.
Do not overload the washer; clothing needs room to move through the wash water.
Check the underarms before machine drying so buildup does not repeatedly receive dryer heat.
A Simple Beginner Decision Guide
What you see
Best first action
Next step if it remains
Fresh white streak on the surface
Brush off excess and rinse with cold water
Pretreat with a color-safe laundry product
Gray-white underarm film
Pretreat before washing
Repeat treatment and air-dry to check
Hard or crusty buildup
Test a black-fabric-safe pretreatment, then work gently with a soft brush
Repeat rather than using stronger bleach
Delicate or dry-clean-only black garment
Follow the care label
Use a professional cleaner when appropriate
Stain gone after washing
Air-dry or dry as the care label allows
No further treatment needed
For most washable black shirts, the process is straightforward: identify whether the deodorant is fresh or built up, remove loose residue, pretreat gently when needed, wash according to the care label, and inspect before using dryer heat. That sequence gives you a useful escalation path without risking the color just to remove a white mark.