Home
» INTERNET
»
How to Get Dry Erase Marker Off a Wall Without Damaging the Paint
How to Get Dry Erase Marker Off a Wall Without Damaging the Paint
The safest way to get dry erase marker off a painted wall is to start with the least aggressive method: a soft, barely damp microfiber cloth, followed by mild soapy water if needed. Only move to stronger spot treatments after testing them in a hidden area. That order matters because the wall finish can be easier to damage than the ink is to remove.
Dry erase marker is made to wipe from a nonporous whiteboard. A painted wall is different. Flat and matte paints can absorb color more readily and can develop shiny patches when rubbed. Satin and semi-gloss finishes are generally more washable, but even they can dull, soften, or lose color if a cleaner is too strong. Sherwin-Williams advises starting painted-wall cleaning with soft materials and mild soap, and notes that flat and matte finishes are less durable under scrubbing than satin or semi-gloss. See the manufacturer guidance on cleaning painted walls.
Before You Clean: Identify What You Are Working With
You do not need to become a paint expert before starting, but two details change the safest approach: the paint sheen and how recently the wall was painted. Sheen means how shiny the dried paint looks. Flat and matte have very little shine; eggshell has a soft low sheen; satin is more washable; semi-gloss and gloss are shinier and usually tolerate cleaning better.
Wall condition
Best starting method
How cautious to be
Flat or matte paint
Barely damp microfiber, then very mild soap if needed
Very cautious; stop if the area becomes shiny, lighter, or darker
Eggshell
Damp microfiber and mild soap
Cautious; test any stronger method first
Satin or semi-gloss
Damp microfiber and mild soap
Usually more washable, but still test alcohol or melamine foam
Fresh paint
Follow the paint maker's cure-time instructions
Do not assume dry paint is fully washable; Sherwin-Williams recommends waiting at least two weeks before routine washing
Unknown finish or damaged paint
Hidden test with water only
Stop early and consider touch-up rather than repeated scrubbing
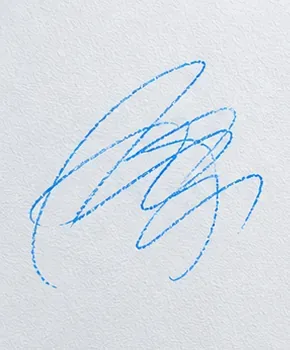
Start by looking closely at the marker and the paint finish before choosing a cleaner.
What You Need
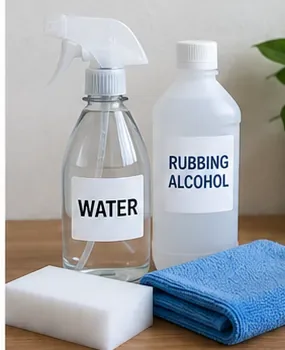
For most beginner-friendly attempts, prepare two clean microfiber cloths, a small bowl of water, and a few drops of mild dish soap. Cotton balls or cotton pads are useful if you later test rubbing alcohol on a tiny area. A white melamine foam sponge can be kept as an optional escalation tool, but it should not be your first choice because its micro-abrasive action can change the sheen of paint.
Avoid starting with acetone or nail polish remover, undiluted bleach, strong degreasers, scouring powder, a stiff brush, or a rough kitchen scrub pad. Those products may remove the marker, but they can also remove or burnish the paint film. Sherwin-Williams defines burnishing as an unwanted increase in gloss caused by rubbing, scrubbing, or abrasion; its guidance on paint burnishing explains why a stain can disappear while a shiny patch remains.
Gather gentle supplies first; stronger options should stay optional until you know the paint can tolerate them.
Step-by-Step: Remove the Marker with the Lowest-Risk Method First
Step 1: Test in a Hidden Spot
Choose an area behind furniture, near a baseboard, or another inconspicuous location painted with the same finish. Dampen a clean microfiber cloth with water, wring it out thoroughly, and rub lightly for several seconds. Let the spot dry completely. Check it from the front and from an angle.
If the paint looks unchanged, proceed. If the test spot becomes shinier, duller, lighter, darker, tacky, or transfers color to the cloth, do not escalate. The wall finish is telling you that repeated cleaning may cause more visible damage than the marker itself.
Step 2: Try Plain Water
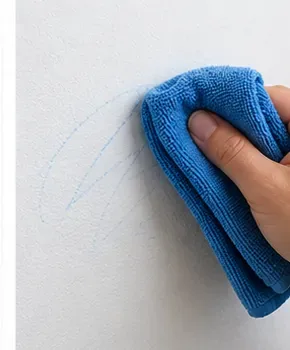
Use a clean microfiber cloth that is damp, not dripping. Work on a small section of the marker with light pressure. Blot and wipe rather than grinding the cloth into the wall. Rotate to a clean portion of the cloth as blue, black, red, or green pigment transfers.
This first pass is especially appropriate for fresh marks and washable dry erase products. It also gives you useful information: if the line fades quickly, you probably do not need any stronger chemistry.
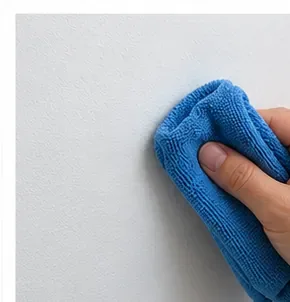
Begin with a barely damp microfiber cloth and light pressure rather than aggressive scrubbing.
Step 3: Add Mild Dish Soap
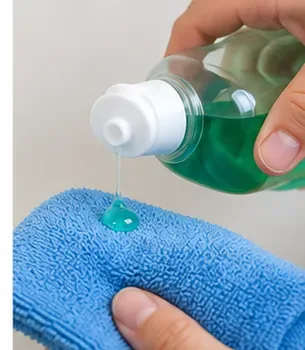
If water leaves a visible shadow, mix a few drops of mild dish soap into a small bowl of water. Dampen a clean cloth in the solution and wring it until it is only slightly moist. Wipe the mark with short, controlled strokes. Do not soak the wall, because excess water can leave streaks and may affect the paint or the drywall paper beneath it.
After a short pass, stop and inspect. The goal is progressive improvement, not continuous scrubbing. Sherwin-Williams recommends mild soap and water as the normal starting point for washing painted walls and advises non-abrasive cloths or sponges.
If water alone does not work, use a few drops of mild dish soap in water and keep the cloth well wrung out.
Step 4: Rinse, Dry, and Decide Whether You Actually Need a Stronger Method
Wipe the cleaned spot once with a second cloth dampened with plain water, then dry it with a soft towel. Let the wall air-dry for several minutes before deciding whether the marker remains. A wet wall can look darker than a dry wall and can make you think the stain is worse—or better—than it really is.
If only a faint trace remains on flat or matte paint, stopping may be the best tradeoff. Repeated cleaning can create a permanent shiny halo. On a more washable satin or semi-gloss finish, you may have room for one carefully tested escalation.
When Mild Soap Is Not Enough: Choose One Escalation Path
Do not automatically use every method in sequence. Pick the least risky option for your wall, test it in a hidden place, and reassess after it dries.
Option A: Very Light Melamine Foam on a Durable Finish
A melamine foam sponge is a fine micro-abrasive. That is why it can lift stubborn marks, and also why it can dull or polish paint. If you use one, dampen it, squeeze out excess water, and make one or two very light passes over a small area. Avoid this method on delicate flat or matte paint unless the paint manufacturer specifically says the coating is highly washable.
Stop immediately if the wall becomes shiny or if paint color appears on the sponge. A cleaner-looking but visibly burnished patch is not a successful result.
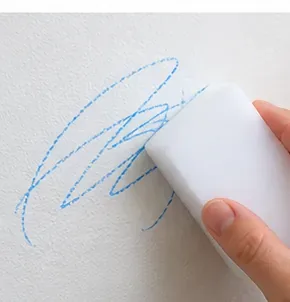
A melamine sponge is an escalation step, not a starting point; test first and use very light pressure on a durable finish.
Option B: Spot-Test Rubbing Alcohol for Remaining Ink
Crayola's official stain guidance for its washable dry erase markers on painted walls starts with a damp sponge and, if the stain remains, eventually suggests blotting with rubbing alcohol; Crayola also explicitly says results may vary and to test first. That guidance is specific to Crayola's product, so treat it as a cautious reference rather than a guarantee for every marker and every paint. You can read the original Crayola painted-wall stain tip.
If your hidden paint test tolerates alcohol, put a small amount of 70% isopropyl alcohol on a cotton pad or clean white cloth. The applicator should be damp, not saturated. Blot a small piece of the remaining line, then immediately wipe with a plain damp cloth. Do not flood the surface and do not scrub back and forth. If the paint softens, becomes tacky, changes sheen, or transfers to the applicator, stop.
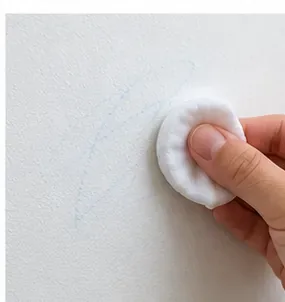
Rubbing alcohol can be a last-resort spot treatment for some dry erase inks, but only after an inconspicuous paint test.
Step 5: Rinse the Area and Evaluate the Result After It Dries
Whichever method worked, finish by wiping the area with a clean cloth dampened with plain water. This removes soap or solvent residue that could attract dirt or leave a visible ring. Dry with a soft towel and allow the wall to return fully to room-dry appearance.
Check the spot under normal room lighting and from a shallow angle. A successful result has three qualities: the marker is gone or unobtrusive, the paint color matches the surrounding wall, and the sheen has not changed. If the line is gone but the spot is glossy, dull, pale, or fuzzy, more cleaning is unlikely to improve it.
After any cleaner, wipe with plain water, dry the area, and inspect the sheen as well as the remaining color.
When to Stop Cleaning and Touch Up the Paint Instead
Stop when you see paint transfer on the cloth, a shiny halo, a dull patch, softened paint, exposed drywall paper, or a marker shadow that no longer improves after a gentle pass. At that point, the remaining color may have penetrated the paint film. Repeated abrasion can enlarge the damaged area.
A small touch-up with the original wall paint may be more predictable than continuing to chase the last trace of pigment. Matching touch-up paint can still be noticeable if the old wall has faded or if a different roller texture is used, so feather the repair gently and follow the paint manufacturer's instructions.
If a repair would involve sanding or scraping paint in a U.S. home built before 1978, consider lead-safe precautions first. EPA notes that renovation activities that disturb old painted surfaces can create hazardous lead dust. Its updated 2026 guidance for lead-safe DIY renovation explains how to reduce that risk. Simple wet cleaning that does not disturb the paint is a different situation; the warning becomes important when you move into sanding, scraping, or other surface preparation.
A good result is not only stain removal: the paint should also keep its original color and sheen.
Common Beginner Mistakes to Avoid
Scrubbing harder because the line is still visible. Extra pressure can burnish flat paint long before it removes a deep stain.
Skipping the hidden test. A cleaner that works on one wall can change the color or sheen of another paint.
Using a soaking-wet sponge. More water does not mean more cleaning power, and it can leave streaks or affect drywall paper.
Using a Magic Eraser as the first step. Melamine foam can be effective, but its abrasive action makes it an escalation tool.
Jumping straight to acetone or nail polish remover. Strong solvents can attack the coating itself.
Drawing over the wall mark with another dry erase marker. That trick can work on a nonporous whiteboard because fresh dry-erase solvent can re-wet old ink. A painted wall is not a whiteboard, and adding more ink can enlarge the stain.
Judging the result while the wall is wet. Let the area dry before deciding whether you need another pass.
Quick Checklist
Identify the paint sheen if possible.
If the wall was recently painted, check the coating's cure and washability guidance.
Test water and your chosen cleaner in a hidden spot.
Start with a barely damp microfiber cloth.
Move to mild dish soap only if needed.
Choose one carefully tested escalation for stubborn residue; do not automatically stack multiple aggressive methods.
Rinse with a clean damp cloth and dry.
Stop if the paint changes sheen, color, or texture.
Bottom Line
For a beginner, the best approach is controlled escalation: water first, mild soap second, then a carefully tested stronger option only if the wall finish can tolerate it. The objective is not simply to make the blue or black line disappear. The better outcome is a wall that looks unchanged once it dries. Flat paint deserves the most restraint; satin and semi-gloss usually give you more cleaning margin. If the marker has penetrated the coating or the paint begins to change, stopping and touching up the finish is often safer than continued scrubbing.