Home
» INTERNET
»
How to Get Hard Wax Out of Clothes Without Setting the Stain
How to Get Hard Wax Out of Clothes Without Setting the Stain
Hard wax on clothing is a two-part problem: first you need to remove the solid wax sitting on or between the fibers, then you need to deal with any oily, resinous, or colored residue left behind. A good result is not simply “the lump is gone.” The fabric should feel normal, show no raised or greasy patch, and look unchanged in color and texture after it has dried.
This guide focuses on hard depilatory wax—the stripless wax used for hair removal. That matters because formulations vary. For example, one current hard-wax formula from Sally Hansen lists glyceryl rosinate, paraffin, beeswax, and other ingredients, while other products use different resin or polymer systems. That means no single solvent or temperature can be assumed safe for every wax and every garment. The safest starting point is mechanical removal, gentle heat only when the care label allows it, a fabric-safe pretreatment, and laundering according to the garment label.
The fabric begins fuzzing, stretching, or snagging
During heat transfer
Wax marks appear on the absorbent paper and get lighter with each clean section
No transfer occurs, the fabric looks shiny, or the wax becomes gummy and spreads
After pretreatment
The patch feels less slick and the remaining shadow is smaller
Color lifts from the garment or the area develops a ring
After washing and air-drying
No stiff spot, oily halo, color shadow, or fabric distortion remains
Any visible or greasy residue remains; repeat treatment before machine drying
That last point is important. The American Cleaning Institute advises checking a stain before putting the garment in a dryer because dryer heat can make a remaining stain harder to remove.
Step 1: Identify the wax and read the care label
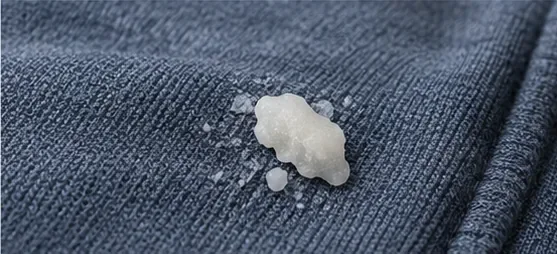
A raised, hardened wax deposit is the easiest stage to remove mechanically; note the fabric texture and any color change before treatment.
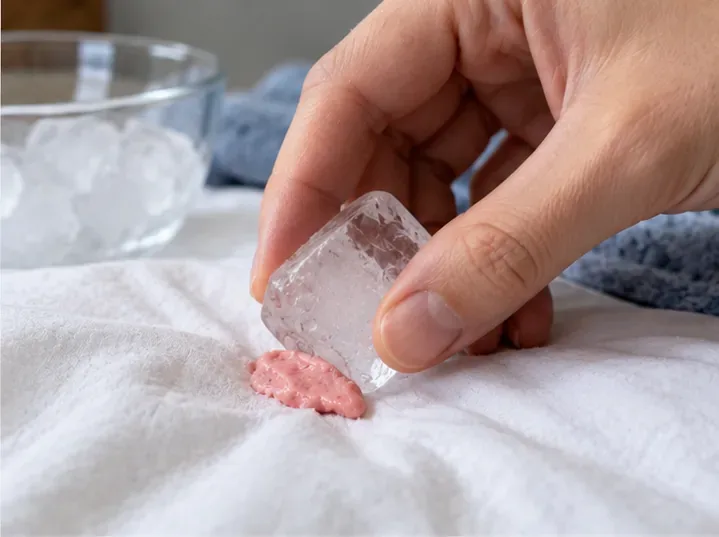
Let the wax become fully firm before handling it. If the spill is still soft, touching or rubbing it can push material farther into the weave. For a thick deposit, a cold pack or a bag of ice placed over the spot can help it become more brittle, but keep moisture contained rather than soaking the garment.
Then read the care label. The Federal Trade Commission’s Care Labeling Rule requires covered apparel to carry regular-care instructions, including relevant washing, drying, ironing, bleaching, and warning information. If the label says “do not iron,” “dry clean only,” or otherwise restricts heat or washing, do not override that instruction just because wax is present.
Quality check: before proceeding, you should know whether the garment can be washed, whether ironing is allowed, and whether any bleach is prohibited. If you cannot determine that, the lower-risk option is professional cleaning.
Step 2: Remove as much hardened wax as possible
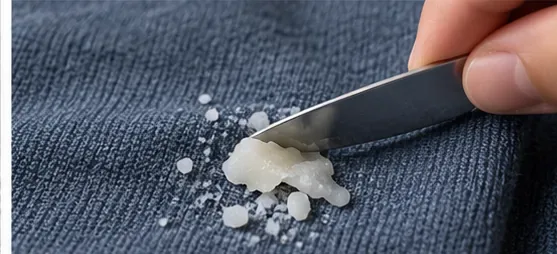
Use a dull edge and shallow angle to lift hardened wax without cutting or aggressively scraping the fibers.
Place the garment on a flat surface and gently lift off the thickest wax with the edge of a spoon, a dull butter knife, or a plastic card. Work from the outside of the deposit toward the center. The goal is to remove thickness, not to scrape the fibers perfectly clean.
Both the American Cleaning Institute and the University of Georgia recommend scraping off surface wax with a dull edge before applying heat. That order matters: the less wax left on the surface, the less material can melt and spread.
Quality check: stop scraping once only a thin film or embedded residue remains. If the fabric starts to pill, fray, or show lighter abrasion marks, mechanical removal has reached its limit.
Step 3: Transfer embedded wax with gentle heat—only if the label allows it
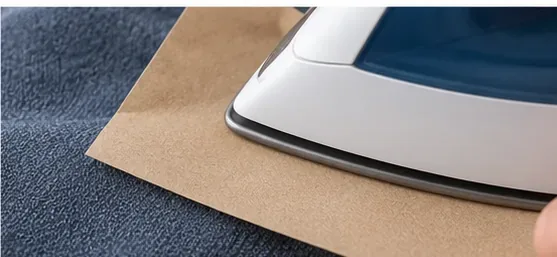
When the care label permits ironing, gentle heat and clean absorbent paper can draw remaining wax out of the fibers.
Place plain, clean, absorbent paper above and below the stained area. White paper towels are useful because they make wax transfer easy to see. Set the iron to a warm or low setting that is within the garment’s care instructions. Press briefly rather than holding the iron in one place for a long time.
The ACI guidance specifically calls for placing the stain between clean paper towels and pressing with a warm iron, replacing the towels as they absorb wax. University of Georgia guidance likewise calls for a warm iron, not a hot one. Do not increase the temperature in an attempt to “force” a faster result.
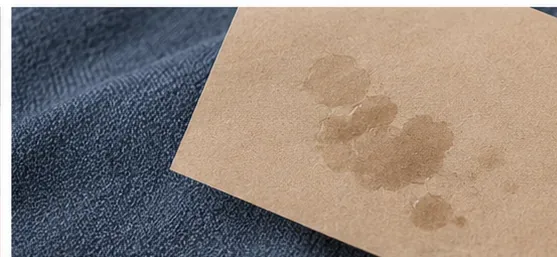
Quality check: the paper should begin showing translucent or oily wax marks. The fabric itself should not become glossy, flattened, scorched, or discolored.
Step 4: Move to clean paper and judge whether heat is still helping
Visible wax marks on the absorbent paper show that material is transferring out of the garment; move to a clean section before pressing again.
Shift to a clean section of paper after each transfer. Continue only while each pass removes noticeably more wax. This is a practical stopping rule rather than a universal number of passes, because hard-wax formulas, spill size, fabric thickness, and iron temperatures vary.
If the residue stops transferring, or if it becomes sticky and spreads, stop using heat. Some depilatory hard waxes contain resins or polymers as well as waxes, so a method that works quickly on paraffin may not behave the same way on a salon wax formula.
Quality check: switch methods when new paper stays nearly clean or when the garment begins reacting poorly to heat. Repeated pressing is not a measure of success by itself.
Step 5: Treat the remaining oily or colored shadow
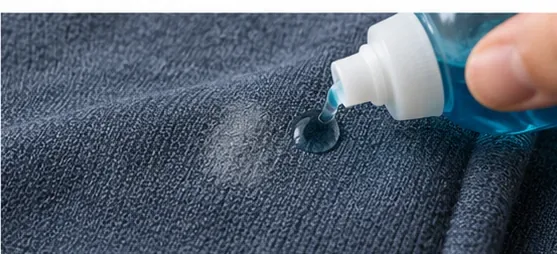
Once the bulk wax is gone, apply a fabric-safe prewash stain remover or liquid laundry detergent to the remaining residue.
After the solid wax has been removed, you may still see a darker oily halo, a colored shadow, or a slightly stiff area. Apply a prewash stain remover or liquid laundry detergent that is suitable for the garment, following the product directions. Test the product first on an inconspicuous seam if you are unsure about colorfastness.
Avoid improvising with strong solvents, acetone, or alcohol unless the garment manufacturer or a qualified textile-care source specifically supports that chemical for the fiber. University of Georgia’s textile guidance notes that some solvents and alcohol treatments can damage particular synthetic fibers. A method that dissolves wax is not automatically safe for the cloth.
Quality check: after pretreatment, the fabric should not lose dye, develop a sharp-edged ring, or change texture. If any of those occur, rinse as appropriate for the care label and stop home treatment.
Step 6: Work the pretreatment gently
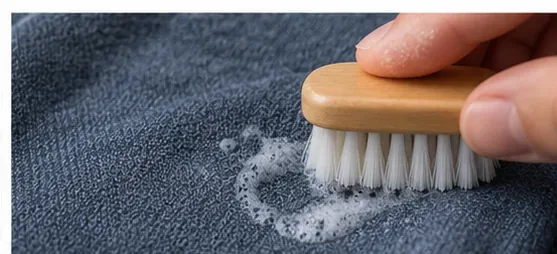
Use light pressure when working pretreatment into sturdy washable fabric; delicate fabrics are better blotted than scrubbed.
For sturdy washable fabrics, gently work the pretreatment into the stained area with your fingers or a very soft brush. For knits, loosely woven fabrics, or anything prone to abrasion, blotting is safer than brushing. Follow the pretreatment product’s contact-time instructions rather than leaving it on indefinitely.
This stage is meant to loosen the remaining oily or resinous material so laundering can carry it away. Aggressive scrubbing can create a lighter patch that is more visible than the original stain.
Quality check: the fabric should retain its original nap, weave, and color. If the treated patch starts looking fuzzy, polished, or stretched, stop mechanical agitation.
Step 7: Launder according to the garment label
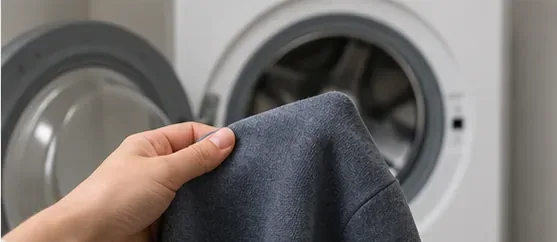
Wash the garment only after most wax has been removed, using the cycle and water temperature allowed by the care label.
Wash the item according to its care label, using detergent and the warmest water that is safe for that fabric. Do not assume hotter is always better. FTC labeling rules make clear that wash temperature and other care limitations exist because harsher procedures may damage certain garments.
If colored wax has left a dye shadow, ACI guidance says a bleach that is safe for the fabric may be used. The key phrase is safe for the fabric: follow both the garment label and the bleach product directions. Do not use chlorine bleach merely because a stain remains.
Quality check: after washing, inspect the wet garment before it enters a machine dryer. If a dark halo, colored patch, or waxy feel remains, repeat the appropriate pretreatment rather than adding dryer heat.
Step 8: Air-dry, inspect, and decide whether the result is acceptable
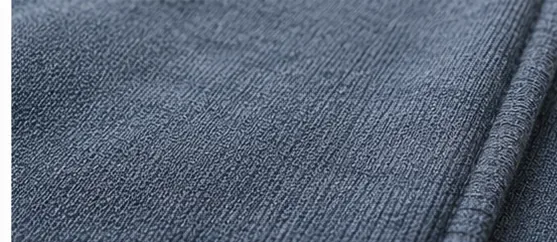
A satisfactory result has an even surface with no raised wax, oily halo, obvious dye shadow, or heat damage.
Air-dry the garment so you can judge the true result without exposing a remaining stain to dryer heat. Check the area in good light and compare it with the surrounding fabric from several angles. Run your fingertips lightly over the spot.
You are looking for four things: no raised wax, no greasy feel, no visible color shadow, and no change in texture caused by scraping or heat. A faint mark that is only visible while the fabric is wet may disappear when dry; a stiff, shiny, or oily patch after drying usually means residue remains.
Quality check: if the stain is improving with each cycle of treatment, another careful round may be reasonable. If there is no meaningful improvement, or the fabric is starting to change, stop. Repeating a damaging method more times rarely improves the final appearance.
When should you skip heat or home treatment?
The care label prohibits ironing or washing. Follow the garment label rather than the generic wax-removal method.
The fabric is delicate, structured, coated, embellished, or expensive. A professional cleaner can evaluate the fiber, finish, lining, and trim together.
The wax has a strong dye that remains after the wax itself is gone. At that point you are treating a dye stain, not simply wax.
The garment changes color or texture during a hidden-area test. Stop before treating a larger visible area.
The residue becomes stickier under heat instead of transferring. This can happen with formulas that contain resins or polymers; move to fabric-safe pretreatment rather than hotter ironing.
Common mistakes that reduce the quality of the result
Using high heat from the start
More heat can soften more wax, but it also increases the risk of spreading residue or damaging heat-sensitive fibers and finishes. “Warm” heat in published wax-stain guidance should not be interpreted as the hottest iron setting.
Trying to scrape every last trace away
Scraping is useful for bulk removal. Once the remaining material is inside the weave, repeated scraping can abrade the surface while doing little to remove the embedded residue.
Putting the garment in the dryer because it looks almost clean
ACI recommends repeating stain treatment rather than drying a garment while a stain remains. Air-drying first gives you a safer inspection point.
Assuming all hard wax is the same
“Hard wax” describes how the depilatory product is used and removed, not one universal chemical recipe. A current Sally Hansen stripless hard-wax product page, for example, lists rosinate, paraffin, beeswax, and polymer-related ingredients in its formula. Other manufacturers use different blends. If you know the exact product that spilled, its ingredient list and manufacturer guidance can help explain why the residue behaves differently from ordinary candle wax.
What this method cannot guarantee
No home method can guarantee complete removal without knowing the garment fiber, dye, finish, care restrictions, wax formulation, spill temperature, and how long the residue has been present. Colored wax can leave a separate dye stain even after the wax is gone, and some fabrics can be permanently altered by the original hot spill itself.
The practical goal is therefore controlled improvement: remove the bulk wax without damaging fibers, transfer what will safely transfer, treat the remaining residue with a fabric-compatible product, and stop when the cleaning method begins posing more risk than the stain. If the garment is valuable or the result is not clearly improving, professional cleaning is the better next step.