Home
» INTERNET
»
How to Get Water Out of a Charger Port Safely: What to Do and When to Stop
How to Get Water Out of a Charger Port Safely: What to Do and When to Stop
A wet charging port is a problem you solve by preventing damage first, not by forcing the water out as fast as possible. The goal is to reach a point where the port and cable are dry, any liquid-detection warning stays gone, and wired charging works normally without intermittent connections or heat. If those signs do not appear, the right move is more drying time or professional service—not a more aggressive drying trick.
This guide applies broadly to modern phones with USB-C or Lightning ports, but drying behavior and moisture-detection systems vary by model. Apple, Google, and Samsung all advise disconnecting wired charging when moisture is detected. Their official timing guidance also differs, which is why the safest general rule is to follow your phone maker's warning and support instructions rather than relying on one universal countdown.
What should you do first if the charger port gets wet?
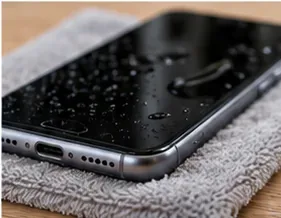
Disconnect the charging cable from the phone immediately. If the cable is connected to a wall adapter or other powered accessory, disconnect that end too when it is safe to do so. Charging through a wet connector can contribute to corrosion and permanent connector damage. Apple's current support guidance specifically warns that wet Lightning or USB-C pins can corrode, while Samsung says its moisture-protection system blocks charging to help avoid corrosion.
If the phone was merely splashed and is otherwise functioning normally, focus on the port, cable ends, and outside surfaces. If the device was submerged, has visible damage, becomes unusually hot, shuts down unexpectedly, or has other functions that stop working, this simple drying process may not be enough.
How to get water out of a charger port
1. Stop wired charging and remove the cable
Disconnect wired power first; the immediate goal is to prevent charging through a wet connector.
Do not keep reconnecting the charger to see whether it works yet. Put the charger and cable aside so the cable end can dry separately. If you are handling a powered adapter, make sure your hands are dry.
On iPhone, a liquid-detection alert can disable charging and accessory connections until the connector, cable ends, and accessory are dry. Apple documents this behavior in its official liquid-detection support guide. Google similarly tells Pixel users to unplug charging accessories when the USB-C port reports liquid or debris in its official Pixel troubleshooting guidance.
2. Let gravity remove free water
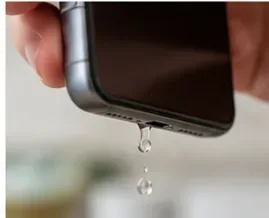
Hold the port downward so gravity can help excess liquid leave the opening without pushing anything inside.
Turn the phone so the charging port faces down. A gentle tap against your hand, or a light downward shake, can help free visible droplets. Keep the motion controlled. Apple recommends gently tapping the iPhone against your hand with the connector facing down, and Samsung advises gentle shaking to help remove moisture.
You are not trying to force every trace of moisture out in one motion. If droplets stop falling, move on to passive drying rather than shaking harder.
3. Wipe only the outside surfaces
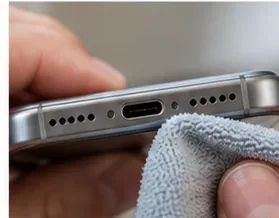
Use a soft, dry cloth on the exterior only; do not push fabric, paper, or swabs into the connector.
Use a clean, soft, lint-free cloth to remove water from the phone's exterior and the area around the opening. Keep the cloth outside the port. Apple explicitly says not to insert foreign objects such as cotton swabs or paper towels into the connector, and Samsung also warns against inserting objects into a wet charging port.
A good result at this stage is simple: no standing water on the outside of the phone and no droplets collecting around the port opening. This does not prove the inside is dry.
4. Place the phone somewhere dry with the port unobstructed
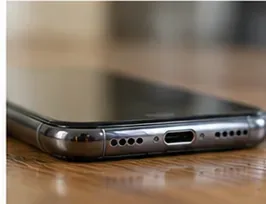
Leave the phone in a dry location where the port is exposed to room air rather than covered or sealed.
Set the phone in a dry, well-ventilated place. Keep the connector unobstructed and, where practical, oriented so moisture can drain rather than collect deeper in the opening. Google tells Pixel owners with a wet USB-C port or cable to turn the phone off and place the phone and cable on a flat surface to dry at room temperature.
Avoid enclosing the phone in a bag of rice. Apple specifically warns against rice because small particles can damage the connector. A sealed container is also not automatically better than open airflow unless your device maker specifically recommends it.
5. Use cool, indirect airflow and give it enough time
Cool, indirect airflow can support evaporation; avoid heat and do not blast compressed air into the port.
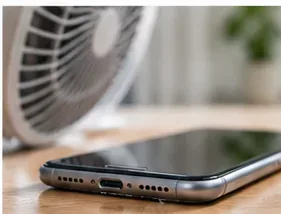
Normal airflow is useful. A fan positioned to move room-temperature air around the phone can help evaporation. Do not use a hair dryer, heater, oven, or other external heat source. Apple also says not to use compressed air, and Samsung's current water-exposure guidance warns against compressed air and external heat.
There is no single drying time that fits every phone and every spill. Apple says an iPhone can be tried again after at least 30 minutes, but if the alert returns, drying may take up to 24 hours. Samsung says water in a supported water-resistant Galaxy charging port will often evaporate in approximately 1 to 2 hours. Google tells Pixel users to wait until the system indicates the USB port can be used again. Those differences matter: treat your manufacturer's alert and instructions as the deciding signal.
If your phone supports wireless charging, that may be an option while the wired port dries. Apple and Samsung both allow wireless charging on supported devices provided the phone itself, especially the surface touching the wireless charger, is dry. Do not place a wet phone on a charging pad.
6. Inspect the port without putting anything inside
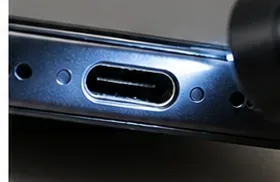
Use a bright light to inspect the opening for visible moisture, corrosion, scorching, or debris without inserting a tool.
When the outside looks dry and enough time has passed, inspect the port under a bright light. You are looking for obvious moisture, residue, lint, discoloration, corrosion, bent contacts, scorching, or melting. Do not use a toothpick, pin, brush, swab, tissue, or metal tool to probe a wet connector.
If the port looks burned, melted, badly corroded, or physically damaged, stop here. Google's Pixel guidance directs users with a port that appears burned, melted, or corroded toward warranty or authorized repair options. Samsung also recommends service if normal drying steps do not restore charging.
7. Check the cable end as carefully as the phone
The cable connector must be dry too; a wet or damaged cable can trigger another warning or contaminate the port again.
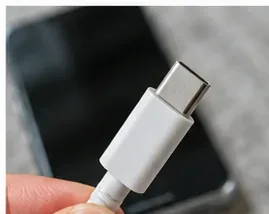
A phone port can be dry while the cable end is still damp. Inspect the charging plug, cable jacket, and power adapter for moisture, residue, bent contacts, discoloration, or damage. If one particular cable repeatedly triggers a liquid warning after the phone is dry, stop using that cable and follow the accessory manufacturer's guidance.
Apple notes that a repeated alert with one particular cable or accessory can indicate that the accessory itself is damaged. This is an important quality check because reconnecting a wet cable can put moisture back into a port that had already dried.
8. Test wired charging only after the port and cable are dry
Reconnect a dry cable only after the phone has had enough drying time and no visible moisture remains.
Reconnect a known-good, dry cable only when the port looks dry and the manufacturer's recommended waiting period or device notification allows it. Watch what happens for the first few minutes.
A successful result is more than seeing a battery icon. The moisture warning should stay gone, the connection should remain stable when the phone is left still, and the connector should not become unusually hot. If the liquid warning returns, disconnect immediately and resume drying. If the warning is gone but charging cuts in and out, the cable or port may still be contaminated or damaged.
How do you know the charger port is actually dry?
Use several signs together rather than relying on appearance alone:
No visible droplets, fogging, or damp residue are present in or around the connector opening.
The charging cable end is also dry and undamaged.
The phone no longer displays a liquid, moisture, or USB-port warning when a dry accessory is connected.
Wired charging remains stable instead of repeatedly connecting and disconnecting.
There is no unusual heat, burning smell, discoloration, or visible corrosion at the connector.
Passing all of these checks is a better outcome measure than simply waiting a fixed number of minutes. Moisture can remain under connector pins even when the opening looks dry, which is why Apple tells users to continue air-drying if the alert reappears.
What should you never use to dry a charging port?
Avoid methods that can move water deeper, damage contacts, leave debris, or overheat the device:
Rice: Apple warns that rice particles can damage an iPhone connector.
Hair dryers, heaters, or direct high heat: external heat can damage the phone and is specifically discouraged by Apple and Samsung.
Compressed air: Apple and Samsung caution against it in their current liquid-exposure guidance.
Cotton swabs, paper towels, pins, toothpicks, or other objects: pushing material into the port can damage contacts or leave fibers behind.
Repeated test charging while the warning is still active: the warning exists to prevent electrical contact while moisture is detected.
When should you stop trying to dry it yourself?
Switch from home drying to manufacturer support or a qualified repair service when any of the following applies:
The moisture warning keeps returning after the phone has had the full drying time recommended by its manufacturer.
The port is visibly corroded, burned, melted, bent, or otherwise damaged.
Charging works only intermittently with multiple known-good cables.
The phone became hot, shut down unexpectedly, or developed speaker, microphone, display, battery, or touch problems after liquid exposure.
The phone was deeply submerged, exposed to salt water or another liquid that can leave conductive or corrosive residue, or has cracks that may have compromised its water resistance.
Samsung's official moisture-in-charging-port guidance advises service when normal drying steps do not work. For broader water exposure, follow the exact instructions for your model rather than assuming a water-resistance rating guarantees that no internal liquid entered the device.
Bottom line
The safest way to get water out of a charger port is deliberately uneventful: unplug the cable, point the connector down, remove water from the exterior, give the port cool airflow and time, inspect without inserting anything, make sure the cable is dry too, and test only when the phone's own warning system and manufacturer guidance say it is reasonable.
The result you want is a dry-looking connector, no recurring moisture alert, and stable wired charging without heat or intermittent contact. If you do not reach that result, more force is not the answer. Continue drying within the manufacturer's recommended window or move to professional inspection.