Home
» INTERNET
»
How to Make Makeup Brushes Dry Faster Without Damaging Them
How to Make Makeup Brushes Dry Faster Without Damaging Them
The fastest safe way to dry makeup brushes is to remove as much water as possible before air-drying, then keep the brushes flat, separated, and exposed to cool room airflow. Gently squeeze—not twist—the wet bristles, blot them thoroughly with a clean towel, reshape the brush head, and lay the brush flat. If possible, let the bristle tips extend beyond the edge of a counter so air can reach them without water draining into the ferrule, the metal section that joins the bristles to the handle.
This approach is faster because the towel does the heavy work first: every drop you remove mechanically is water that no longer has to evaporate. It is also consistent with dermatologist and manufacturer care guidance. The American Academy of Dermatology recommends squeezing out excess moisture and laying brushes flat with the tips hanging off a counter edge, while M·A·C advises squeezing, towel-drying, reshaping, and allowing brushes to dry naturally. See the American Academy of Dermatology brush-cleaning guidance and M·A·C brush care instructions.
The quick answer: what actually makes brushes dry faster?
Method
When it helps most
Main caution
Gently squeeze out water
Every brush after rinsing
Do not wring, twist, or pull the bristles
Blot with a clean absorbent towel
Dense foundation, buffing, and powder brushes
Press rather than scrub aggressively
Dry flat in a single layer
Routine deep cleaning
Do not stand wet brushes upright
Add cool room airflow
Humid rooms or dense brushes that stay damp
Avoid heated airflow
Use a purpose-built drying rack
Large brush collections
Follow the rack manufacturer's positioning instructions
Use a quick-clean or dry-clean method
Color changes or light between-use cleanup
Not a replacement for periodic deep washing
If you only remember one principle, make it this: speed up moisture removal, not temperature. Heated tools may seem faster, but official e.l.f. drying guidance specifically says not to use a hair dryer or heat tools. The same guidance recommends letting brushes become completely dry before use. See e.l.f.'s official makeup-brush cleaning and drying instructions.
Four steps to make makeup brushes dry faster
1. Gently squeeze out as much water as you can
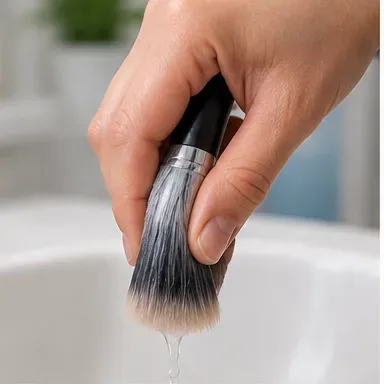
After the final rinse, hold the brush so the bristles point downward. Using clean fingers or a clean absorbent towel, gently press the bristles together from near the base of the fibers toward the tip. Do not twist the bundle as if you were wringing out a cloth.
This is especially useful for dense foundation and buffing brushes because water can remain trapped deep inside the fiber bundle. e.l.f. recommends a gentle squeeze with a clean microfiber towel or paper towel and specifically advises against wringing or twisting. The American Academy of Dermatology likewise recommends squeezing out excess moisture before the brush is laid out to dry.
A freshly washed face brush is held bristles-down while excess water is gently squeezed from the fibers without twisting them.
2. Blot the brush thoroughly with a clean towel
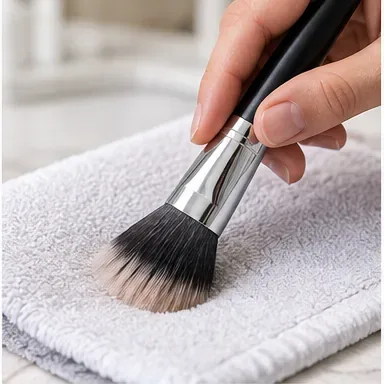
Next, press the damp bristles into a clean, dry, absorbent towel. Rotate the brush slightly and repeat on a dry section of the towel until it is no longer leaving a noticeably wet patch. For a large, dense face brush, you can wrap the towel loosely around the bristles and press gently.
Blotting is different from rubbing. Vigorous back-and-forth scrubbing can distort a freshly washed brush head, while pressing lets the towel wick away water without unnecessary mechanical stress. M·A·C's care instructions call for carefully squeezing excess water, wiping on a soft towel, and arranging the fibers back into their original shape before drying.
A damp face brush is pressed lightly into a clean towel so the fabric can absorb residual moisture before air-drying begins.
3. Reshape the bristles and lay brushes flat
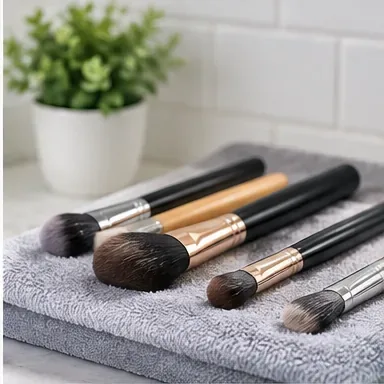
Use your fingers to restore each brush head to its normal shape, then place the brushes flat in a single layer. The American Academy of Dermatology recommends laying them on a towel with the tips hanging off the edge of a counter. That arrangement helps air reach the bristles while preventing water from running down toward the handle.
If your setup does not allow the tips to overhang safely, laying brushes flat on a fresh towel is still consistent with care guidance from M·A·C, Real Techniques, and other brush manufacturers. Keep the brush heads separated rather than stacking damp brushes on top of one another. Real Techniques' deep-cleansing instructions end with rinsing, reshaping, and laying the tool flat to dry. See the official Real Techniques care instructions.
Clean brushes lie flat in a single layer on a fresh towel, keeping wet brush heads from being stacked or stored upright.
4. Increase cool airflow, not heat
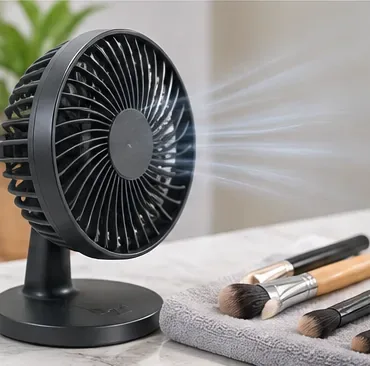
If the room is humid or still, gentle room-temperature airflow can help evaporation. A practical option is to place a small fan several feet away on a low setting so air moves through the drying area rather than blasting the bristles at close range. This is an airflow technique, not a requirement from a particular brush manufacturer.
Keep the air cool. Do not use a hair dryer, space heater, heated vent, or other hot-air shortcut. e.l.f.'s current care guide says not to use a hair dryer or heat tools, while M·A·C instructs users to let brushes dry naturally. If a brush has a wooden handle, glued ferrule, specialty coating, natural hair, or unusually delicate fibers, the manufacturer's own care directions should take priority over any general drying shortcut.
A small tabletop fan moves cool room air across brushes resting on a towel, increasing ventilation without applying heat.
How long do makeup brushes take to dry?
There is no single reliable drying time for every brush. Brush size, fiber density, room humidity, how thoroughly you blotted it, and the amount of water retained near the center of the brush head all matter.
As a useful manufacturer-specific reference, e.l.f. lists approximate drying windows of 4–6 hours for small eye brushes, 6–8 hours for medium face brushes, 8–12 hours for dense foundation brushes, and 12–24 hours for large powder brushes. Those are guidelines, not guarantees for every brand or climate. A very dense brush in a humid bathroom may take longer.
Sigma's Dry'n Shape Tower instructions provide another useful condition-specific benchmark: the company says brushes placed in that drying system should remain there for 6–8 hours or overnight until completely dry, and notes that drying time depends on brush size and bristle density. See Sigma's official Dry'n Shape Tower instructions.
What should you avoid if you want faster drying without damage?
Do not stand wet brushes upright in a cup. The American Academy of Dermatology warns that this can let water run down the brush and loosen the glue joining the head to the handle.
Do not use a hair dryer or other heat tool. e.l.f. explicitly advises against it in its drying instructions.
Do not put damp brushes into a closed makeup bag or container. e.l.f. notes that enclosed storage can lengthen drying time and may contribute to mold.
Do not twist or wring the bristles. Gentle squeezing and blotting remove water with less distortion.
Do not use the brush while the center is still damp. The outside of a dense brush can feel dry before the inner fibers are ready.
If you need a brush again very soon
Sometimes the real problem is not overnight drying—it is needing the same brush for another color or client in a short time. In that situation, a full water wash may not be the right tool for the immediate job.
For light between-use cleaning
A fast-drying brush-cleanser product can reduce downtime compared with a full rinse. M·A·C says its Brush Cleanser is designed to clean and condition fibers and help shorten drying time. Follow the product directions and still wait until the brush is fully dry before putting it back on skin. See the official M·A·C Brush Cleanser page.
For switching dry powder colors
A liquid-free dry brush cleaner can remove loose pigment without wetting the brush at all. e.l.f.'s Dry Brush Cleaner, for example, uses a reusable sponge and is positioned for quick color changes and between-cleaning use without soap or water. That can eliminate drying time for a light pigment switch, but it is not the same as washing away accumulated oils, skin debris, and residue. See the official e.l.f. Dry Brush Cleaner instructions.
How often should brushes be fully washed?
Drying faster should not become a reason to skip proper cleaning. The American Academy of Dermatology recommends washing makeup brushes every 7 to 10 days and notes that dirty brushes can accumulate product residue, dirt, oil, and bacteria. People who use brushes professionally, share tools, work with cream products, or have specific hygiene protocols may need stricter routines.
If you clean frequently, it can be useful to rotate between two similar foundation or powder brushes. One can finish air-drying while the other remains available. That does not make an individual brush dry faster, but it removes the pressure to use a brush before it is fully dry.
How to tell when a brush is actually dry
Check more than the surface. e.l.f.'s drying guidance describes a fully dry brush as light and fluffy, with freely moving bristles, no cool sensation when touched, no musty smell, and the original brush shape restored. Dense face brushes deserve extra attention because moisture can remain inside the center after the outer fibers feel dry.
A simple self-check is to press clean fingertips gently into the center of the brush head. If it feels cool, clumped, heavy, or noticeably different from a dry brush of the same type, give it more time. Do not seal it in a case until it is fully dry.
Bottom line
To make makeup brushes dry faster, focus on water removal and airflow rather than heat: gently squeeze out excess water, blot thoroughly with a clean towel, reshape the bristles, lay the brushes flat, and give them cool room ventilation. Dense brushes will still take longer than small eye brushes, and no method can guarantee one universal drying time.
For most people, the biggest improvement comes from better blotting before the brush ever reaches the drying surface. If you need a tool immediately for a color change, use an appropriate quick-clean or dry-clean method instead of forcing a freshly washed brush to dry with heat.