Home
» INTERNET
»
How to Remove a Kitchen Sink Drain: Basket Strainer, P-Trap, or Disposal Flange?
How to Remove a Kitchen Sink Drain: Basket Strainer, P-Trap, or Disposal Flange?
Removing a kitchen sink drain can mean three very different jobs: taking off the P-trap, removing the basket-strainer assembly from the sink itself, or removing a garbage-disposal flange and mounting system. The right method depends on what you actually need to repair. If you choose the wrong target, you can turn a simple clog-clearing job into a resealing project, or you can start dismantling a powered disposal when all you needed was access to the trap.
This guide focuses on those choices and tradeoffs. It shows the common removal sequence for a conventional kitchen basket strainer, explains when stopping at the P-trap is smarter, and gives a separate path for sinks with garbage disposals. Manufacturer references were checked in September 2026, including Moen sink-strainer instructions, Oatey sealing guidance, and current InSinkErator disposal-removal guidance.
First decide what you actually need to remove
Your goal
Usually remove
Why this is the better scope
Main tradeoff
Retrieve an object or clear a clog below the sink
P-trap only
It gives direct access to the drain path without disturbing the seal at the sink.
You may still need to remove more plumbing if the blockage is farther downstream.
Replace a leaking or corroded basket strainer
Tailpiece plus basket-strainer assembly
The leak may be at the flange seal, gasket, or retaining hardware.
You must reseal the drain correctly before using the sink again.
Replace a garbage-disposal sink flange
Disposal, mounting assembly, and flange
The disposal is mechanically attached to the sink flange.
This adds electrical safety and the weight of the disposal to the job.
Replace most of the under-sink drain
P-trap, tailpiece, and possibly strainer
Useful when several fittings are damaged, badly corroded, or misaligned.
More joints mean more opportunities for alignment problems and leaks.
If the sink drains slowly but the flange does not leak, start with the P-trap. Removing a sound basket strainer just to reach a clog creates unnecessary work. If water appears around the rim of the drain body where it meets the sink, or the strainer body itself is cracked or badly corroded, removing the basket-strainer assembly makes more sense.
What type of kitchen sink drain do you have?
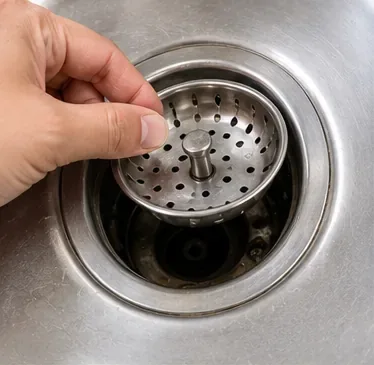
Start by removing the loose basket or stopper so you can see what type of drain assembly is underneath.
Lift out the removable basket or stopper and look at the drain body. Then look underneath the sink. The hardware below tells you more than the shiny flange above.
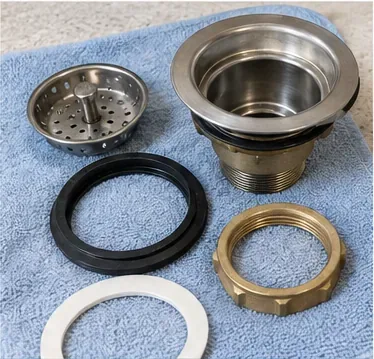
Large locknut basket strainer: A broad nut under the sink clamps the drain body to the basin, usually with a rubber gasket and friction washer between the nut and sink.
Center-screw or cup-style strainer: Some designs use a bolt or screw through the upper strainer cup to pull an upper and lower cup together. Moen's M8633 instructions, for example, describe a chrome-plated brass bolt joining the two strainer cups.
Garbage-disposal flange: The disposal hangs from a dedicated mounting assembly rather than a normal basket-strainer locknut. Removing only the visible flange from above is not the correct first step.
That distinction determines your tools. A large locknut may require tongue-and-groove pliers, a large adjustable wrench, or a purpose-made basket-strainer wrench. A center-fastener design may need only a screwdriver and pliers. A disposal mount may require a flathead screwdriver, the manufacturer's wrench or an Allen wrench, and safe electrical disconnection.
Before starting: a short preparation checklist
Do not run water while the drain piping is disconnected.
Empty the cabinet and place a bucket, shallow pan, and towels below the trap.
Wear eye protection when working under the sink; dirty water and debris can fall when a joint opens.
Take a phone photo of the existing pipe alignment, washers, and connections before disassembly.
If a garbage disposal is present, switch off its electrical circuit or unplug it before touching the mounting system.
Have replacement slip-joint washers and the correct drain sealant available if you expect to reinstall the drain.
How to remove a standard kitchen sink basket strainer
1. Disconnect only as much drain piping as necessary
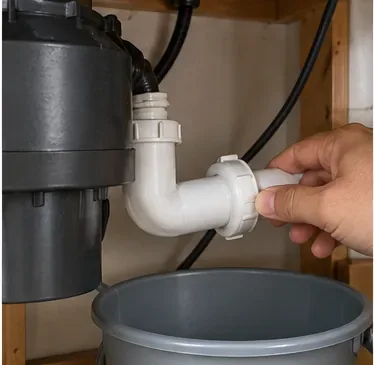
Place the bucket directly under the P-trap. Loosen the slip nuts that block access to the basket strainer's tailpiece. Plastic slip nuts can often be loosened by hand; older or stubborn fittings may need adjustable pliers. Use moderate pressure. Cracking an old plastic nut creates a new repair that was not part of the original job.
If your goal is only to clean the trap or retrieve an item, this may be the place to stop. Pull the trap down carefully, empty it into the bucket, and inspect it. There is no benefit in breaking the sink-to-strainer seal if the drain body itself is not the problem.
Use a bucket before disconnecting any drain piping. A disposal-equipped sink follows a different removal path from a standard basket-strainer sink.
The photo above shows why identifying the configuration matters: a garbage disposal changes the connection under the sink. On a conventional basket strainer, you normally disconnect a tailpiece. On a disposal, the discharge tube connects to the disposer body and the motor unit must be freed from its mounting assembly before the sink flange can be removed.
2. Identify the retaining system before turning anything
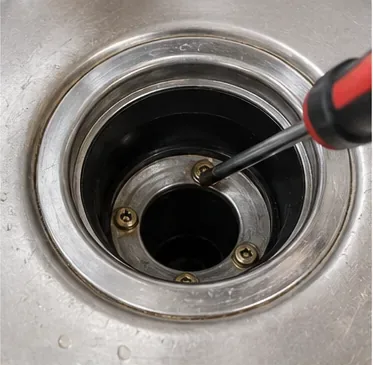
Some drain designs are retained by screws or a center fastener. Identify the fastening system before applying force.
Look for a large locknut under the basin, a center screw or bolt, or another manufacturer-specific fastener. Do not assume the metal ring visible from the top is meant to be pried out. Most kitchen drain flanges are clamped to the sink from below or drawn together by a fastener.
A screw-retained system can be easier to disassemble because you do not need to rotate a large corroded nut. The tradeoff is that damaged screw heads or a seized center bolt can be difficult to remove without harming the assembly. If the fastener begins to strip, stop and switch to a better-fitting driver rather than forcing it.
3. Loosen the locknut or center fastener
A common basket-strainer design uses a large retaining nut underneath the sink. Hold the upper flange steady while loosening it.
For a large-locknut basket strainer, hold the drain flange from above so it does not spin. A helper can be useful. From below, turn the retaining nut counterclockwise. The best tool depends on clearance: tongue-and-groove pliers work in many cabinets, while a basket-strainer wrench can grip the nut more evenly in tight spaces.
For a center-screw design, loosen the specified fastener instead. The Moen M8633 Deluxe Sink Strainer instructions show a design in which a central bolt joins the upper and lower strainer cups. That is mechanically different from a large-locknut strainer, so trying to treat both designs the same wastes effort and can damage the hardware.
If corrosion has frozen a metal locknut in place, penetrating oil and patient, controlled tool pressure are preferable to striking the sink or flange. Cutting a badly seized locknut can work as a last resort, but it carries a higher risk of damaging the sink finish or surrounding plumbing. On an enameled, stone, composite, or otherwise damage-sensitive sink, hiring a plumber can be the lower-risk option.
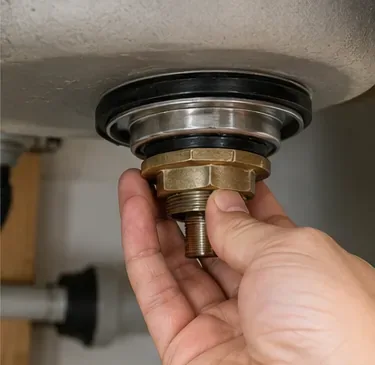
4. Remove the gasket, friction washer, and lower hardware
Once the retaining hardware is loose, support the drain body so parts do not drop into the cabinet. Remove the nut, friction washer, rubber gasket, and any lower cup in the order they come off. If the parts are going back in, keep them laid out in sequence.
Reusable hardware should be flexible, flat, and free of cracks. A hardened rubber gasket, distorted friction washer, cracked plastic nut, or heavily corroded metal part is a weak candidate for reuse. Saving a few dollars on a questionable gasket is rarely worth reopening the cabinet because the joint drips later.
5. Push or lift the drain body out of the sink
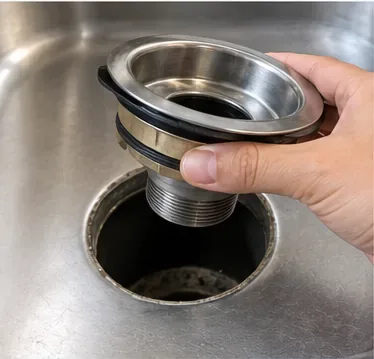
Once the retaining hardware and lower plumbing are free, the drain body can be pushed or lifted out of the sink opening.
With the lower hardware removed, push the drain body upward from below while lifting the flange from above. Old plumber's putty usually releases with steady pressure. Silicone may hold more firmly and can require careful separation around the flange edge.
A plastic putty knife or another nonmarring scraper is safer on many finishes than a metal screwdriver. If the flange will not move, recheck underneath for hardware you missed before increasing force.
6. Inspect the removed parts before deciding to reuse them
Keep the removed gasket, friction washer, nut, and drain body in order. Their condition helps determine whether reuse is sensible.
This is the practical decision point. Reusing a solid stainless-steel or brass strainer can make sense when the body is undamaged and the problem was simply an old seal. Replacing the assembly is usually more efficient when threads are stripped, the body is cracked, plating is badly deteriorated, or the retaining nut is deformed.
Also compare the new drain's tailpiece connection and drain-opening requirements before discarding the old parts. Similar-looking kitchen strainers can use different fastening systems, depths, and outlet arrangements.
7. Remove the old sealant without damaging the sink
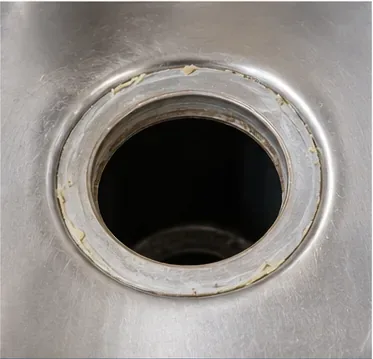
Old plumber's putty or silicone must be removed from the sink opening before a new seal is made.
Scrape away old plumber's putty or silicone from the drain opening, then clean and dry the surface. The goal is not just cosmetic cleanliness: leftover lumps can keep a new flange from sitting flat and create a leak path.
When you reinstall or replace the drain, do not automatically use plumber's putty just because the old installer did. Oatey's current basket-strainer FAQ says sealant compatibility depends partly on the sink material, notes that regular putty can stain some porous surfaces, and specifies silicone for its plastic strainers. See the Oatey basket-strainer sealing guidance. The drain manufacturer and sink manufacturer should take priority over a generic rule.
8. Stop at a clean opening if the drain is being replaced
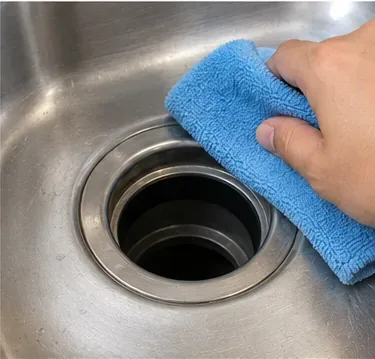
A clean, dry opening gives you a reliable starting surface for either a replacement drain or a careful reinstallation.
If removal was the entire goal, a clean, dry opening is the finish line. If you are reinstalling the same drain, use a new gasket when the old one is compressed, brittle, or questionable, apply the sealant specified for the sink and drain, tighten the assembly evenly, reconnect the tailpiece and P-trap, and test before putting items back into the cabinet.
If the sink has a garbage disposal
A disposal flange is not simply a basket strainer with a motor attached. The disposal must be supported and released from its mounting ring before the old mounting hardware and flange are removed. The electrical part of this job is the main tradeoff: a mechanically simple flange replacement becomes a higher-risk task if the disposer is hardwired or if you are not comfortable verifying that power is off.
InSinkErator's current replacement instructions say to turn off electrical power at the fuse box or circuit breaker, disconnect the drain trap and dishwasher connection if present, support the disposer while releasing it from the mounting assembly, and then remove the old mounting hardware and flange. Their instructions also call for removing the old putty and testing the finished connections for leaks. See InSinkErator's replacement-disposal instructions.
If the disposal is hardwired and removing it requires opening electrical connections, a plumber or electrician may be the better choice. There is little practical benefit in taking on electrical work solely to save a sound sink flange if the repair can be handled another way.
Which removal method is best for a stuck drain?
Problem
First choice
Why
When to change approach
Plastic slip nut will not turn
Hand pressure, then adjustable pliers
Least likely to crush or crack the nut
Replace the nut if it deforms or splits
Large metal strainer locknut is seized
Correct-size pliers or strainer wrench
Applies force directly to the nut
Consider a plumber if corrosion is severe or sink damage is a concern
Center screw is tight
Correct driver with firm downward pressure
Reduces cam-out and stripped heads
Stop if the head begins to strip
Flange is stuck in old putty
Steady upward pressure and nonmarring scraper
Minimizes damage to the sink surface
Recheck for hidden hardware before using more force
Flange is bonded with silicone
Carefully cut or separate the seal around the edge
Silicone can grip more strongly than putty
Avoid aggressive metal prying on finished or brittle sinks
What to check before calling the job finished
If you are reinstalling the drain, reconnect the trap and tailpiece without forcing them sideways. Slip-joint plumbing should align naturally; using the nuts to pull badly misaligned pipes together can create leaks or stress the fittings.
Wipe all joints dry before testing so a new drip is easy to see.
Fill the sink with water and check the flange area while the basin is holding water.
Release the stopper and watch the tailpiece, trap, and slip-joint connections during full flow.
For disposal installations, also inspect the mounting assembly, discharge connection, and dishwasher connection if one is used.
Put a dry paper towel under questionable joints; small drips show up quickly.
Moen's Easy Clean drain installation instructions explicitly call for connecting the drain pipe and filling the sink with water to check for leaks, and direct disposal installations to follow the disposal manufacturer's instructions. That is a useful general principle: the final leak test matters as much as the removal technique.
Bottom line
The best way to remove a kitchen sink drain depends on the repair you are trying to make. For a clog, removing only the P-trap is usually the least disruptive option. For a leaking basket-strainer seal, disconnect the lower plumbing, identify whether the assembly uses a locknut or center fastener, remove the retaining hardware, and lift the drain body out. For a disposal flange, follow the disposal manufacturer's power-off and mounting-removal procedure rather than treating it like a standard strainer.
The tradeoff is simple: removing more parts gives you more access, but every disturbed seal and joint must be put back correctly. Start with the smallest scope that solves the problem, identify the hardware before using force, and only expand the job when the condition of the drain or plumbing makes it necessary.