Home
» INTERNET
»
How to Remove Hot Glue From Fabric Without Making the Damage Worse
How to Remove Hot Glue From Fabric Without Making the Damage Worse
Hot glue can look permanent once it has cooled into the weave of a shirt, tote bag, costume, or upholstery fabric. The useful news is that hot-melt adhesive often responds better to a controlled physical approach than to aggressive scrubbing: make the glue hard and brittle, lift away what you can, then deal with any thin residue only if the fabric can tolerate the treatment.
Illustrative example: imagine Maya is finishing a craft project when a small bead of hot glue lands on a blue cotton-polyester tote. This is a hypothetical example used to show how the method works; it is not a report of a real test or a claimed result. We will follow that same tote through the decisions below.
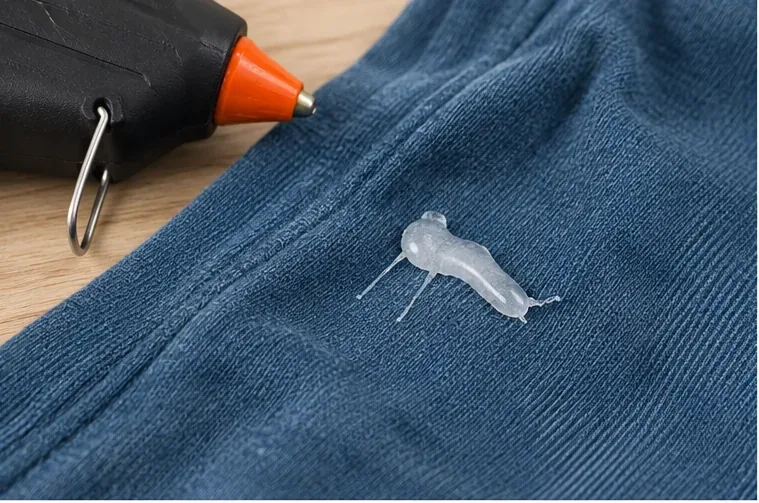
A typical starting point: a cooled hot-glue bead sitting on the surface of blue fabric. Let the adhesive become safe to handle before trying to remove it.
Start with the fabric, not the glue
Before reaching for a solvent, read the garment or textile care label. The U.S. Federal Trade Commission's Care Labeling Rule requires covered apparel to carry regular-care instructions and warnings when a commonly expected care procedure could harm the item. That makes the label your first boundary: if it says dry clean only, do not turn a glue-removal attempt into an improvised wash-and-solvent experiment.
The University of Georgia Extension likewise advises reading the care label and pretesting any cleaning agent on an inconspicuous area before treating adhesive stains. Its adhesive-stain guidance also uses cold to harden some adhesive residues before scraping. Although that page covers several adhesive types rather than hot glue specifically, the care-label and patch-test principles are broadly useful.
Fabric situation
Reasonable first move
When to stop DIY treatment
Sturdy, washable cotton, denim, canvas, or a similar everyday fabric
Cold treatment, then gentle lifting with a dull edge
If the color changes, fibers pull, or residue is embedded deeply
Cold treatment only, with very light mechanical removal
Before applying alcohol or strong friction
Dry-clean-only garment or expensive tailored item
Remove only loose, hardened glue if it releases easily
Take it to a professional cleaner for the remaining residue
Large upholstery piece that cannot fit in a freezer
Use a sealed bag of ice on the affected area
If moisture, solvent, or abrasion could affect backing, dye, or finish
What you need
A freezer, or a sealed bag of ice for large items
A dull-edged tool such as a spoon edge, plastic card, or blunt table knife
Clean white cloths or cotton swabs
Rubbing alcohol only if the cold-and-lift method leaves residue and a hidden-area test shows no damage
Your item's care label or manufacturer's care instructions
Avoid beginning with a sharp blade, hard scrubbing, or a large pour of solvent. Hot glue can bridge across fibers; forcing it sideways may push fragments deeper into the weave or snag the textile.
How to remove hot glue from fabric step by step
1. Let the hot glue cool completely
If the spill is fresh, do not rub it while it is still soft. Loctite's current manufacturer guidance for removing hot glue from textiles specifically warns against rubbing, because that can push the adhesive farther into the fibers. Wait until the glue is fully cool and firm.
In our hypothetical tote example, Maya leaves the bead alone instead of smearing it with a paper towel. This preserves a raised edge that may later be easier to lift.
2. Harden the glue with cold
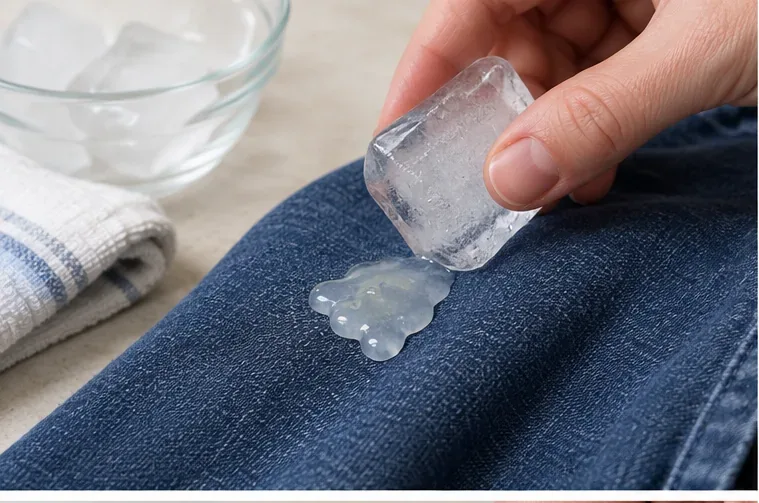
For a garment or small fabric item, Loctite recommends placing it in the freezer for about 30 minutes. If the piece is too large, its guidance suggests putting a bag of ice on the area. The goal is simple: make the hot-melt adhesive harder and more brittle so it releases mechanically instead of stretching.
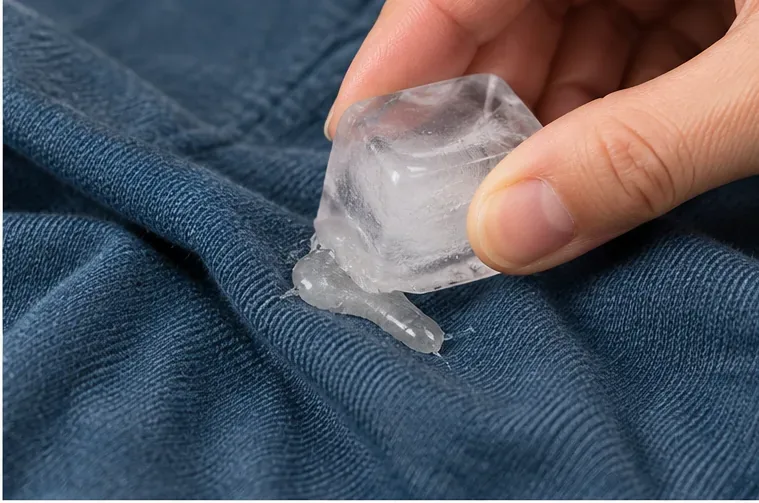
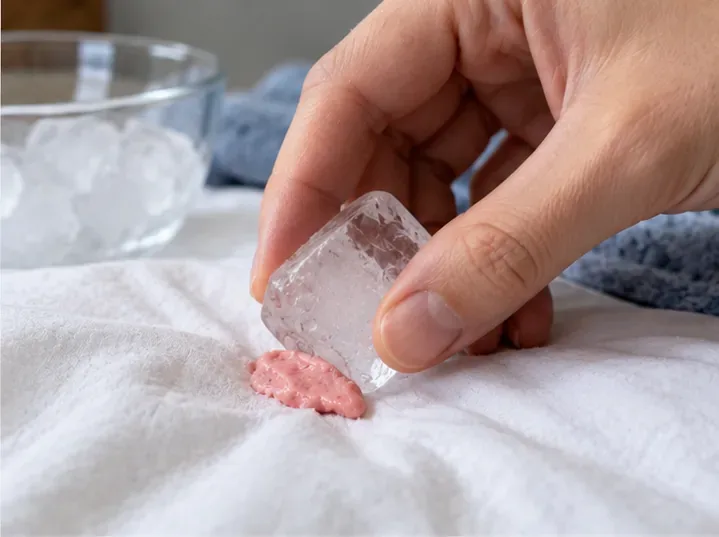
Cold makes the adhesive firmer and easier to break away. For items that cannot go in a freezer, use a sealed ice bag rather than soaking the fabric.
Do not add more moisture than necessary. A sealed ice bag is preferable to letting melting ice soak an unknown fabric.
A close-up of spot chilling: keep the cold focused on the glue until it feels rigid rather than rubbery.
3. Flex the fabric gently to find a lifting edge
Once the glue is cold, bend the fabric slightly around the spot. Do not stretch aggressively. Often the adhesive will crack or separate at one edge. If you can lift that edge with a fingernail without pulling threads, peel slowly.
For Maya's tote, the first useful sign would be a pale, brittle edge separating from the weave. If the glue still feels flexible, chill it longer rather than pulling harder.
4. Remove brittle pieces with a dull tool
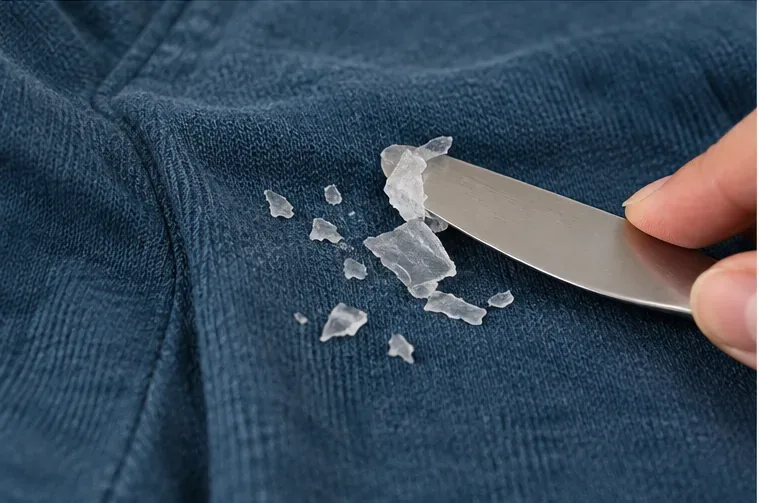
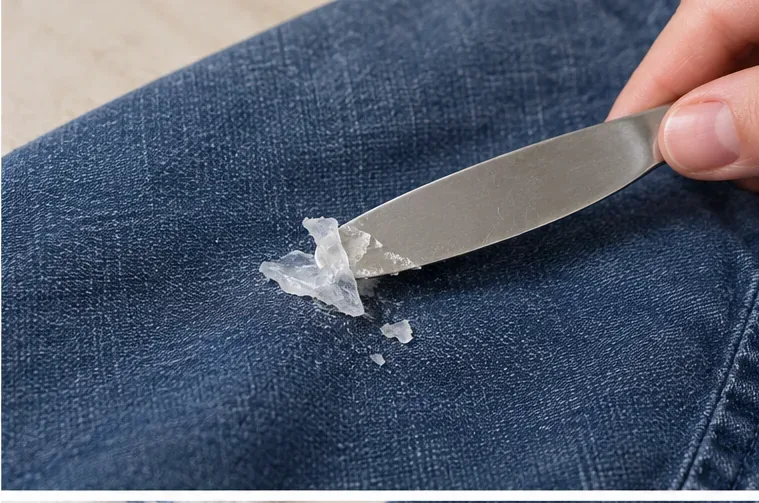
Use a spoon edge, plastic card, or blunt table knife to work under the hardened glue. Keep the tool nearly parallel to the fabric so it lifts the adhesive rather than digging into the fibers. Work in short motions from the outside toward the center.
After chilling, hot glue can fracture into brittle pieces. Use a blunt edge and shallow angle so the tool lifts adhesive instead of cutting fibers.If a larger section releases, peel it away slowly. Stop if the fabric begins to stretch, fuzz, or lift with the glue.
Collect loose fragments as you go. Avoid repeated scraping once the raised glue is gone; that is the point where mechanical removal can start to abrade the surface.
5. Inspect the fabric before using any solvent
At this stage, many spills will be mostly gone. Hold the textile under good light and look for three different outcomes: a clean surface, a thin shiny adhesive film, or fibers that appear pulled or discolored. Only the thin residue is a candidate for a carefully tested alcohol step.
If Maya's hypothetical tote now looks clean, she should stop. More treatment is not automatically better. If a faint residue remains, she moves to a hidden-area test first.
6. Patch-test rubbing alcohol on a hidden area
Loctite lists rubbing alcohol as a second method for dried hot glue on textiles: apply it with a cotton swab around the adhesive's edge, then lift the weakened bond. However, the manufacturer also tells readers to take care with delicate textiles. Before putting alcohol on the visible stain, dab a tiny amount on an inside seam or other inconspicuous area and let it dry completely.
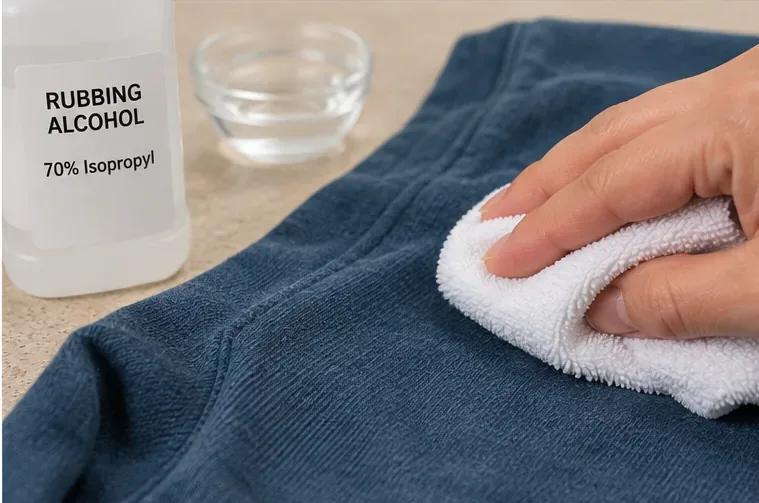
Check for dye transfer, fading, a change in texture, or a visible ring. If any of those appear, stop and do not use alcohol on the stain. The photo below shows a common 70% isopropyl-alcohol bottle, but the cited Loctite guidance says “rubbing alcohol” and does not require that exact concentration. The product label and the textile's care instructions still control.
Use rubbing alcohol only after an inconspicuous-area test. The bottle shown is 70% isopropyl alcohol, but the manufacturer guidance does not require a specific concentration.
7. If the test passes, treat only the remaining residue
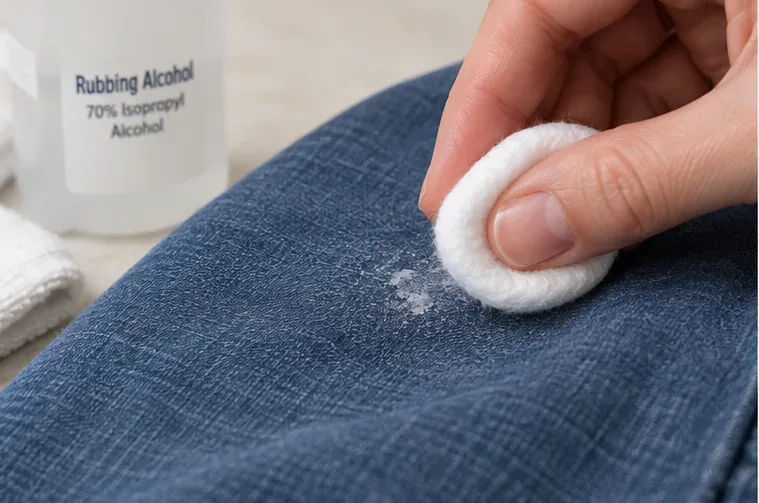
Dampen a cotton swab or small white pad rather than pouring alcohol onto the textile. Work from the edge of the glue inward and use a light dabbing motion. Give the alcohol a moment to contact the adhesive, then try to lift the softened edge. Repeat with fresh cotton as needed instead of saturating a wide area.
Keep the solvent treatment small and controlled. Dab residue rather than flooding the fabric, and stop immediately if color or texture changes.
Do not substitute acetone simply because it is a stronger solvent. Acetone is used for some other adhesive types, but it is not necessary for the basic hot-glue method described by Loctite, and solvent compatibility varies by fiber, dye, and finish. If cold plus patch-tested rubbing alcohol is not enough, professional cleaning is the safer next step for valuable or delicate items.
8. Clean according to the care label, then inspect before heat drying
If the item is washable and its label allows laundering, clean it according to those instructions after the adhesive has been removed. If the label calls for hand washing, cold water, gentle drying, or another restriction, follow it. Do not assume that a glue stain gives you permission to override the normal care method.
Air-dry or otherwise use the label-approved low-risk drying method until you can inspect the area. High heat can soften hot-melt adhesive, so it is sensible to confirm that no glue remains before exposing the spot to unnecessary heat.
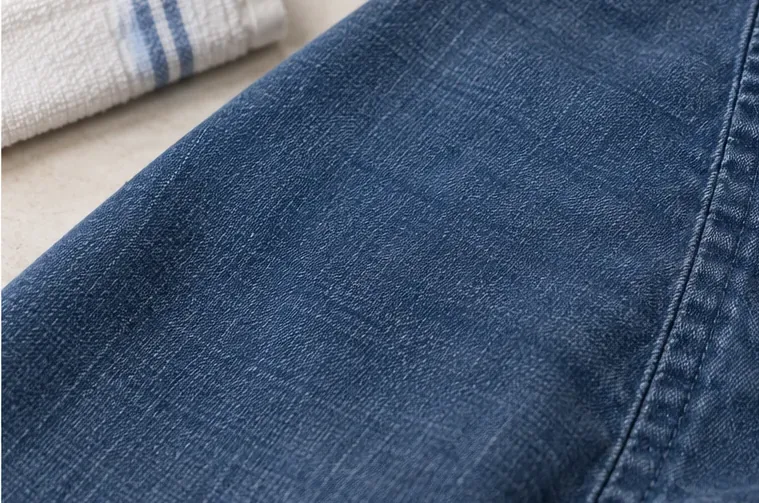
The end point is a normal-looking fabric surface with no raised or glossy glue left. Once dry, inspect in good light before returning the item to regular use.
What if the hot glue is deeply embedded?
A thick drop sitting on top of a tight weave is much easier than glue that has flowed through a loose knit, lace, fleece, or pile fabric. If the adhesive is locked around multiple fibers, pulling a single hardened piece may distort the textile. In that case, remove only what releases without force.
For upholstery, lined garments, performance fabrics, coated textiles, vintage pieces, or anything whose fiber content is uncertain, a professional cleaner may be able to choose a treatment based on the actual construction and finish. A cautious stop is better than replacing a small adhesive mark with a permanent faded patch or damaged weave.
Common mistakes that make hot glue harder to remove
Rubbing soft glue: this can spread it into a wider, thinner layer between fibers.
Pulling before the glue is brittle: warm or flexible glue can stretch and grip more surface area.
Using a sharp knife: a sharp edge can cut threads before the adhesive releases.
Skipping the hidden-area test: dye and finish compatibility cannot be assumed from fabric color alone.
Flooding the spot with alcohol: targeted dabbing gives you more control and reduces the treated area.
Applying direct high heat as a first move: heat softens hot-melt adhesive; on a garment it may spread the glue and may conflict with the care label.
Continuing after the surface looks clean: unnecessary extra solvent or scraping can create damage that was not there initially.
A quick decision guide
What you see
What to do next
Raised, hard glue sitting mostly on top
Freeze or ice it, then lift gently with a dull edge
Small brittle fragments remain
Continue shallow, gentle mechanical removal
Only a thin film remains on a sturdy fabric
Patch-test rubbing alcohol, then dab locally if the test is clean
Color comes off during testing
Stop solvent treatment
Fabric is delicate, dry-clean-only, vintage, coated, or structurally fragile
Use minimal cold/mechanical treatment and consult a professional cleaner
Glue is gone but the area is still wet from treatment
Let it dry and inspect before applying heat
How the illustrative example ends
Returning to Maya's hypothetical tote: the sound sequence is to let the glue cool, chill it until brittle, lift the bulk with a dull edge, and stop if the surface is already clean. If a thin residue remains, she first tests rubbing alcohol on an inside seam. Only if that test dries without color or texture change does she dab the residue locally. Afterward, she follows the tote's normal care instructions and inspects the area again when dry.
That sequence is more important than any single household product. Hot glue removal works best when you change the adhesive's physical state first, preserve the fabric second, and use solvent only as a controlled fallback.
Sources used for this guide
The hot-glue-specific removal method comes from Loctite's manufacturer guide to removing hot glue. Care-label boundaries are based on the FTC's Care Labeling Rule. The recommendation to read the label, pretest cleaning agents, and use cold to harden certain adhesive residues is also consistent with University of Georgia Extension textile-care guidance. These sources do not establish that every fabric or dye will tolerate rubbing alcohol, which is why this guide treats patch testing and care-label compliance as mandatory decision points.