Home
» INTERNET
»
How to Take a Chain Off a Bike: Quick Link vs. Chain Tool Methods
How to Take a Chain Off a Bike: Quick Link vs. Chain Tool Methods
Taking a chain off a bike is usually straightforward, but the best method depends on how that chain is joined. A modern derailleur chain may use a quick link (also called a master link or, in SRAM terminology, a PowerLock), while another chain may need a chain tool to push out a rivet. Older single-speed chains may use a clip-style master link that needs a different approach again.
The practical goal is not simply to make the chain come apart. A good removal leaves the chain, connector, derailleur, and surrounding parts undamaged and gives you a clear plan for putting the drivetrain back together safely. That is why choosing the method before applying force matters more than speed.
Quick answer: which removal method should you use?
Chain setup
Best starting method
Main advantage
Main tradeoff
Modern chain with a quick link
Quick-link pliers
Fast, controlled, and does not require driving out a rivet
Many current quick links are single-use, so you may need a new connector
Chain with no removable connector
Compatible chain tool
Works when there is no quick link to open
You must know the correct rejoining method before breaking the chain
Older or single-speed clip-style master link
Tool appropriate to the clip-style link
Avoids unnecessary rivet removal
Modern quick-link pliers may not fit this connector style
Chain being discarded
Quick link if present; otherwise chain tool
Reassembly of the old chain is less important
You still need to avoid damaging the derailleur or frame while removing it
If you are removing a chain only to clean it, check the connector rules first. For example, Shimano's current guidance says not to reuse a QUICK-LINK once it has been removed, and SRAM says its Eagle PowerLock is designed for one-time use. That means taking the chain off for routine cleaning can create the extra cost and step of installing a new connector. See Shimano's General Operations dealer manual and SRAM's PowerLock reuse guidance.
What you need before taking the chain off
Quick-link pliers if the chain uses a modern reusable-style connector shape, even if the specific link itself must be replaced after removal
A compatible chain tool if the chain must be opened by driving out a rivet
A rag or gloves for handling a greasy chain
A small tray or container for the removed connector
A replacement quick link, joining pin, or other approved connector if the manufacturer requires one for reassembly
Compatibility matters. Chain widths and connector designs vary by speed and drivetrain family. A tool or connector that works on an older 8-speed chain is not automatically correct for an 11-, 12-, or 13-speed system. When in doubt, identify the chain model before opening it.
How to take the chain off a bike
1. Stabilize the bike and reduce drivetrain tension
Put the bike in a work stand if you have one, or position it so it cannot roll or fall while you work. On most derailleur bikes, shifting toward the smallest rear sprocket and, if present, the smallest front chainring reduces chain wrap and makes the chain easier to handle. On a 1x drivetrain, only the rear shift applies.
Some rear derailleurs have a clutch, cage lock, or service position. Those features are brand- and model-specific, so use the manufacturer's instructions rather than forcing the cage by hand. On an e-bike, switch the system off and follow the bike maker's service guidance before working around the chain and crank.
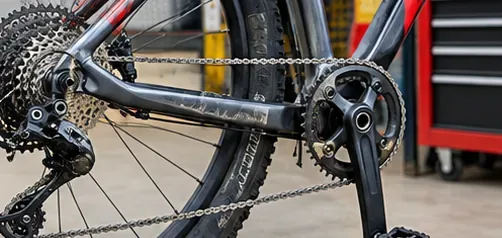
Stabilize the bike and reduce drivetrain tension before opening the chain.
2. Wipe enough dirt away to see the links clearly
You do not need to deep-clean the chain before removal, but heavy grease can hide the connector shape. Wipe or lightly brush a short section while rotating the crank by hand. Keep fingers away from chainring teeth and do not rotate an e-bike drivetrain under power.
The useful action here is simple: make the outer plates and rivets visible so you can tell a normal link from a quick link.
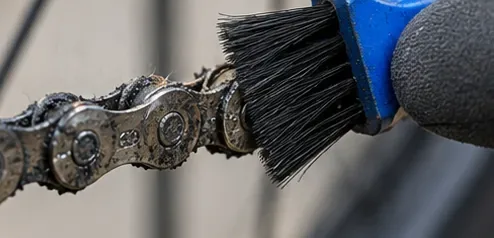
Clean just enough grime from the chain to identify its connector and inspect the link plates.
3. Identify how the chain is joined
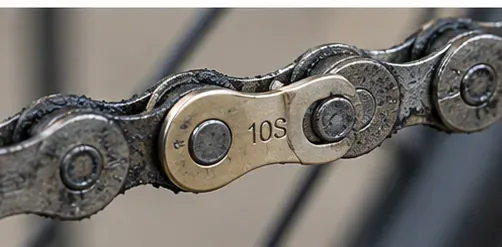
A modern quick link usually has two outer plates with elongated or keyhole-shaped slots around the pins. Some are marked by the manufacturer. Rotate the chain until that link is easy to reach.
If you cannot find a quick link, do not assume the chain is defective. It may use a riveted connection, or it may have a connector whose shape is unfamiliar. Check the chain model before choosing a random rivet to push out.
For older clip-style master links, especially on some single-speed systems, the removable side plate or retaining clip is visually different from the slot-style quick links used on many derailleur chains. Park Tool notes that its modern MLP-1.2 master-link pliers are not intended for the style with both pins fixed to one plate and a spring clip; see the Park Tool MLP-1.2 product guidance.
Look for a quick link or master link before reaching for a chain breaker.
4. If there is a quick link, open it with quick-link pliers
Place the plier tips in the openings adjacent to the quick link so the tool compresses the two link pins toward each other. Squeeze in a controlled motion until the connector releases, then separate the two halves.
Shimano's dealer instructions specify its TL-CN10 tool for removing Shimano QUICK-LINKs by sliding the pins to release the connector. The exact tool brand is less important than compatibility and correct engagement; the jaws should act on the connector, not crush neighboring plates. See Shimano's chain installation/removal manual.
Tradeoff: this method is usually the lowest-risk way to open a compatible chain, but removing the link may make that connector unusable for reassembly. Shimano states that a removed QUICK-LINK should not be reused. SRAM likewise states that its PowerLock connectors are one-time-use in the systems covered by its current support guidance. If your chain is from another maker, check that maker's instructions rather than assuming the rule is the same.
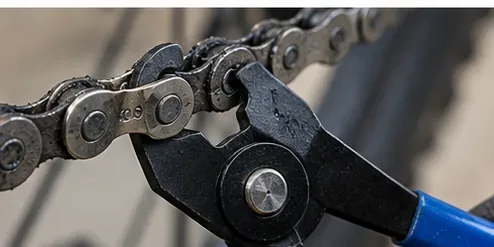
Quick-link pliers are the cleanest removal method when the chain uses a compatible removable connector.
5. If there is no quick link, use a compatible chain tool only when the chain design allows it
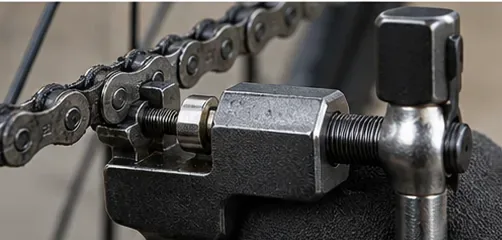
Seat the chain squarely in the chain tool so the tool's driving pin is centered on the chain rivet. Turn the handle slowly. The tool should press straight into the rivet rather than bending the side plates.
Shimano's current chain manuals show this process for chain cutting: seat the chain correctly in the cutter, align the tool, and push the center of the pin completely out. See Shimano's chain cutting instructions.
Tradeoff: a chain tool is more universal than quick-link pliers, but opening a riveted chain can commit you to a specific replacement connection method. Do not assume you can press the same pin back into the chain and ride safely. Many chains require a new quick link, reinforced connecting pin, or manufacturer-specific joining procedure.
If the chain is being discarded, this tradeoff matters less. If you intend to reinstall the same chain, confirm the approved reconnection method before you push anything out.
For a chain without a removable link, a compatible chain tool can drive out a rivet when the chain design allows it.
6. Separate the chain ends without twisting the plates
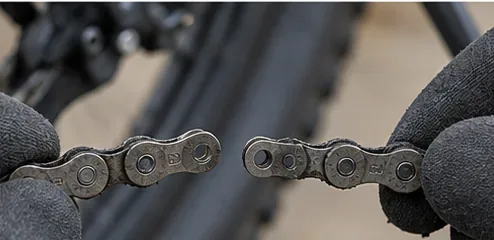
Once the quick link is open or the rivet has been removed, gently pull the two chain ends apart. Do not pry sideways. Side loading can bend plates or create a stiff link.
If the chain does not separate easily, stop and inspect the connector. A quick link may not be fully released, or a chain-tool rivet may still be partly engaged. More force is not the best diagnostic.
Once the connector is released, separate the chain ends without twisting the side plates.
7. Thread the chain out of the drivetrain
Support the chain with one hand and guide it off the front chainring, rear cassette, and derailleur pulleys. Pay attention to how it passes through the rear derailleur cage, especially between the upper and lower pulley. Taking a quick reference photo before removal can make reinstallation easier.
Lay the chain on a rag or tray instead of dropping it on the floor. If you are replacing it, keep the old chain until the new chain has been sized; the old length can be a useful reference when the drivetrain configuration has not changed.
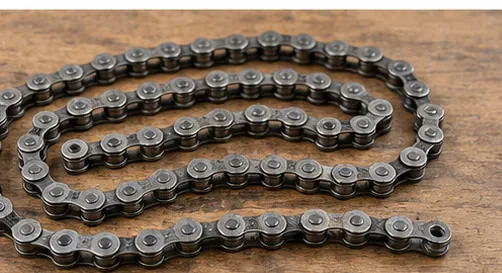
Set the removed chain aside in order, especially if you plan to measure or compare it with a replacement.
8. Inspect the drivetrain and decide what happens next
With the chain removed, inspect the chainring teeth, cassette, derailleur pulleys, and chain path. Remove accumulated dirt before installing a clean or new chain. This is also the moment to decide whether the old chain is going back on or being replaced.
If the chain came off because of wear, skipping, a damaged link, or an unknown connector history, replacement may be safer than reinstalling it. Chain wear limits vary by drivetrain and manufacturer, so use the specification for your system rather than a single universal percentage.
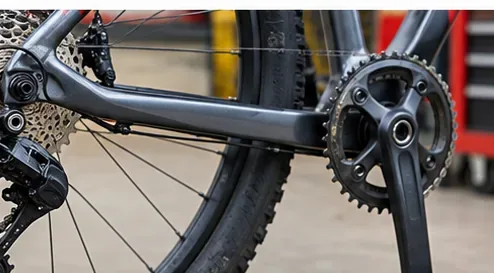
With the chain off, inspect and clean the drivetrain before installing a serviced or replacement chain.
Quick-link pliers vs. a chain tool: which is better for you?
Choose quick-link pliers when convenience matters
If your chain has a compatible quick link and you expect to service bikes regularly, dedicated pliers are the easiest option. They give controlled leverage and reduce the temptation to improvise with screwdrivers, wire, or other tools that can slip.
The tradeoff is that connector replacement can become part of the service. If your chain maker specifies single-use quick links, keep the correct spare link on hand before opening the chain.
Choose a chain tool when there is no removable connector
A chain tool is the correct choice for a chain that must be opened at a rivet, and it is also essential for shortening many new chains to the correct length. The tool must match the chain width and design.
The tradeoff is reassembly complexity. A rivet that has been driven out may not be approved for reuse. Before opening a chain you plan to reinstall, find the approved connector or joining method first.
Do not force a method across connector types
A common mistake is treating every master link as the same. Modern slot-style quick links, older clip-style links, and manufacturer-specific connectors can require different tools. The safest practical rule is to identify the connector first and choose the tool second.
Common mistakes that make chain removal harder
Breaking the chain before checking for a quick link. You may create unnecessary reassembly work.
Using a chain tool on the quick link itself. Shimano warns against cutting at the QUICK-LINK connection; open the connector with the specified method instead.
Planning to reuse a connector without checking the manual. Current Shimano QUICK-LINK and SRAM PowerLock guidance includes one-time-use requirements for the products discussed above.
Letting the derailleur snap forward. Control chain tension as you separate the link.
Forgetting the chain route through the derailleur cage. A reference photo can prevent routing mistakes later.
Assuming a chain tool fits every chain. Narrow modern chains can require specific tool geometry.
When should you stop and use a bike shop?
Professional help is sensible if you cannot identify the chain or connector, the chain tool will not align squarely, the quick link is damaged or corroded, the rear derailleur is bent, or the chain has failed under load. It is also a good option when a high-end or electronic drivetrain has model-specific chain direction, connector orientation, or sizing requirements that you have not verified.
Removing a bike chain is not a test of strength. The right result is a clean separation with no bent plates, damaged rivets, or uncertainty about how the chain will be reconnected.
Bottom line
If your bike has a modern quick link, compatible quick-link pliers are usually the simplest removal method. If it has no removable connector, a compatible chain tool can open the chain, but you should know the approved rejoining method before you start. For older clip-style master links, use the connector-specific method rather than assuming modern pliers will fit.
The best choice depends on what you are trying to do. For a worn chain that is going in the recycling bin, a chain tool is perfectly practical. For a chain you want to service and reinstall, connector rules, compatibility, and replacement parts matter more than saving a minute during removal.