Home
» WINDOWS
»
XnConvert: Apply Effects and Convert Image Formats in Batches
XnConvert: Apply Effects and Convert Image Formats in Batches
XnConvert applies the same edits to multiple images and saves the results in your chosen format. Add images in Input, build an editing sequence in Actions, choose a destination and format in Output, then click Convert. For format conversion alone, leave the action list empty.
The desktop application processes files on your computer without uploading your photos. It is useful for resizing a photo collection, applying consistent effects, or preparing images for a website.
Download XnConvert and check compatibility
As of November 1, 2026, the official XnConvert download page lists version 1.118.0. The latest Windows release targets Windows 10/11, 64-bit; macOS and Linux downloads are also available. Windows users can choose an installer or ZIP package. Check the platform requirements before downloading, especially on an older operating system.
XnConvert offers more than 80 operations, including cropping, resizing, brightness and contrast adjustments, sharpening, and watermarking. It reads more than 500 formats and exports to around 70. Reading a format does not guarantee that it can export that format.
According to the developer's licensing FAQ, private, educational, public-service, and nonprofit use is free; commercial use in a company requires a paid license.
How to apply effects and convert image formats
Start with a few representative images and save results to a separate folder. The interface examples below illustrate the workflow; exact controls and placement can vary by version and platform.
1. Add the images to your batch
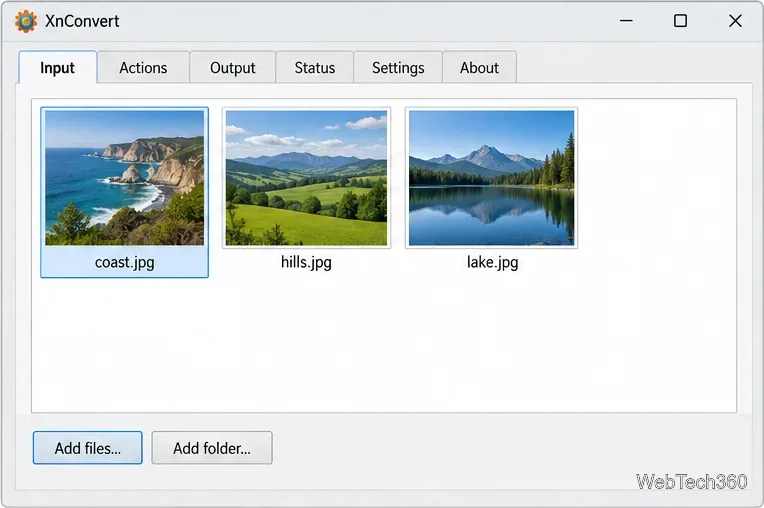
Open the Input tab and drag in images or a folder. You can also use Add files or Add folder when those controls are displayed. Review the list and remove anything that should not receive the same processing.
Include a portrait, a landscape, and an image containing fine detail in your initial sample when relevant. A setting that suits one photograph may crop another awkwardly or make small text harder to read.
Example input batch containing three landscape photographs.
2. Build and preview your actions
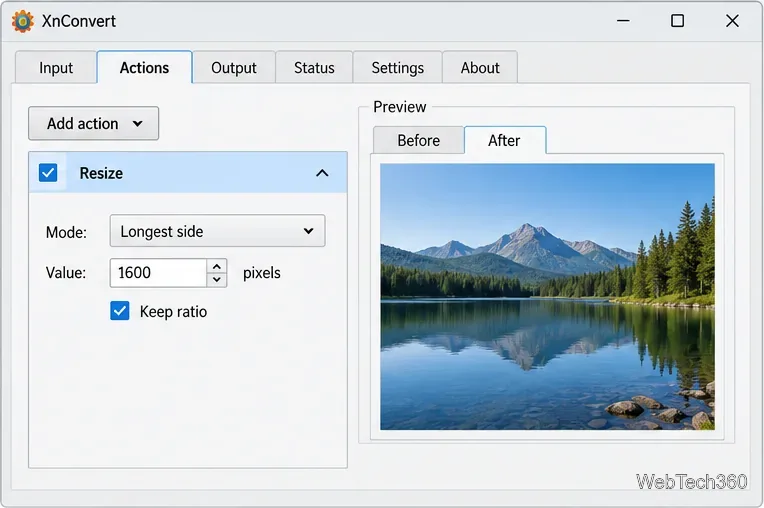
Open Actions and choose Add action. For resizing, the documented path is Image > Resize. For example, select Longest side, enter 1600 pixels, and keep Keep ratio enabled. This preserves the image's proportions.
Add other adjustments or effects only when needed. Actions run from top to bottom, so their order matters. Compare the Before and After previews on several files, and adjust the relevant parameters. Available controls depend on the action; not every operation has an intensity slider.
If you only want to change file formats, skip adding actions. The developer's batch-processing walkthrough explains this workflow.
Example resize configuration with the After preview selected.
3. Choose the output folder, names, and format
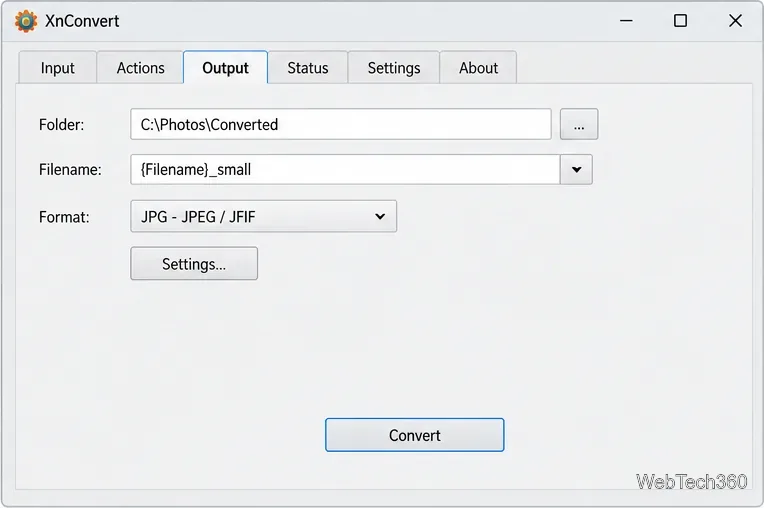
In Output, select a destination folder separate from your originals. Choose the target format explicitly rather than leaving Same as original selected when you need every result in one format.
Choose a format that fits the destination:
JPEG: a practical choice for photographs that need broad compatibility. Compression is lossy, so inspect the quality setting.
PNG: useful for screenshots, sharp graphics, and transparency when lossless output matters.
WebP: useful for web delivery, with lossy and lossless options. Confirm that the receiving application accepts it.
Open the format's Settings button to review its available options. Converting a damaged or heavily compressed JPEG to PNG will not restore missing detail. See the developer's PNG guidance and WebP guidance for format characteristics.
Set a filename pattern if needed. For example, {Filename}_small adds a suffix to the original base name. The developer documents filename placeholders. Review overwrite behavior and metadata-preservation options before proceeding.
Example output configuration using JPEG and a separate destination folder.
4. Convert and check the saved files
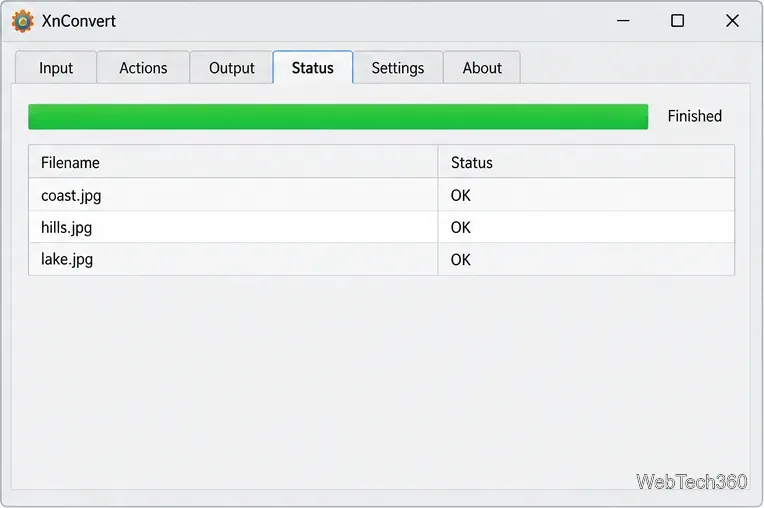
Click Convert, then inspect Status for errors or warnings. Open several files from the destination folder and check dimensions, sharpness, colors, transparency where relevant, and filenames.
Once the sample looks right, process the remaining images. You can save the batch settings as a preset for later reuse. Recheck the destination and format whenever you load a preset, since a previous job's settings may not suit the next batch.
Example status report; check your own batch for errors or warnings.
Fix common output problems
Stretched images: check the resize action's ratio setting. Avoid forcing unrelated width and height values.
Blurry results: avoid unnecessary enlargement and repeated lossy saves. Return to the original file before trying different settings.
Missing transparency: use PNG or an appropriate WebP configuration instead of JPEG.
Unexpected file types: select a specific output format and review the saved preset.
Failed conversions: read the Status report, confirm that the source opens, and check the destination folder's write permissions.
Keep your originals until you have checked the exported files. For unusual formats, consult the developer's supported-format list and verify that the required output appears in your installed version.