Home
» WINDOWS
»
Delete Files and Folders Permanently with Eraser on Windows
Delete Files and Folders Permanently with Eraser on Windows
Eraser is a free Windows utility that securely deletes selected files and folders by overwriting their data on compatible storage. Unlike ordinary Delete or Shift+Delete, which mainly removes file-system references, Eraser is designed to make overwritten information harder to recover. It is most useful for sensitive files on a traditional magnetic hard drive (HDD). It is not a guarantee that every copy of a file is gone, particularly on SSDs, cloud-synced folders, or backed-up systems.
Before you start: choose the right drive
Make a backup of anything you want to keep, then confirm the target path. Eraser does not have an undo button for successfully overwritten data. For SSDs and USB flash storage, wear leveling may redirect writes, leaving earlier data in blocks that file-level software cannot reach. For whole-device disposal, use an appropriate manufacturer-supported sanitize or cryptographic-erase process instead of relying on a file overwrite. See the NIST SP 800-88 Rev. 2 media sanitization guidance for the broader distinction.
How to permanently delete files and folders with Eraser
1. Install Eraser and select your files
Download Eraser from the official Eraser website and choose the appropriate release on its download page. During installation, enable Windows Explorer integration if offered. The project's compatibility list explicitly names Windows 10 and earlier versions; Windows 11 behavior should be checked on your installation rather than assumed to be officially certified.
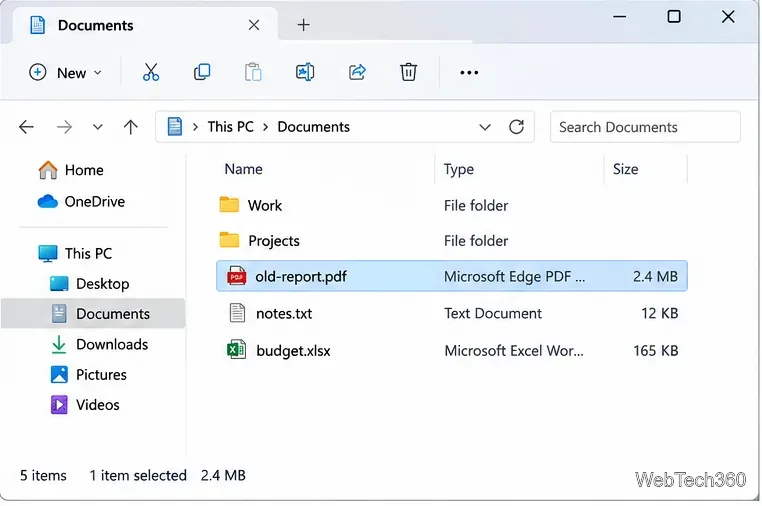
Open File Explorer and select the file or folder you intend to remove. Close documents or applications that may still be using it. Review the selection carefully if you have chosen multiple items.
Before erasing, double-check the file or folder you selected; the action cannot be undone.
2. Start an erasure from File Explorer
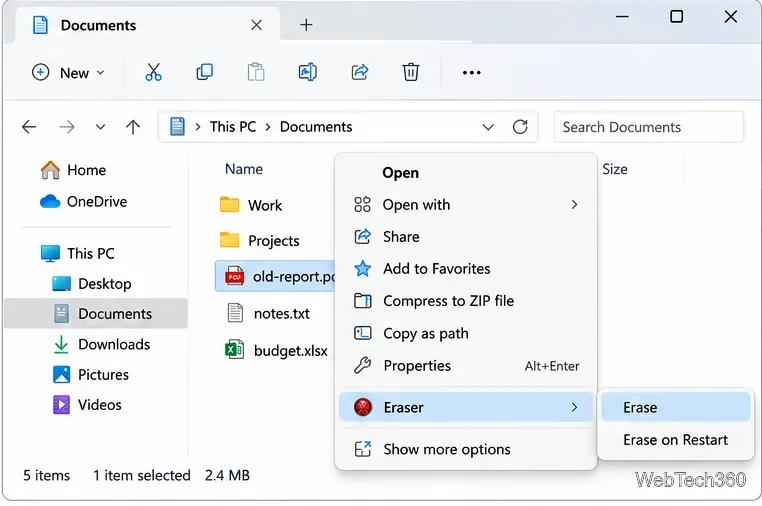
Right-click the selected item, open Eraser, and choose Erase. If you need to target a file that is currently in use, the extension also provides Erase on Restart. On Windows 11, third-party context-menu commands may appear under Show more options; available menus depend on the installed version and shell integration.
Confirm any prompt, and let the task complete. The official Explorer extension instructions also cover Recycle Bin items and drive free-space tasks. Do not erase an entire drive or its free space by mistake.
Use the Eraser menu to erase now or queue the item for erasure after a restart.
3. Create a scheduled or manual task
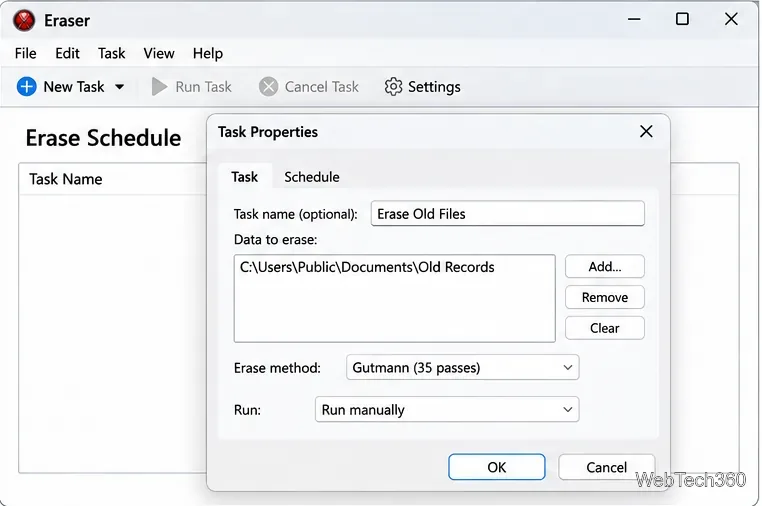
Open Eraser's main window. From Erase Schedule, select New Task (or press Ctrl+N). Give the task a meaningful name, choose whether it runs manually, immediately, at restart, or on a recurring schedule, and use Add Data to specify the exact files or folders. Review each target before saving. For scheduled tasks, specify the frequency in the Schedule tab.
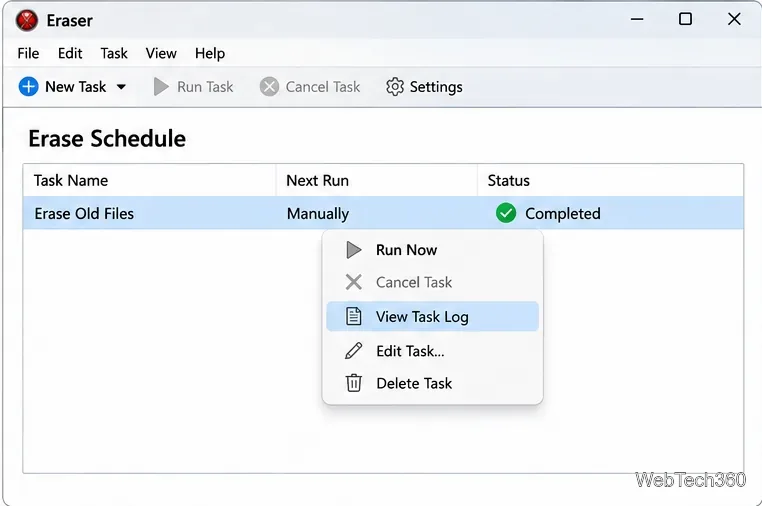
For a one-time manual job, right-click the saved task in Erase Schedule and select Run Now. Scheduling can be convenient, but a folder may contain different files later: check recurring targets whenever your workflow changes. The official task guide also warns that an Erase on Restart task could erase a replacement file at the same path if the original was moved before reboot.
For repeatable cleanup, configure a task and inspect its targets and run schedule.
4. Check the result and task log
Wait for the completion notification. In Erase Schedule, right-click the task to View Task Log. Check the log even when a file has disappeared from Explorer: a completed task may still report errors. File locks, permissions, or certain compressed, encrypted, and sparse NTFS files can prevent successful erasure. For any failures, address the cause and rerun only after verifying the target. The Eraser running-tasks documentation explains how to view logs and manage tasks.
Check the task log rather than assuming that an item disappeared without errors.
Which erase method should you use?
Open Settings to find the default file and unused-space erasure methods. Eraser offers multiple overwrite patterns, including the historic 35-pass Gutmann method, but more passes are not automatically safer on modern hardware. They can take considerably longer. For an HDD, choose an erasure method appropriate to your policy and risk; for flash-based devices, extra passes do not resolve wear-leveling limitations. After changing settings, click Save Settings, as described in the official settings guide.
What Eraser cannot remove
Erasing one local file does not erase copies in OneDrive or another cloud service, File History, system backups, email attachments, shared folders, snapshots, or files previously copied elsewhere. Check each storage location and follow the service's deletion and retention rules. Eraser also is not a substitute for whole-drive sanitization when selling, donating, or recycling a computer.
Bottom line: Eraser is a practical way to overwrite selected files and folders on supported Windows HDDs. Select the target carefully, use the Explorer menu or task scheduler, and verify the job log. For SSD sanitization or disposal, use a storage-specific method instead.