Home
» WINDOWS
»
How to Add a Divider to the Windows 10 Taskbar
How to Add a Divider to the Windows 10 Taskbar
Windows 10 does not include a built-in button for adding a divider between taskbar icons. You can imitate one by pinning a shortcut that uses a narrow vertical-bar icon, then dragging it between groups of apps. The separator occupies a normal taskbar icon slot; it is not a true layout control.
This method uses a tiny batch file, a Windows shortcut, and a custom .ico image. It does not require a taskbar customization app, but because the pinning trick is not an officially supported divider feature, its behavior can vary by Windows build.
How to add a divider to the taskbar in Windows 10
1. Make a vertical-line icon
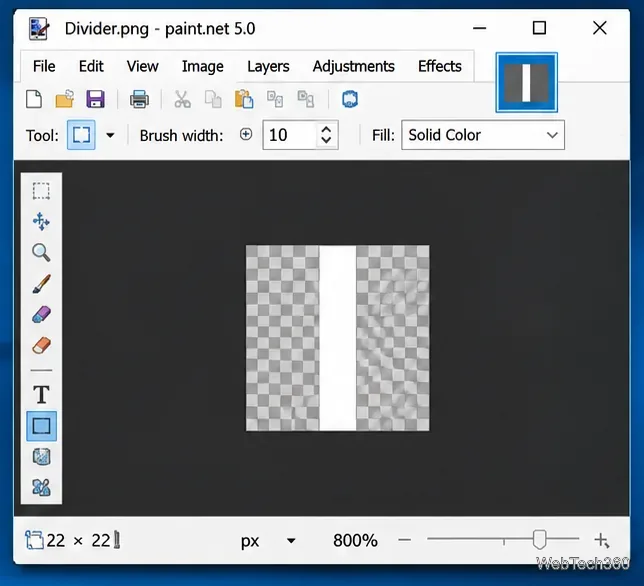
Start with an icon that is easy to see against your taskbar color. In an image editor such as Paint.NET, create a small square canvas with a transparent background. Draw a solid, centered vertical line, leaving transparent space on both sides. A 64 × 64-pixel canvas with a line about 8–12 pixels wide is a practical starting point; adjust the width to your taste.
Save the artwork as a PNG, then export or convert it to a genuine .ico file named Divider.ico. Windows shortcuts need an icon file, not a PNG renamed with an ICO extension. If your editor cannot export ICO, GIMP's icon-export documentation describes an editor that can. Save the final icon in a folder you will keep.
A vertical line with transparent margins becomes the visual separator on the taskbar.
2. Create a harmless placeholder batch file
Open Notepad and type these two lines:
@echo off
exit /b
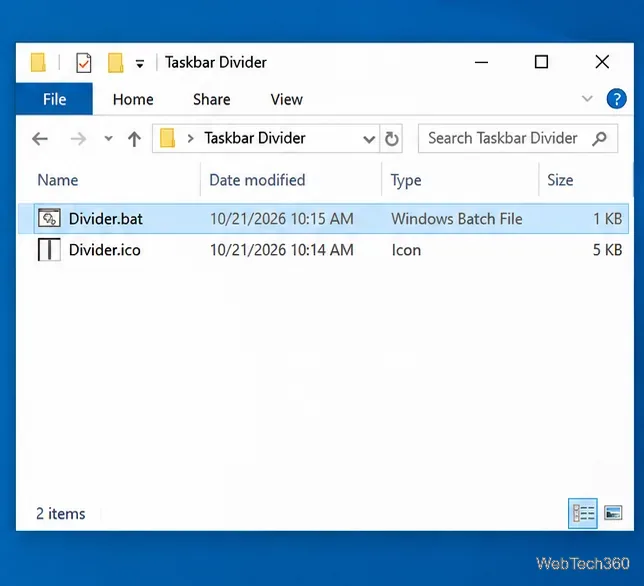
Choose File > Save As, set Save as type to All Files, and save the file as Divider.bat in the same permanent folder as Divider.ico. The file is only a target for the shortcut; it does not organize apps or change taskbar settings. If you later click the divider, a Command Prompt window may appear momentarily and close.
Keep the batch file and icon together so the shortcut does not lose its target or artwork.
3. Create an Explorer-based shortcut
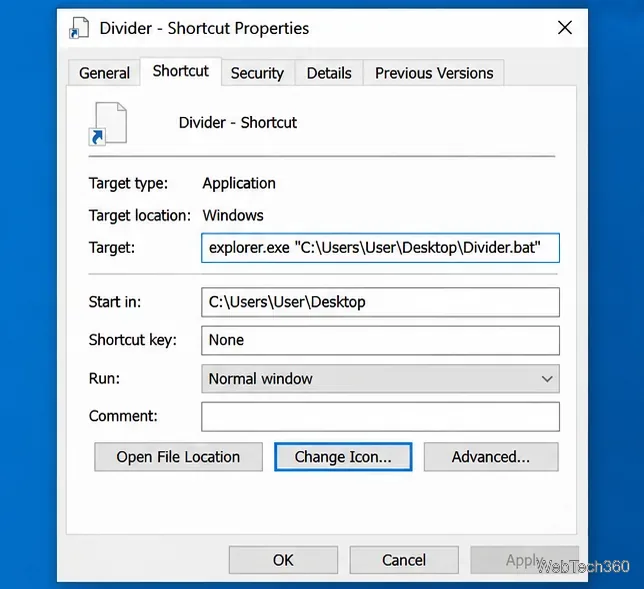
Right-click Divider.bat, choose Send to > Desktop (create shortcut), and then right-click the new desktop shortcut and open Properties. On the Shortcut tab, edit the Target field so it begins with explorer.exe, followed by a space and the quoted full path to the batch file. For example:
Use your actual file location rather than copying the example path literally. Adding Explorer at the front is the workaround that can make an otherwise unpinnable batch-file shortcut available as a taskbar pin. Do not edit the original BAT file to contain that command.
4. Apply the divider icon
In the same Shortcut tab, choose Change Icon. If Windows says the target has no icons, dismiss the message, select Browse, and locate your saved Divider.ico. Select the icon, then choose OK and Apply.
Edit the shortcut target and choose Change Icon before attempting to pin the shortcut.
5. Pin and position the divider
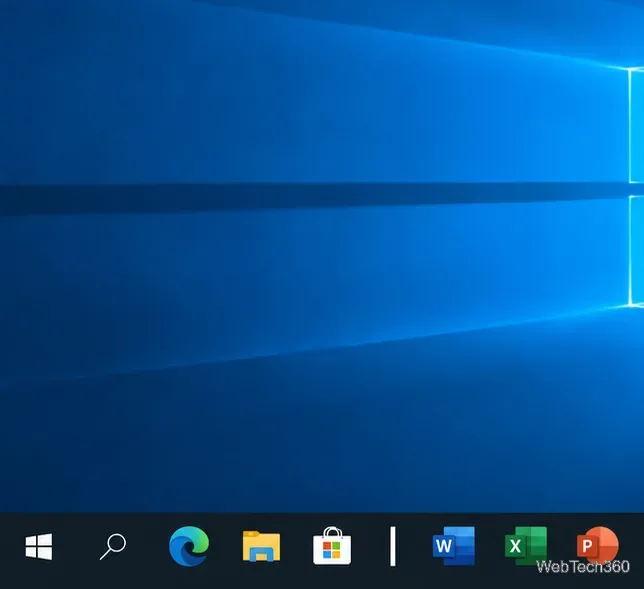
Right-click the customized desktop shortcut and look for Pin to taskbar. If it is available, select it. You can then drag the new vertical-bar icon between two groups of pinned apps—for example, between everyday applications and work tools. Keep the shortcut, batch file, and icon in their original locations.
Because this is a pinned shortcut, it takes up approximately the same taskbar space as another app. It does not create a zero-width rule, automatically regroup programs, or change with Windows accent colors. To add another separator, create a separately named placeholder and shortcut, assign the same ICO if desired, and pin it independently. If Windows groups the new pin with File Explorer or refuses to pin it, see the alternatives below.
The divider appears as a separate pinned item that can be dragged between app groups.
If the divider does not appear
There is no Pin to taskbar option: Check that you are editing the desktop .lnk shortcut, not the .bat file, and that its target begins with explorer.exe. Some builds or workplace policies may still block the workaround.
The icon is blank or looks like File Explorer: Reopen shortcut Properties, choose the ICO again, and unpin and repin the shortcut if needed. Keep the ICO file in a permanent location.
Nothing stays in the right place: Drag the pinned separator into position again. Opening apps, taskbar grouping, and icon changes can affect the layout.
The icon blends into the taskbar: Make a contrasting ICO for your current light or dark theme. The image does not automatically recolor with the taskbar.
Alternative: use a Windows 10 toolbar for spacing
If the shortcut method fails, Windows 10 also offers a different type of visual separation. Right-click the taskbar, clear Lock the taskbar, then choose Toolbars > New toolbar and select an empty folder. After the toolbar appears, use its drag handle to adjust spacing and hide its title if that option is shown. Lock the taskbar when finished. This creates a toolbar area, not a slim divider icon, and it is not the same layout feature as a pinned shortcut. Windows 11 does not offer the classic toolbar menu in the same way.
To remove a pinned divider, right-click it and select Unpin from taskbar. Remove the desktop shortcut or the unused placeholder files afterward if you no longer need them. For standard taskbar pinning and customization controls, see Microsoft's taskbar guidance.
Support note: Windows 10 reached the end of standard support on October 14, 2025. These customization steps may still work, but a taskbar divider does not address the security implications of running an unsupported Windows version. Check Microsoft's Windows 10 support notice for upgrade and Extended Security Updates options.