Home
» WINDOWS
»
How to Join a Wi-Fi Network on Windows 11
How to Join a Wi-Fi Network on Windows 11
To join a Wi-Fi network on Windows 11, press Windows + A, turn on Wi-Fi, select the arrow beside the Wi-Fi tile, choose your network, and click Connect. Enter the Wi-Fi password and select Next. You can also connect through Settings, manually add a hidden network, or forget a connection you no longer use.
Join a Wi-Fi network from Quick Settings
This is the fastest method for connecting to a nearby home, office, or guest network. You do not need to open the full Settings app.
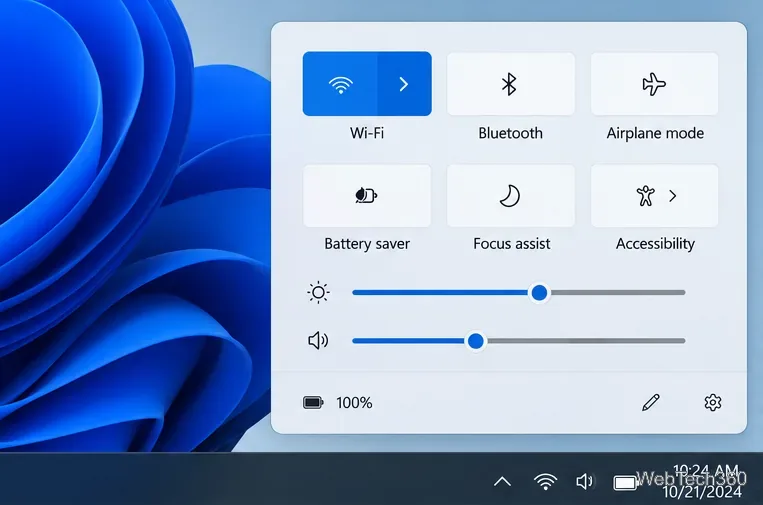
Open Quick Settings. Select the network, volume, or battery area at the right end of the taskbar, or press Windows + A.
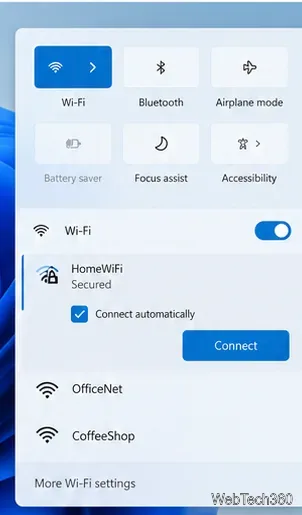
Turn on Wi-Fi. If the Wi-Fi tile is off, select it. Then select the arrow labeled Manage Wi-Fi connections beside the tile.
Open Quick Settings and use the arrow beside Wi-Fi to display nearby networks.
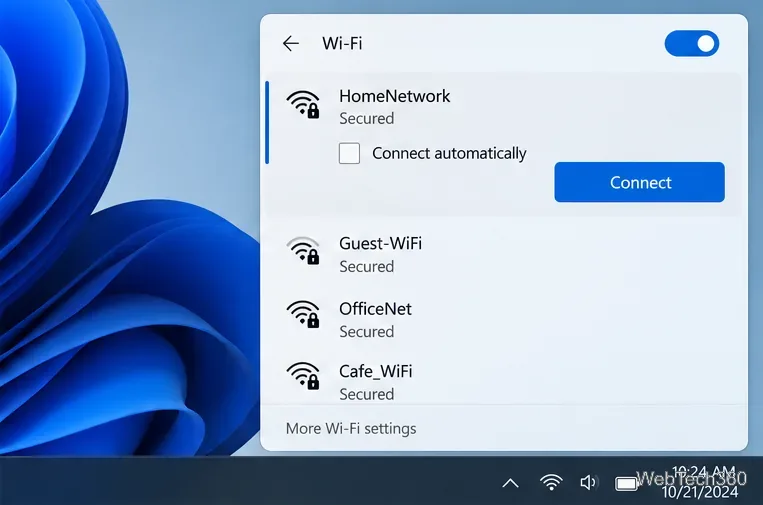
Select your network. Find the correct network name (SSID), select it, and click Connect. Turn on Connect automatically if this is a trusted network you use regularly.
Choose the network name you recognize before connecting.
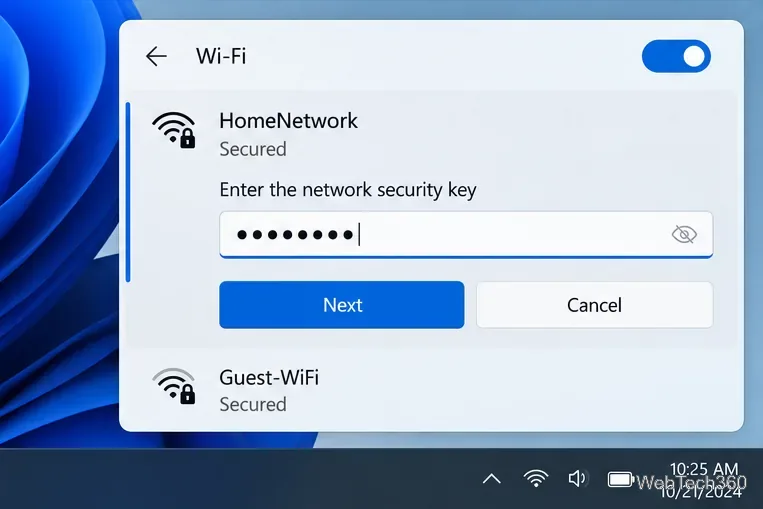
Enter the network security key. Type the Wi-Fi password exactly, including uppercase and lowercase letters, then click Next. When the connection succeeds, Windows displays a connected status for the network.
Enter the network password in the security key field, then select Next.
If the network you want is missing, choose the Refresh network list button in the Wi-Fi list to scan again. Make sure you are within range of the router. The name printed on your router may differ from a customized Wi-Fi name.
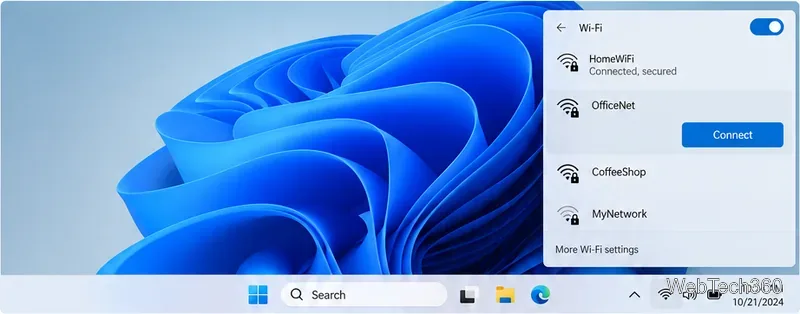
The available-network panel opens over the desktop without requiring the full Settings app.
Connect to Wi-Fi through Windows 11 Settings
Use this route when you want to review wireless settings or manage saved networks while connecting.
Press Windows + I to open Settings.
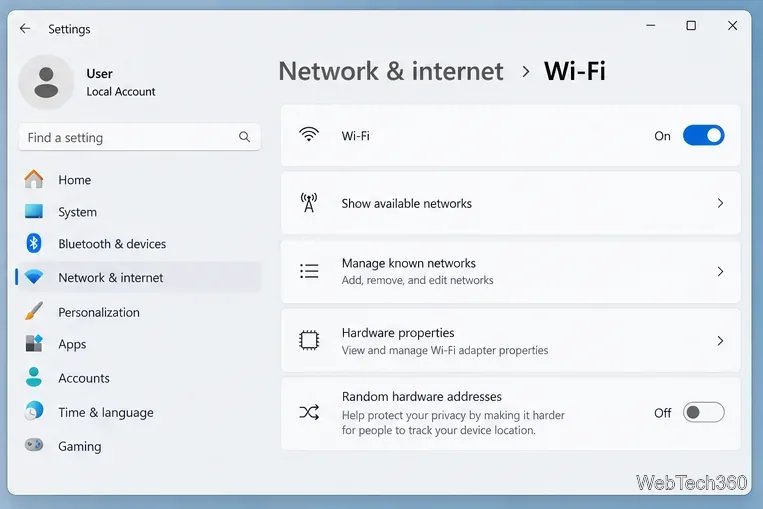
Go to Network & internet > Wi-Fi and turn Wi-Fi on if needed.
The Wi-Fi page is under Network & internet in Settings.
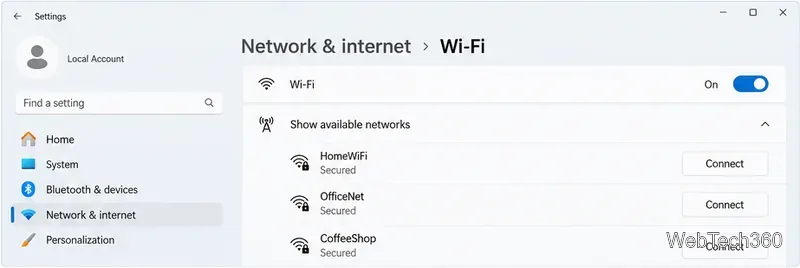
Open Show available networks when that option appears, or use the Wi-Fi connection list from Quick Settings if your Windows build presents it there.
Select the network, choose Connect, and enter the password when prompted.
A Wi-Fi settings view showing how nearby network names and Connect controls may appear.
Menu placement can vary slightly across Windows 11 updates. Microsoft's current instructions prioritize the Manage Wi-Fi connections control in Quick Settings, so use that route if you do not see a list directly inside Settings.
How to join a hidden Wi-Fi network
A hidden network does not broadcast its name in the usual list. Before starting, obtain the exact SSID, security type, and password from the router administrator. The spelling and security type must match the network's configuration.
Open Settings > Network & internet > Wi-Fi > Manage known networks.
Select Add network (sometimes shown as Add a new network).
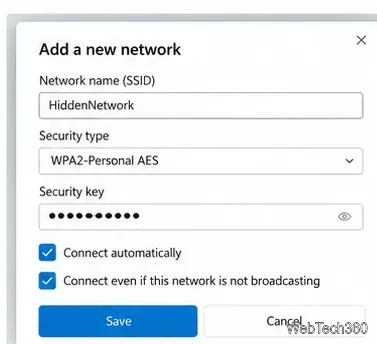
Enter the network name (SSID), select the correct security type, and enter the security key. If you want to reconnect later, select Connect automatically. If appropriate, select the option to connect even when the network is not broadcasting.
Click Save. When in range, use the saved network profile to connect if Windows does not connect automatically.
A hidden-network profile requires its exact SSID and matching security details.
Do not guess the security type. Work or school networks may require enterprise sign-in details rather than a simple password. Microsoft documents the supported profile fields in its Windows Wi-Fi and EAP configuration guidance.
Connect automatically or forget a saved network
Connect automatically is helpful for your own trusted Wi-Fi, but you may prefer to leave it off for public hotspots. You can select this option while first joining the network.
Select Connect automatically only when you want Windows to rejoin that network in the future.
To remove a saved connection, open Settings > Network & internet > Wi-Fi > Manage known networks, find its name, and click Forget. This deletes the saved connection profile; to use that Wi-Fi again, select it and enter its password. Forgetting a network does not switch off the router or remove the network for other devices.
What to do if Windows 11 will not connect
No Wi-Fi networks appear: Confirm Wi-Fi is on and Airplane mode is off under Settings > Network & internet. Refresh the network list and move closer to the router.
Password is rejected: Recheck the security key, including capitalization. If the password recently changed, forget the saved network and reconnect with the new one.
Connected but no internet: Check whether another device has internet access on the same router. If multiple devices are affected, restart the router according to its instructions.
Wi-Fi switch is missing: Check whether the wireless adapter is enabled in Device Manager. On a managed work or school computer, contact the administrator before changing adapter or security settings.
For persistent issues, Windows 11 provides a Network and Internet troubleshooter through Get Help. Treat Network reset as a last resort because it removes and reinstalls network adapters and resets their settings, which can affect VPN or virtual-network configurations.