How to Watch Emby on ChromeOS in Chrome
Open the Emby Web App on your Chromebook, sign in to your server, and play movies, shows, music, and photos without installing Linux.
Syncthing runs on a Chromebook through the Linux development environment, also called Crostini. Install it from the official Debian repository, start its user service, share a ChromeOS folder with Linux, then pair the Chromebook with another Syncthing device. Linux support must be available on your device; a work or school administrator may disable it. Syncthing syncs changes, including deletions, so keep a separate backup of important files.
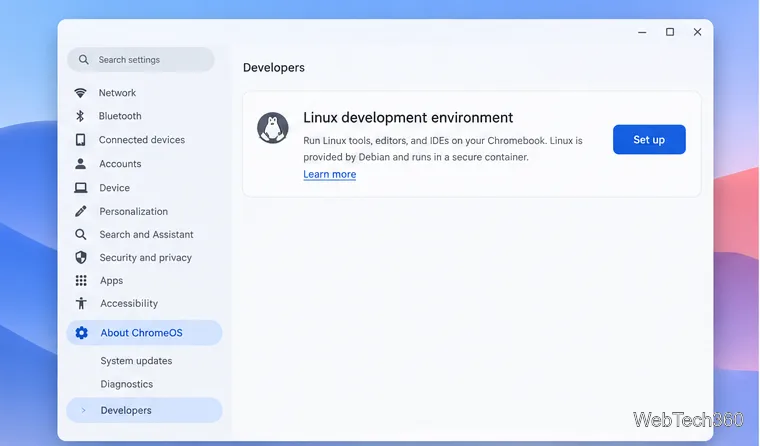
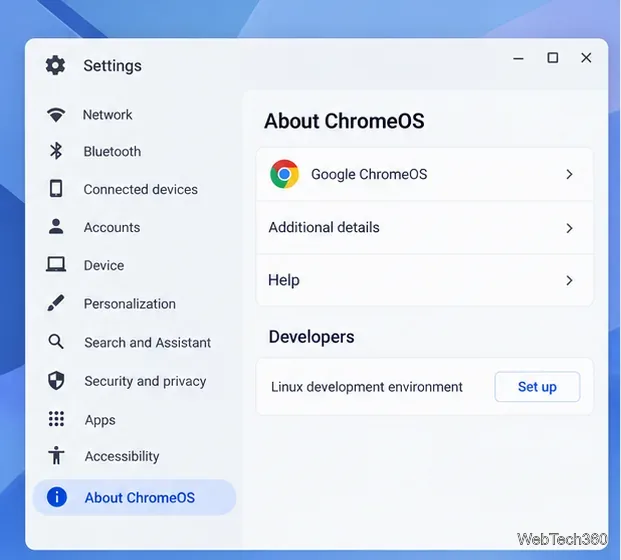
Open Settings > About ChromeOS > Developers. Next to Linux development environment, select Set up and complete the prompts. ChromeOS creates a Debian container and opens Terminal. In Terminal, select the penguin tab if prompted, then refresh package lists:
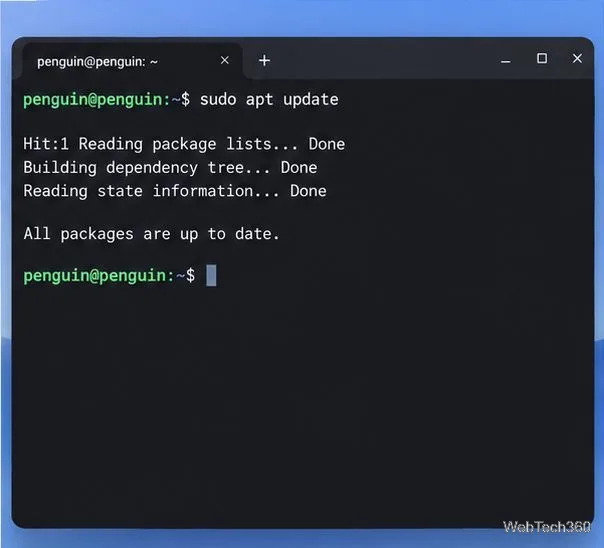
sudo apt update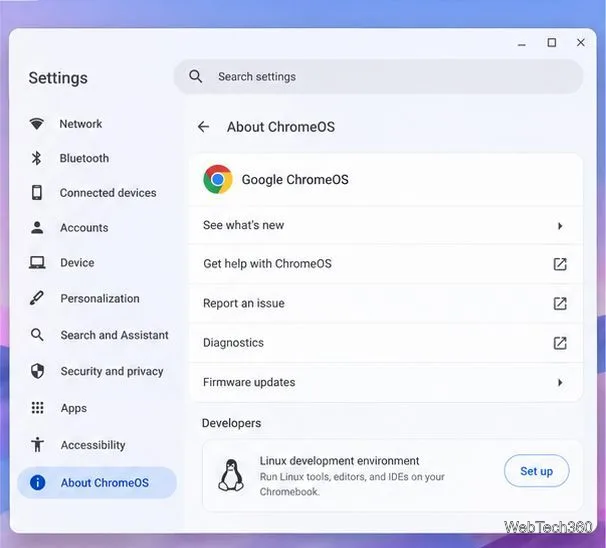
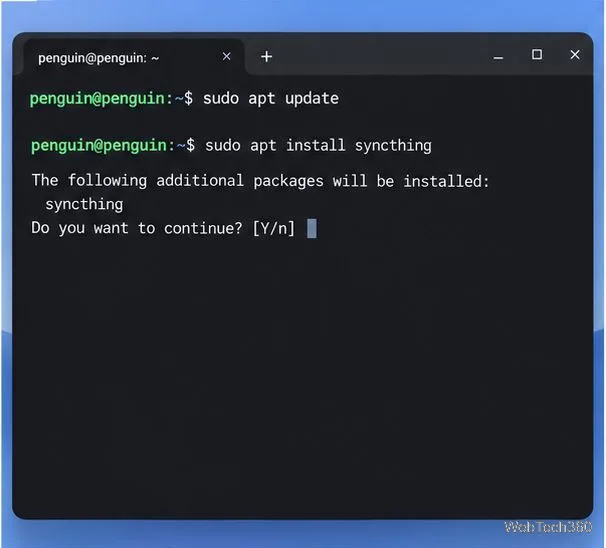
The Debian package may lag behind Syncthing’s current stable release. The Syncthing project maintains a signed APT repository. Add its release key and the stable v2 source, then install:
sudo apt install -y curl ca-certificates
sudo install -m 0755 -d /etc/apt/keyrings
sudo curl -L -o /etc/apt/keyrings/syncthing-archive-keyring.gpg https://syncthing.net/release-key.gpg
echo "deb [signed-by=/etc/apt/keyrings/syncthing-archive-keyring.gpg] https://apt.syncthing.net/ syncthing stable-v2" | sudo tee /etc/apt/sources.list.d/syncthing.list
sudo apt update
sudo apt install syncthing
Confirm the package installation when APT prompts you. These steps follow the official Syncthing APT instructions.
Enable the per-user service so Syncthing runs in the background for your Linux session:
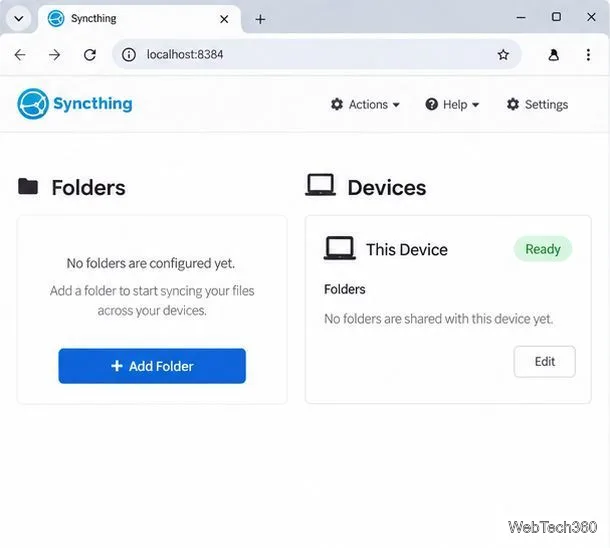
systemctl --user enable --now syncthing.serviceIn Chrome, open http://localhost:8384. ChromeOS tunnels localhost connections into Crostini. Syncthing’s GUI listens on localhost by default; keep that setting for Chromebook use and do not expose port 8384 to your network. If the service unit is unavailable, run syncthing --no-browser in Terminal and leave it open while syncing. Use one start method at a time. See the official autostart guide.
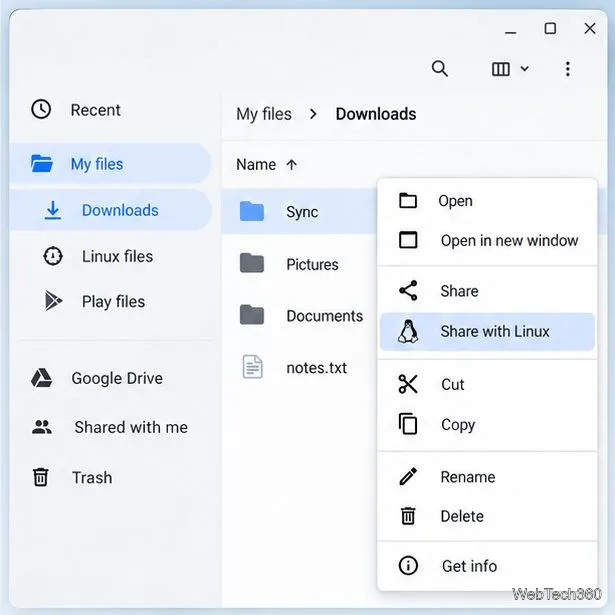
In ChromeOS Files, choose a folder such as My files > Downloads > Sync. Right-click it and select Share with Linux. Linux can then access it under /mnt/chromeos; the example path is usually /mnt/chromeos/MyFiles/Downloads/Sync. Sharing gives Linux access to that folder without moving it. See the ChromeOS Linux setup guide.
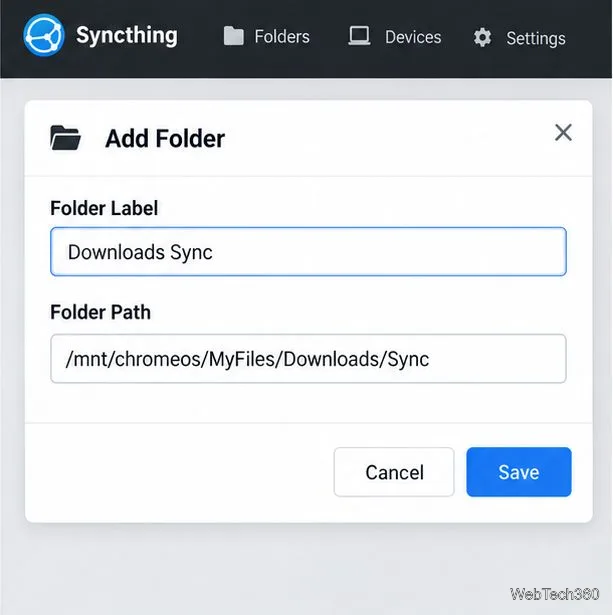
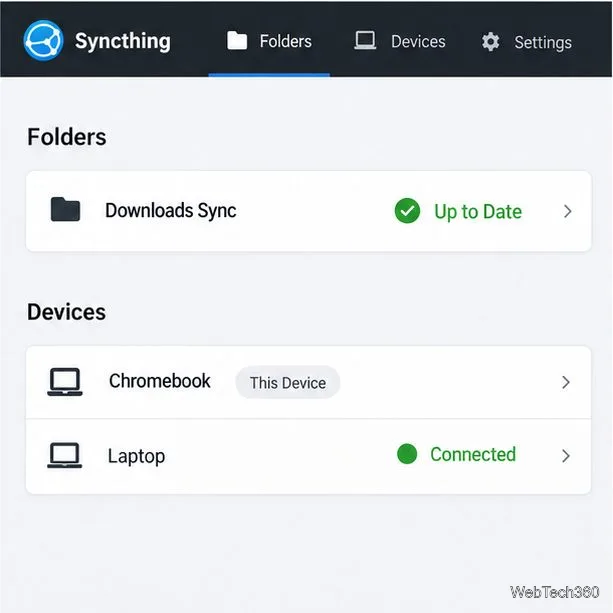
In the dashboard, select Add Folder. Set a label such as Downloads Sync and use the folder picker to choose the shared path. Leave the folder type at Send & Receive for two-way syncing, then save. If the folder is missing, check Files to confirm Linux sharing is enabled and verify the path under /mnt/chromeos.
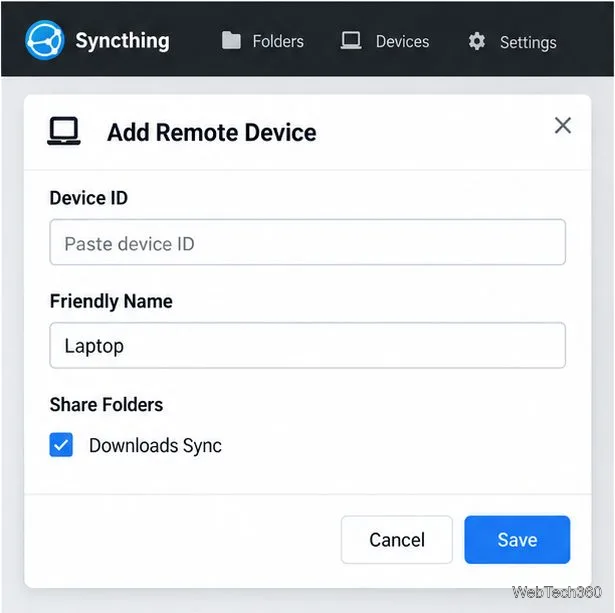
Start Syncthing on the other computer or phone. In its interface, choose Actions > Show ID and copy the device ID. On the Chromebook, select Add Remote Device, paste the ID, give it a recognizable name, and save. IDs are intended to be shared with peers.
Pairing is mutual: accept the Chromebook on the other device, and add its ID there if prompted. On the Chromebook, edit the folder and select the remote device in its sharing options. Save. The Syncthing getting started guide covers the device and folder exchange.
On the other device, accept the folder offer and choose its local destination. Back up existing files before connecting folders with important contents; matching names do not ensure that the data is identical. When both devices are online, the dashboard should show the peer connected and the folder status reach Up to Date. Create a small test file and confirm that it appears on the other device.
Changes and deletions sync across devices. For recovery options, enable file versioning on a receiving device and keep an independent backup. See Syncthing’s file versioning documentation.
systemctl --user status syncthing.service and reload http://localhost:8384. ChromeOS localhost forwarding or an administrator policy can affect access.0.0.0.0, Syncthing recommends a strong password and HTTPS.For Linux availability and setup details, see Google’s Chromebook Linux instructions.
Open the Emby Web App on your Chromebook, sign in to your server, and play movies, shows, music, and photos without installing Linux.
Install Syncthing on a Chromebook, share a ChromeOS folder with Linux, connect another device, and keep the web interface private.
Enable Linux on your Chromebook, install Tor Browser with the Tor Project’s Flatpak launcher, connect to Tor, and understand what the setup protects.
Install Bitwarden on a Chromebook, save your first login, autofill websites, and learn when the optional Linux desktop app makes sense.
Install Firefox, Brave, Edge, or Opera on a Chromebook with Linux. Learn how to enable the Debian environment, choose a compatible package, and understand the limits.
Read EPUBs and PDFs in Google Play Books on your Chromebook, or install Foliate through Linux for a local reader that supports more formats.
Install VLC on a Chromebook from Google Play, play local files and network media, or set up the Linux desktop version when you need it.
Install Krita on a Chromebook with ChromeOS Linux and Flatpak, then launch the app, open shared artwork, and troubleshoot common setup limits.
Use Teams on a Chromebook through Chrome, sign in with a work or school account, install the optional web app, and resolve camera or microphone issues.
Set up ChromeOS Linux, choose the right VS Code Debian package for your Chromebook, and install the desktop editor with APT.