Home
» WEB
»
How to Automatically Forward Emails From a Specific Address in Gmail
How to Automatically Forward Emails From a Specific Address in Gmail
To automatically forward messages from one sender in Gmail, create a filter for that sender and choose a verified forwarding address as the action. Gmail will then forward new messages that match the filter instead of forwarding every email in your inbox. You must verify the destination address first, and you can manage or delete the rule at any time.
1. Add and verify a forwarding address
Gmail requires confirmation before it will forward messages to a new destination. You only need to register and verify an address once for that Gmail account.
On a computer, open Gmail and sign in to the account receiving the original messages.
Click the gear icon, then choose See all settings.
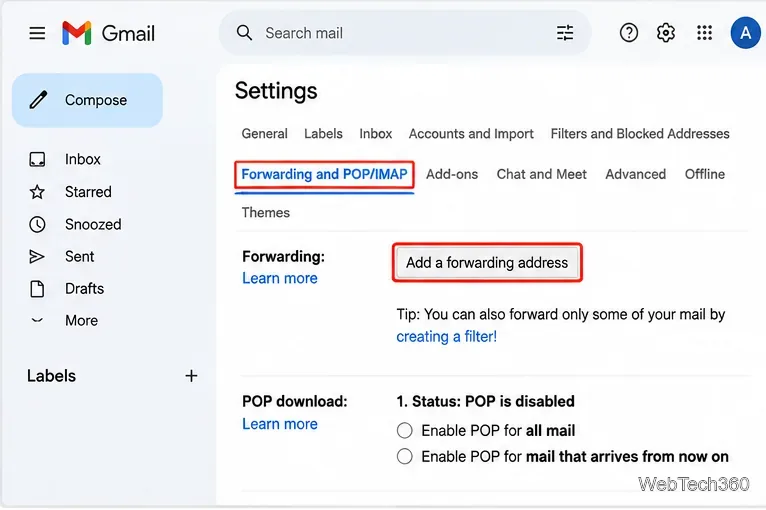
Open Forwarding and POP/IMAP (some accounts may show a shorter Forwarding tab).
In the Forwarding section, click Add a forwarding address, enter the destination email address, and follow the confirmation prompts.
Add a forwarding destination in Gmail settings.
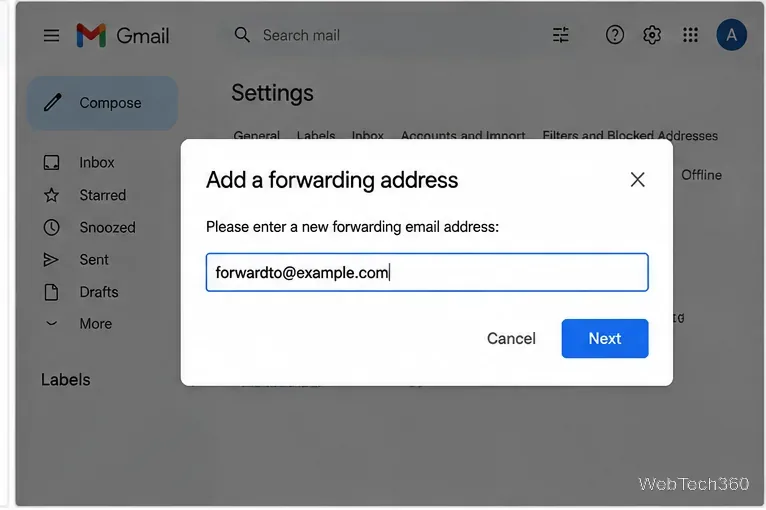
Enter the destination address in the dialog, continue, and open that mailbox in another tab or app.
Enter the destination email address.
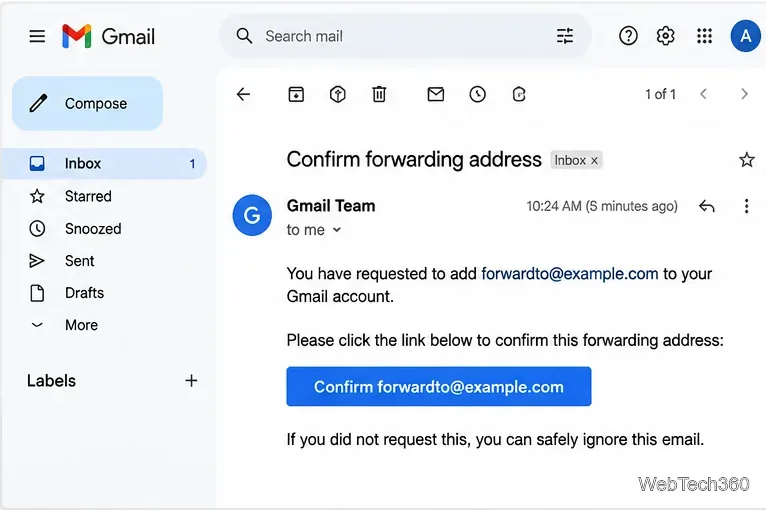
Find the verification message and follow its confirmation link or button. Return to the original Gmail account and refresh the settings page if the address does not appear immediately. You do not need to enable global forwarding for this task; the address only needs to be verified and available in the filter action.
Confirm the forwarding address from the destination inbox.
2. Create a filter for the specific sender
The quickest method is to start from an existing message. If you do not have one, you can create the same rule from Gmail’s search options.
Find and open a message sent by the address you want to forward.
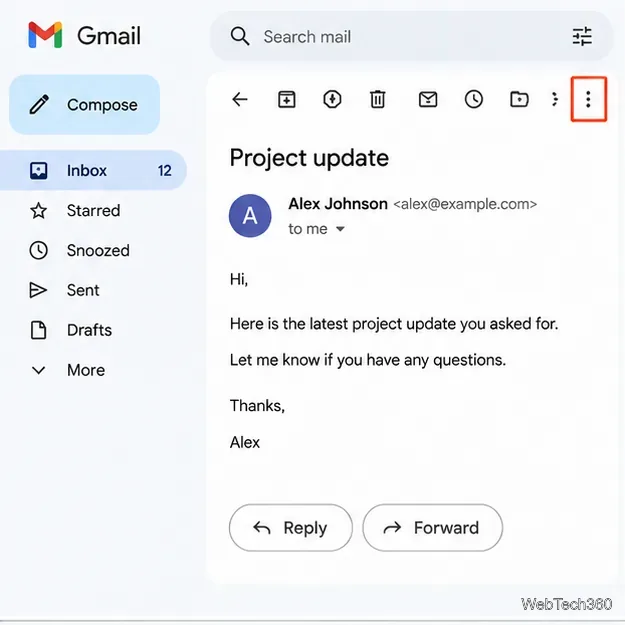
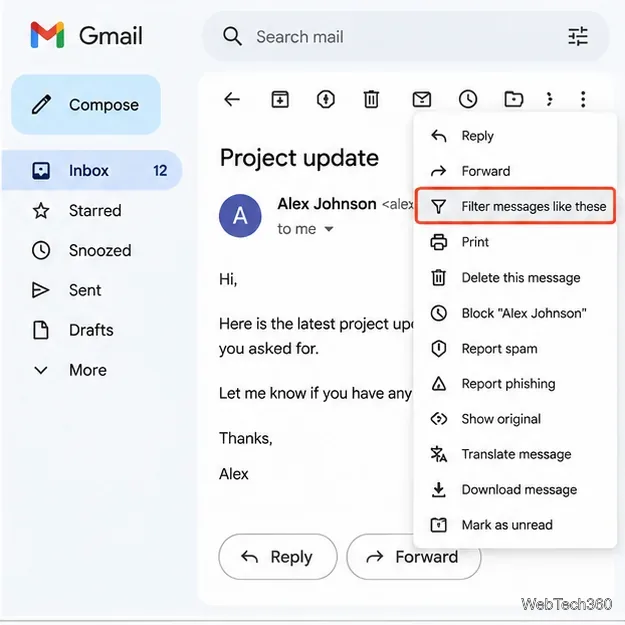
Click the message’s More menu (three vertical dots), then select Filter messages like these.
Open a message from the sender you want to filter.Choose “Filter messages like these” from the message menu.
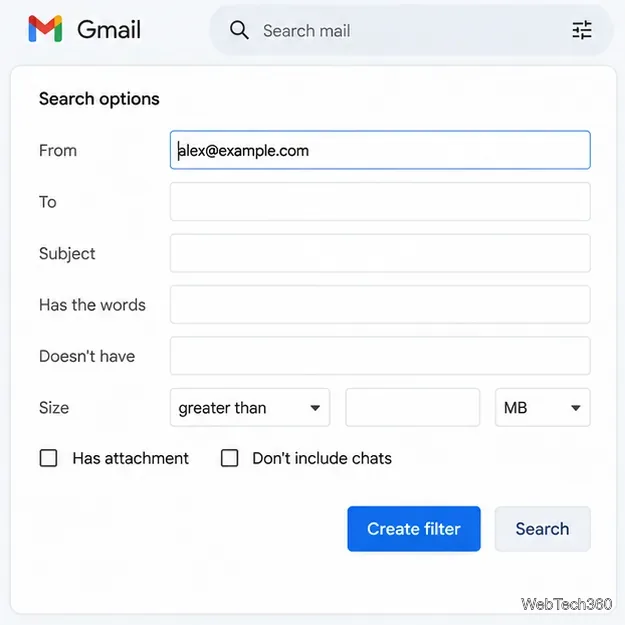
Check the From field. Make sure it contains the exact sender address. Remove any other criteria you do not want to apply, or add criteria such as a subject if you want to forward only a subset of that sender’s messages.
Click Create filter.
Check that the sender address is the only filter criterion you need.
3. Choose forwarding as the filter action
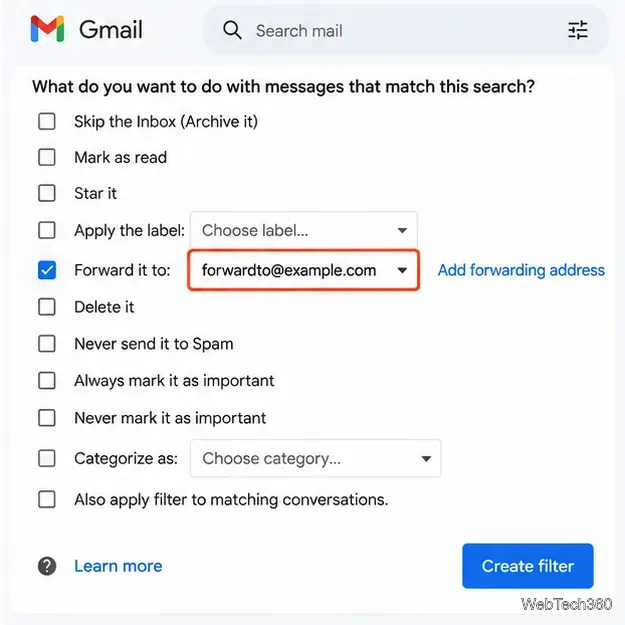
In the list of actions, check Forward it to.
Select the destination address you verified earlier. If it is missing, finish the verification steps above and reopen the filter setup.
Optionally choose other actions, such as applying a label. Avoid selecting Skip the Inbox (Archive it) unless you also want matching messages removed from the inbox view.
Click Create filter to save the rule.
Select the verified forwarding destination in the filter actions.
That’s it. Gmail applies the rule to new incoming messages that match the criteria. Creating a filter does not automatically forward older messages already in the mailbox. If you see an option to apply the filter to matching conversations, understand that it affects existing matching conversations only as offered in the interface; forwarding behavior for future mail is the key purpose of this rule.
Create the filter from search options instead
You can also build the rule without opening a message. In Gmail’s search bar, click Show search options, enter the sender in From, and click Search to check the matches. If the results are correct, choose Create filter, select Forward it to, pick the verified destination, and save. Gmail supports additional search criteria, so use them when you want a more precise rule.
Edit or stop automatic forwarding
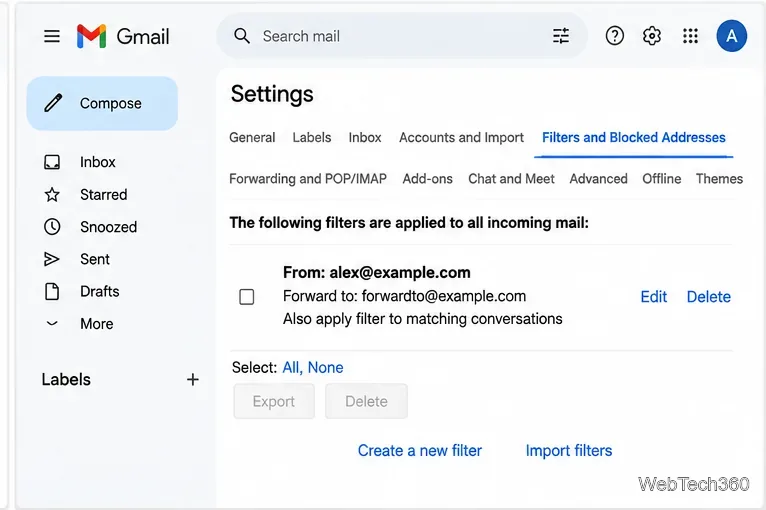
To change the sender or destination later, click Settings → See all settings → Filters and Blocked Addresses. Locate the rule and choose Edit to change its criteria or actions, then continue and update it. Choose Delete to remove the filter entirely. Deleting this rule stops this sender-specific forwarding; it does not delete the original messages.
Manage or remove the sender-specific filter later.
Troubleshooting and important details
The destination is not listed: open the destination inbox and complete the verification request, then refresh Gmail settings.
Every email is being forwarded: check Forwarding and POP/IMAP. For sender-specific forwarding, use a filter and avoid enabling global forwarding for all incoming mail.
A message did not forward: confirm the sender address and any other criteria match the message. Gmail’s filter only acts when all entered criteria match, and spam is excluded from automatic forwarding.
Replies are not forwarded: a reply is forwarded only if it also meets the filter’s criteria. For example, if a reply comes from a different address, a filter that matches only the original sender will not match it.
You want the message to stay in the inbox: do not select the archive action. Forwarding and archiving are separate filter actions.
Because forwarded messages can contain private or business information, double-check the destination address before saving the filter. If Gmail displays a forwarding notice you did not set up, review the forwarding and filter settings and secure your account.