Home
» WEB
»
How to Indent Paragraphs in Google Docs: A Step-by-Step Guide
How to Indent Paragraphs in Google Docs: A Step-by-Step Guide
To indent paragraphs in Google Docs, select the paragraph or paragraphs, then use the ruler or open Format > Align & indent > Indentation options. The ruler is fastest for visual adjustments; the options dialog is more precise when you need a specific measurement or a hanging indent for references. These instructions are for Google Docs on a computer in a web browser.
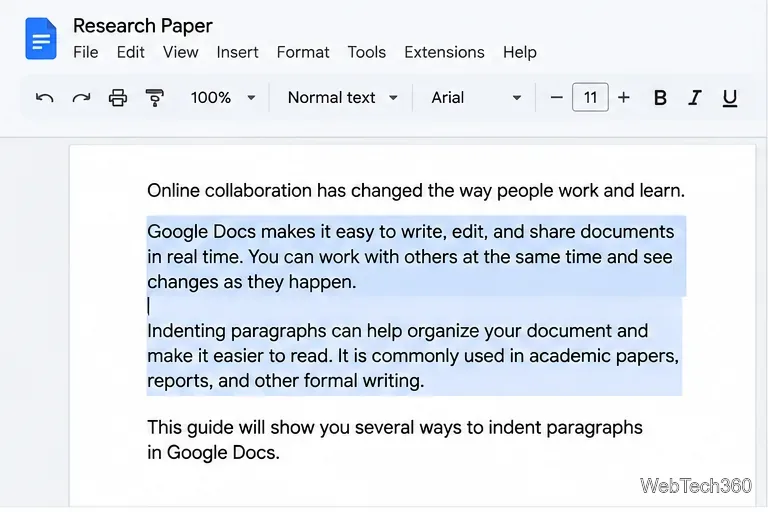
Select the paragraph text you want to format before changing its indent.
Understand the three common paragraph indents
First-line indent: Moves only the first line to the right, often used at the start of paragraphs in essays or manuscripts.
Left indent: Moves every line of the paragraph to the right.
Hanging indent: Keeps the first line at the margin while indenting the remaining lines, a common format for bibliographies and reference lists.
Indentation changes where text begins; it is different from adding blank space before or after a paragraph. Google’s official Google Docs help for lists and hanging indents documents the Indentation options path and the hanging-indent setting.
Method 1: Indent paragraphs with the ruler
Step 1: Select the paragraphs
Open your document in Google Docs. Drag across the paragraph or paragraphs you want to format. To select the entire document, use Ctrl+A on Windows or ChromeOS, or Command+A on Mac. If you only want to change one paragraph, placing the cursor inside it may be enough for paragraph-level settings; selecting the text makes it easier to see what you are changing.
Step 2: Show the ruler
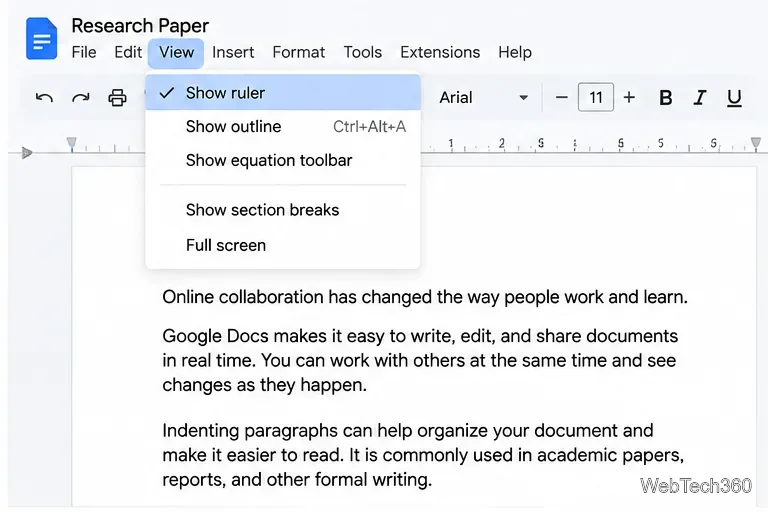
If the ruler is not visible below the toolbar, open View and choose Show ruler. At the left end of the ruler, look for the blue indent markers. The small rectangle controls the first line; the triangle below it controls the paragraph’s left indent. Hover over a marker if you need to confirm its function.
Turn on Show ruler from the View menu when the ruler is hidden.
Step 3: Create a first-line indent
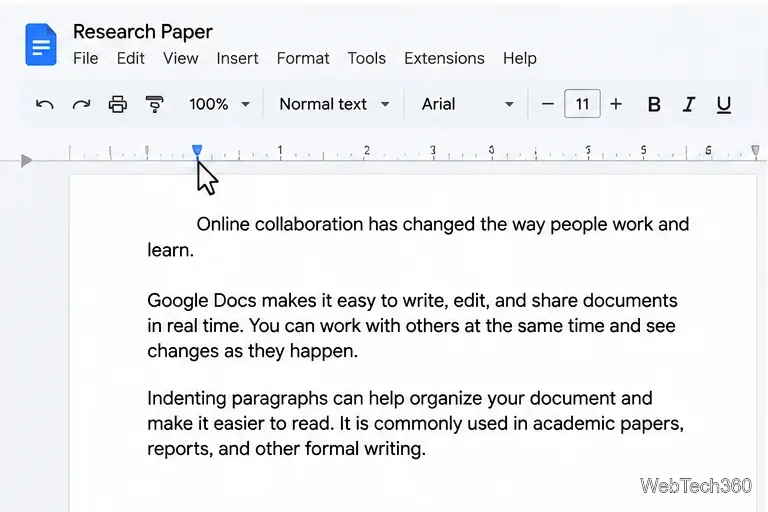
With the target paragraphs selected, drag the small rectangle to the right. Only the first line of each selected paragraph should move, while the following lines remain aligned at their existing left indent. Release the marker when the spacing looks right. For a common half-inch indent, move it approximately 0.5 inches along the ruler; use the dialog method below if you need an exact value.
Move the small rectangle to indent the first line without shifting the other lines.
Step 4: Indent the whole paragraph
To move every line together, drag the triangle to the right. This changes the left indent for the selected paragraph or paragraphs. If the rectangle moves with the triangle, that is expected: the first-line position is relative to the paragraph’s left indent. You can then adjust the rectangle separately to fine-tune the first line.
Method 2: Set an exact indent in Indentation options
Select the relevant paragraph or paragraphs.
Open Format > Align & indent > Indentation options.
In the dialog, set Left or Right indent if needed.
Under Special indent, choose First line or Hanging, then enter the measurement in the adjacent field.
Click Apply.
For example, choose First line and enter 0.5 inches to indent only the first line by half an inch. The exact appearance depends on the page margins and any existing indent settings.
Make a hanging indent for references
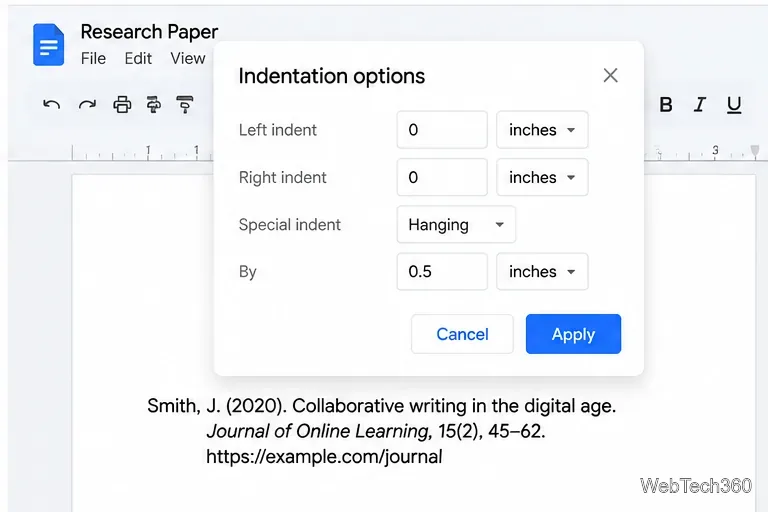
A hanging indent is useful when a citation wraps onto multiple lines. Select all the references you want to format, then open Format > Align & indent > Indentation options. Set Special indent to Hanging, enter the desired amount (0.5 inches is common for many academic styles), and click Apply.
Choose Hanging and set the amount in Indentation options for a consistent reference list.
You can also make a hanging indent with the ruler: move the triangle to the right first, then drag the rectangle back to the left margin. The first line returns to the margin while the remaining lines stay indented. For assignments, follow the specific style guide or instructor’s required measurement.
Quick fixes if the indent looks wrong
The whole paragraph moved: You probably dragged the triangle rather than the rectangle. Undo with Ctrl+Z (Windows/ChromeOS) or Command+Z (Mac), then adjust the correct marker.
The ruler is missing: Reopen View > Show ruler.
Only some paragraphs changed: Check that all intended paragraphs were selected before applying the setting.
You need a precise value: Use Indentation options instead of estimating from the ruler.
You are on a phone or tablet: The full ruler-based workflow described here is designed for the desktop web editor. If the app does not expose the required controls, open the document in a desktop browser.
Which method should you use?
Use the ruler when you want to adjust the layout by eye, the Indentation options dialog when you need a precise measurement, and the Hanging special indent for reference lists. After applying the change, scan the document to confirm that only the intended paragraphs moved and that wrapped lines align consistently.