Home
» WEB
»
How to Restore Chrome’s “Always Open Links of This Type” Option
How to Restore Chrome’s “Always Open Links of This Type” Option
If Chrome no longer shows the “Always open links of this type in the associated app” checkbox, you can restore it on Windows by enabling Chrome’s ExternalProtocolDialogShowAlwaysOpenCheckbox policy. The setting controls whether Chrome offers an “Always allow” choice when a website tries to open an external app through a link such as mailto: or another registered protocol. Google documents this policy for Chrome on Windows, macOS, and Linux.
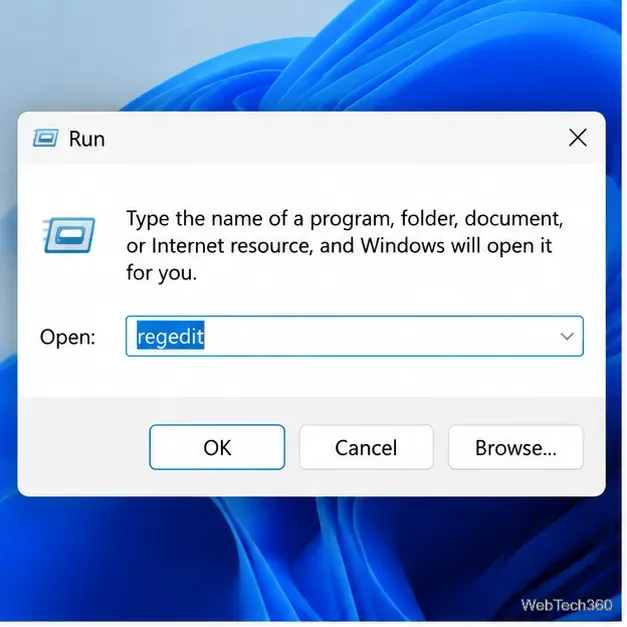
Open Registry Editor from the Windows Run dialog before changing Chrome’s policy.
Before you change the Registry
This procedure changes a Windows policy setting, so take care to enter the path and value name exactly. If this is a work- or school-managed computer, your organization may control Chrome policies; contact your administrator instead of overriding a managed configuration. Consider creating a restore point or exporting the relevant Registry key before editing it.
The checkbox does not make every external link safe. It lets you remember permission for a protocol prompt associated with a site, so only enable it for websites and applications you trust.
Step 1: Open Registry Editor
Press Windows + R to open the Run dialog.
Type regedit and press Enter.
If Windows displays a User Account Control prompt, review it and approve only if you intend to make this change.
Step 2: Go to Chrome’s policy key
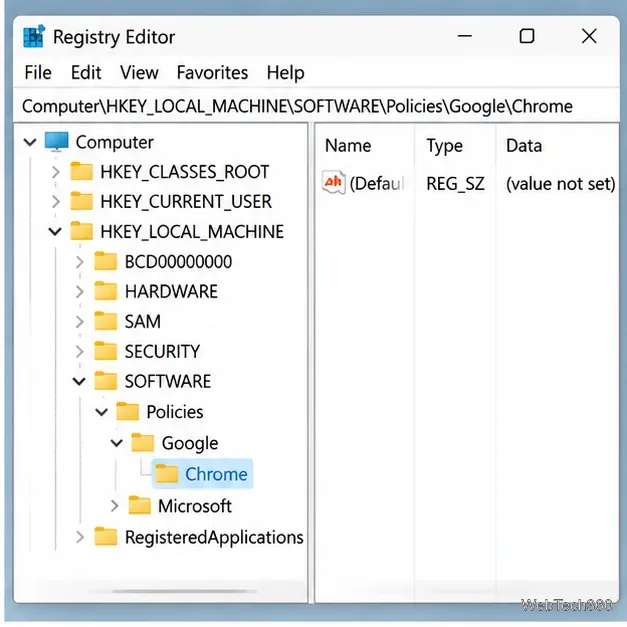
In Registry Editor, navigate to the following key:
The target is the Chrome key beneath SOFTWARE\Policies\Google.
If the Google or Chrome key does not exist, create only the missing key:
Right-click Policies, choose New > Key, and name it Google.
Right-click Google, choose New > Key, and name it Chrome.
Select the Chrome key. Make sure you are working under HKEY_LOCAL_MACHINE, not a similarly named location elsewhere in the Registry.
Step 3: Enable the “Always open” checkbox
Right-click the Chrome key in the left pane.
Select New > DWORD (32-bit) Value. This is the required value type even on 64-bit Windows.
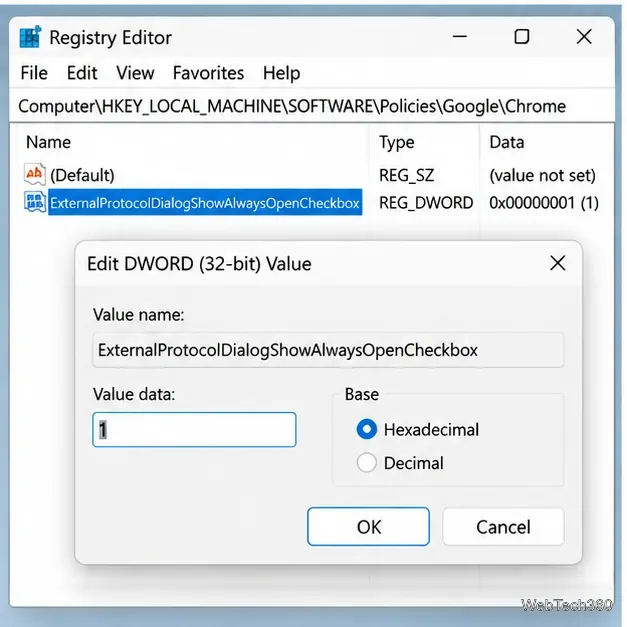
Name the value exactly ExternalProtocolDialogShowAlwaysOpenCheckbox.
Double-click it, set Value data to 1, and select OK. Hexadecimal or Decimal is fine for the value 1.
Set the policy DWORD to 1 to show the checkbox in Chrome’s external-protocol prompt.
The policy’s documented Registry location and value name are listed in Google’s Chrome Enterprise policy reference. A value of 1 enables the checkbox; a value of 0 disables it.
Step 4: Restart Chrome and test a trusted link
Close all Chrome windows, then reopen Chrome. The policy is applied after a browser restart.
Visit a site you trust and click a link that opens a desktop application, such as a mail link.
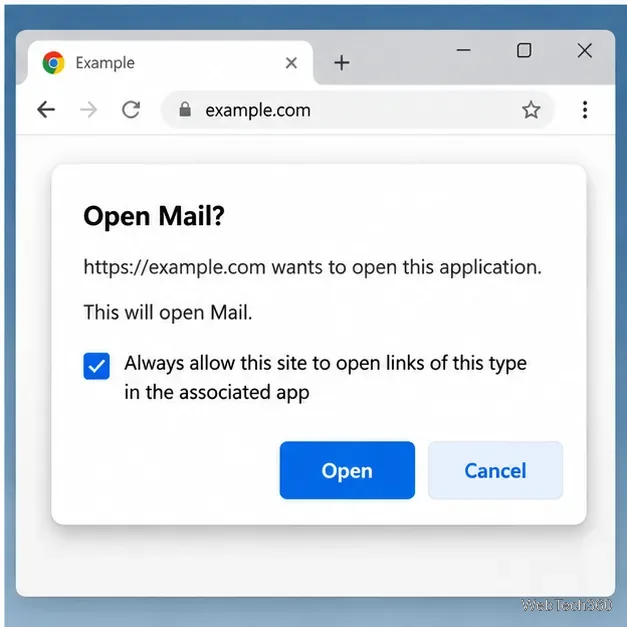
When Chrome shows the external-app confirmation, look for the “Always allow” or equivalent checkbox. Its exact wording can vary by Chrome version and platform.
Select the checkbox only if you want Chrome to remember the permission for that site and link type, then confirm opening the app.
The external-app confirmation can offer a checkbox to remember permission for this site and link type.
If the checkbox still does not appear
Check the value and path: confirm the DWORD is under HKEY_LOCAL_MACHINE\SOFTWARE\Policies\Google\Chrome and its data is 1.
Restart Chrome completely: close every Chrome window and reopen the browser.
Review managed policies: open chrome://policy in Chrome and look for ExternalProtocolDialogShowAlwaysOpenCheckbox. If a policy is set by an administrator, local changes may not take effect.
Consider the site and protocol: Chrome may not offer a remember option for every launch context. The policy controls checkbox visibility; it does not install the target app or make an unsupported protocol work.
How to turn the option off again
To hide the checkbox, change the DWORD value to 0, or remove only the DWORD you created if you want Chrome’s default policy behavior. Then restart Chrome. On a managed device, check with your administrator before changing policy values.