Home
» WEB
»
How to Turn Off the Pop-Up Blocker in Microsoft Edge
How to Turn Off the Pop-Up Blocker in Microsoft Edge
Microsoft Edge blocks pop-ups by default, but you can turn the blocker off or make an exception for a site that needs a new window to sign in, display a document, or complete a workflow. For most people, allowing pop-ups only on the site that needs them is the safer choice. The settings are available from Edge on desktop; menu wording can vary slightly by version.
Turn off the pop-up blocker for all websites
Use this option only if you understand the trade-off: disabling the blocker lets websites open pop-up windows and redirect tabs more freely, including unwanted or deceptive ones.
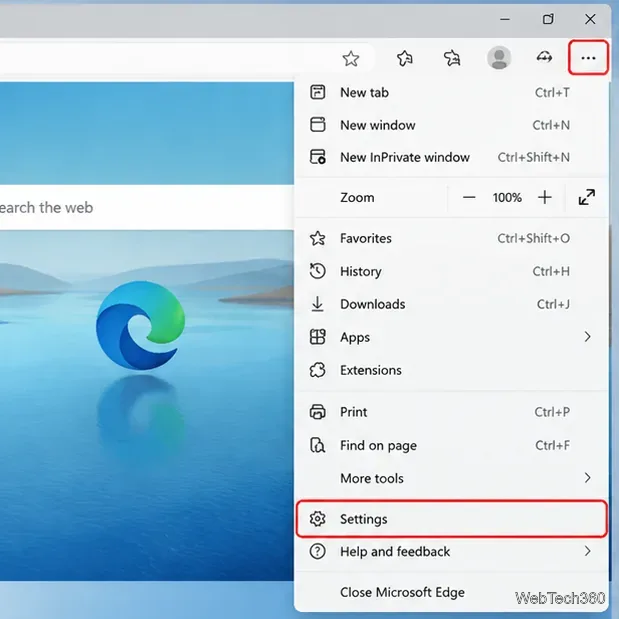
Open Edge’s menu. Launch Microsoft Edge and select the three-dot Settings and more button in the upper-right corner, then choose Settings.
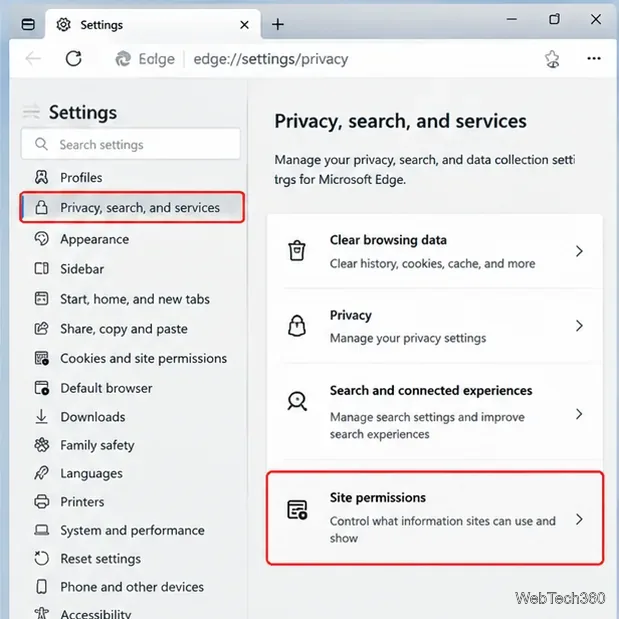
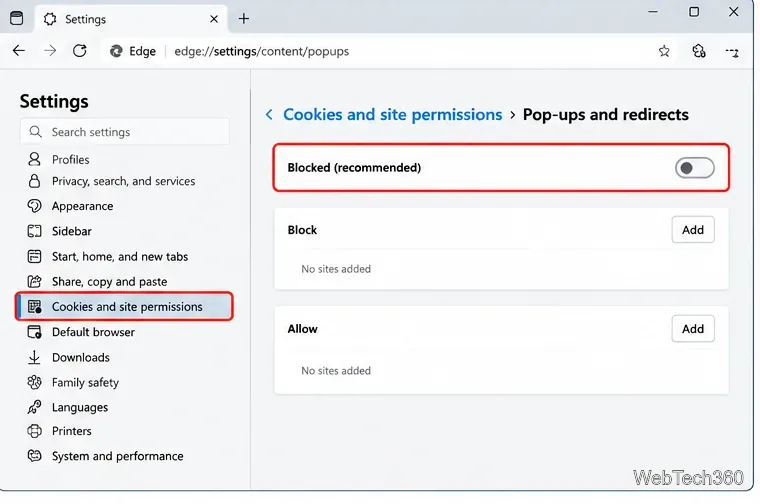
Open site permissions. Select Privacy, search, and services, then find Site permissions. Depending on the Edge version, this may appear under Cookies and site permissions. Open All permissions if it is shown.
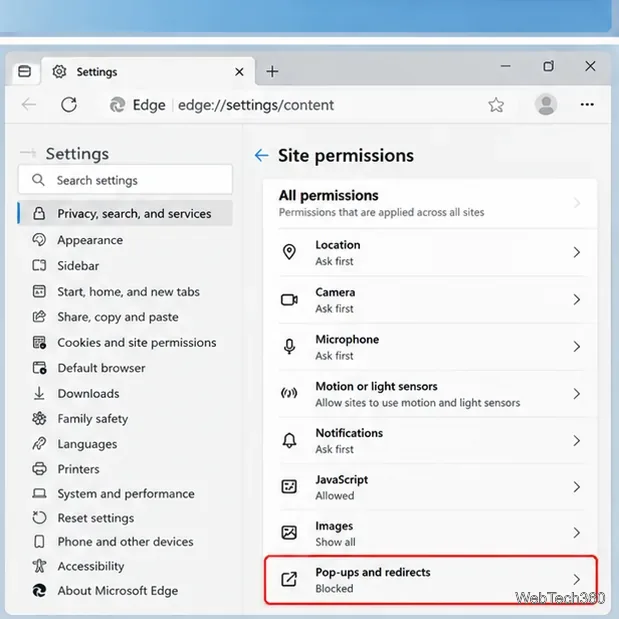
Choose Pop-ups and redirects. Select Pop-ups and redirects from the permissions list. You can also type edge://settings/content/popups into the address bar and press Enter to jump directly to the setting.
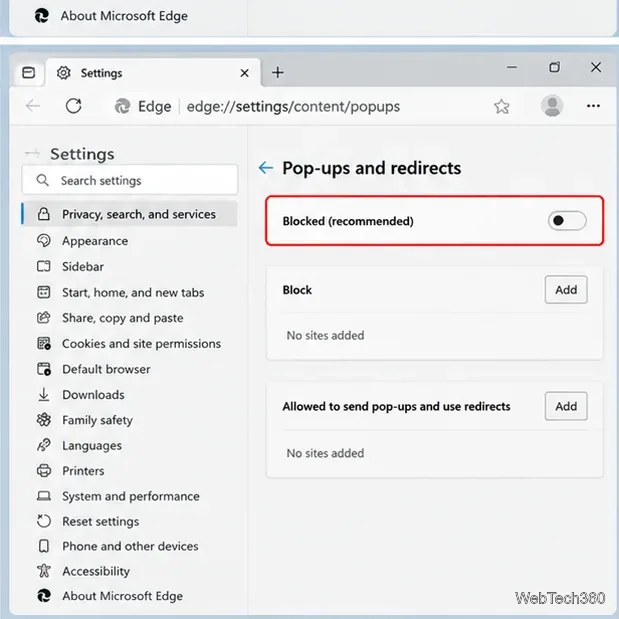
Switch off blocking. Turn off the Blocked (recommended) or similarly named blocking toggle. When blocking is off, Edge can allow pop-ups from sites without requiring an allow-list entry.
Open Settings from the three-dot menu in the Edge toolbar.Privacy and site-permission controls are grouped in Edge Settings.Open Pop-ups and redirects from the site-permissions list.Turn off the blocking toggle to allow pop-ups broadly.
Allow pop-ups for one website instead
If a bank portal, work application, online form, or document viewer needs a pop-up, you usually do not need to disable protection everywhere. Keep the main blocker on and add the site to Edge’s allow list.
Open Settings and navigate to Pop-ups and redirects using the path above.
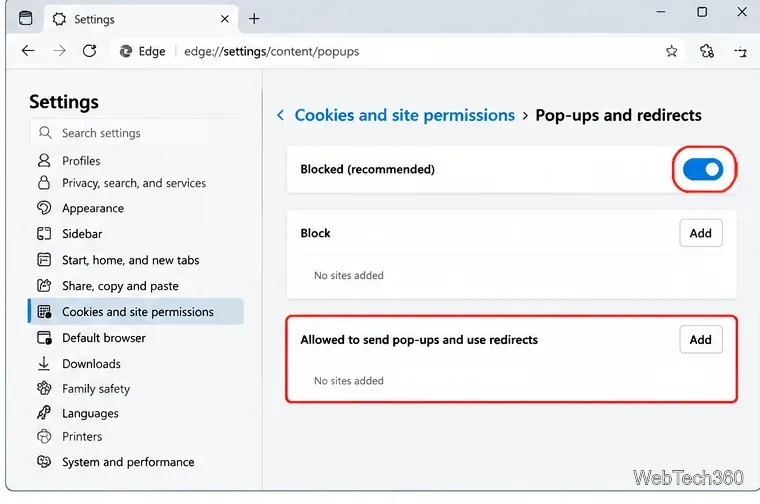
Make sure the main Blocked (recommended) toggle remains on.
Find Allowed to send pop-ups and use redirects (sometimes shown as Allow) and select Add.
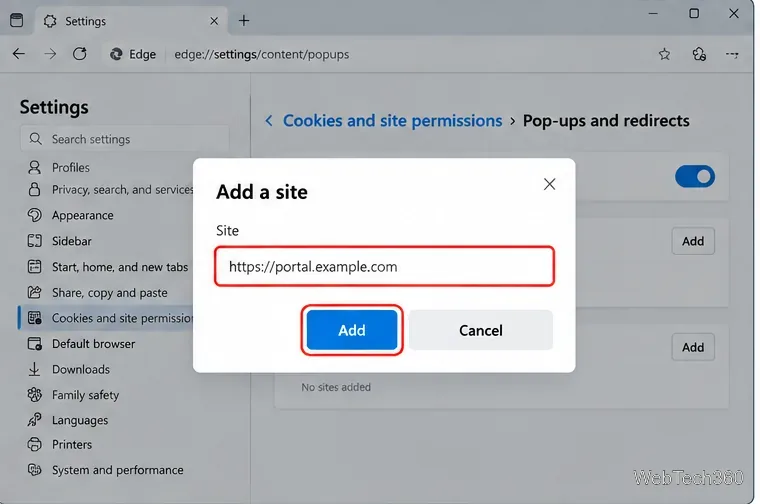
Enter the website’s full origin, including https:// when the site uses HTTPS, then select Add. For example, enter https://portal.example.com only if that is the actual site you trust.
Return to the site and try the action again. If it was already open, refresh the page or repeat the action that launches the pop-up.
Leave the general blocking toggle on when you only need a site-specific exception.Use the Add button beside the allowed-sites list.Enter the exact trusted site address in the Add a site dialog.
Allow a pop-up from the address bar
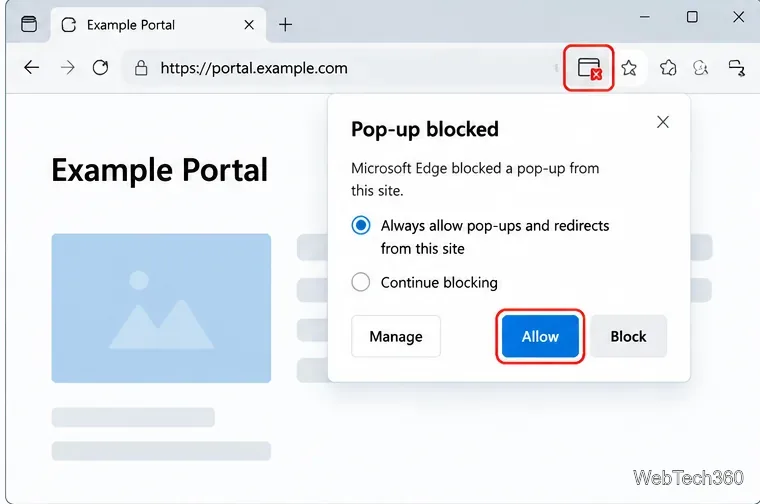
When Edge blocks a pop-up, an icon or notice may appear near the address bar. Select it to review the blocked pop-up. If you trust the website and expected the window, choose the option to always allow pop-ups and redirects from that site, then confirm with Allow if prompted. The wording and available choices may differ by version. Avoid allowing pop-ups from unfamiliar pages or sites that display unexpected security warnings, prizes, or download prompts.
Use the address-bar prompt to allow pop-ups for a trusted site when that option is available.
If pop-ups still do not work
Check the site address. Confirm that the exact website, subdomain, and protocol are in the allow list. An exception for one domain may not cover a different domain used by the sign-in or payment flow.
Refresh and retry. Close the blocked prompt, reload the page, and repeat the action that should open the window.
Distinguish pop-ups from notifications. Website notifications appear in the operating system’s notification area and are managed separately under site permissions. Changing the pop-up blocker will not stop or enable those notifications. See Microsoft’s guide to managing website notifications.
Check extensions. Ad-blocking or privacy extensions can change how a page behaves. Temporarily disable extensions one at a time to identify a conflict, then re-enable any that are not responsible.
Update Edge. Open Settings > About Microsoft Edge and install any available update.
Is it safe to turn off Edge’s pop-up blocker?
It is generally better to keep blocking enabled and allow only sites you recognize and need. Pop-ups can be legitimate, but they can also imitate system alerts or lead to phishing pages and unwanted downloads. Edge’s built-in blocker primarily controls windows or tabs that open automatically; it does not remove every advertisement embedded in a webpage, and it may not stop a window you deliberately open by selecting a link or button.
For the official instructions and current menu labels, see Microsoft Support: Block pop-ups in Microsoft Edge. If you only need one service to work, use the allow list and leave the general blocker enabled.