How to Add a Network Share to Your Chromebook

How to Add a Network Share to Your Chromebook

To add a network share to a Chromebook, open Files, choose More > Add new service > SMB Shares, and enter its address. Once mounted, the share appears in Files for browsing and transfers. ChromeOS connects to an SMB share; it does not create one on the server.

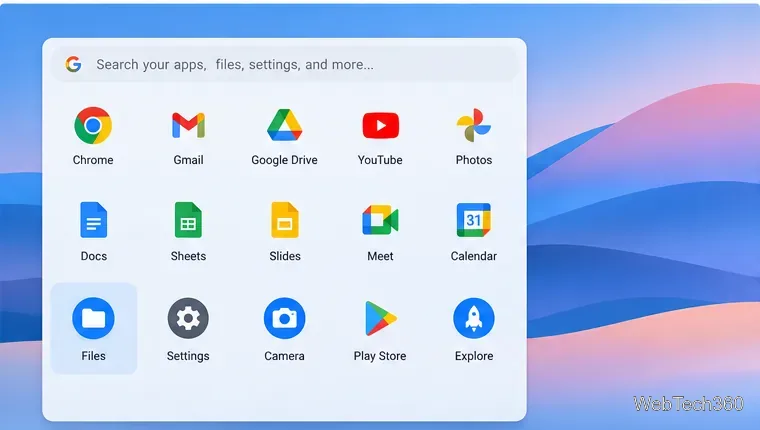
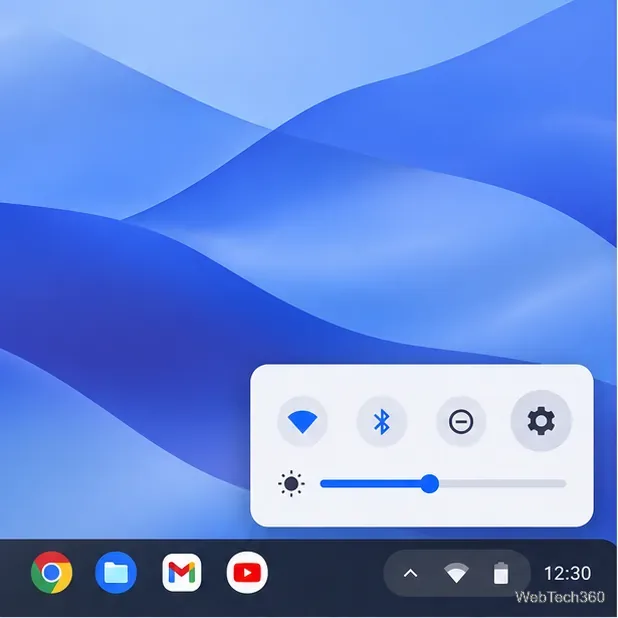
Illustration of the Chromebook Launcher with the Files app selected.

What you need before connecting

Make sure the folder is already shared from a Windows PC, NAS, or other SMB server. Your Chromebook must be able to reach that host on the same network or through a configured VPN. Have the server name or IP address, exact share name, and an account with access.

If you are sharing a Windows folder for the first time, use Microsoft’s guide to file sharing over a network to publish the folder and grant access. A Chromebook’s SMB connection cannot bypass permissions set on the server.

Add the share from the Files app

  1. Open Files. Select the Launcher in the lower-left corner of the screen and choose Files. You can also search for “Files” from the Launcher.
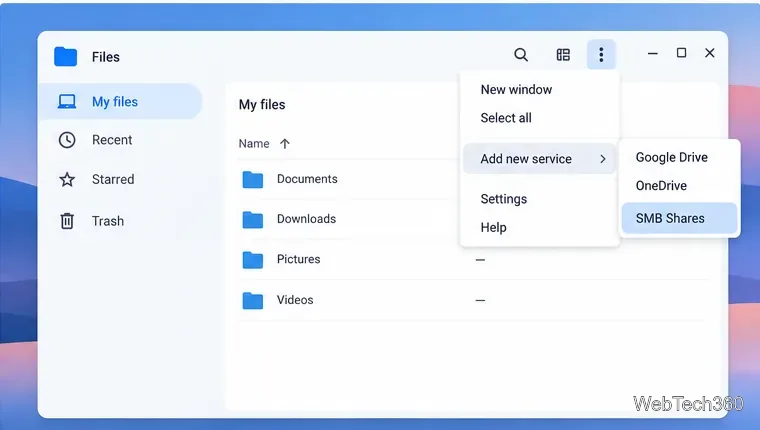
  2. Open the SMB connection option. In Files, select the three-dot More menu in the upper-right corner. Choose Add new service, then SMB Shares. Google’s current Chromebook instructions use this Files-app route; the option may be listed under Services on some ChromeOS versions.
Illustration of the Files app More menu with Add new service and SMB Shares.
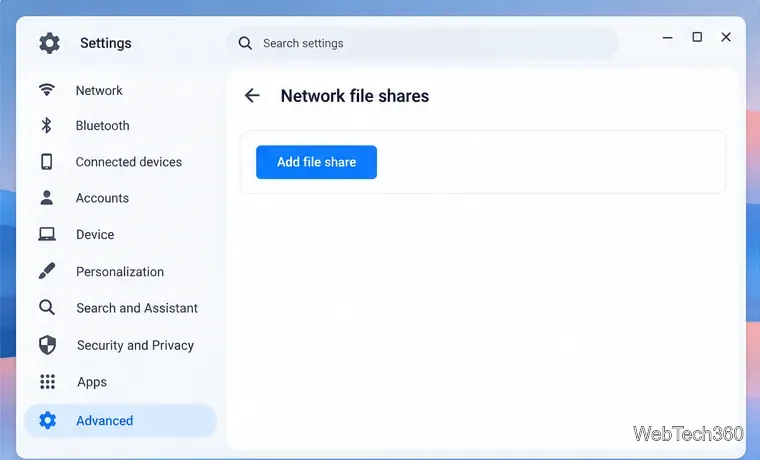
  1. Choose Add File Share. ChromeOS opens its network file share settings. Select Add file share to open the connection form.
Illustration of ChromeOS Network file shares settings and the Add file share button.
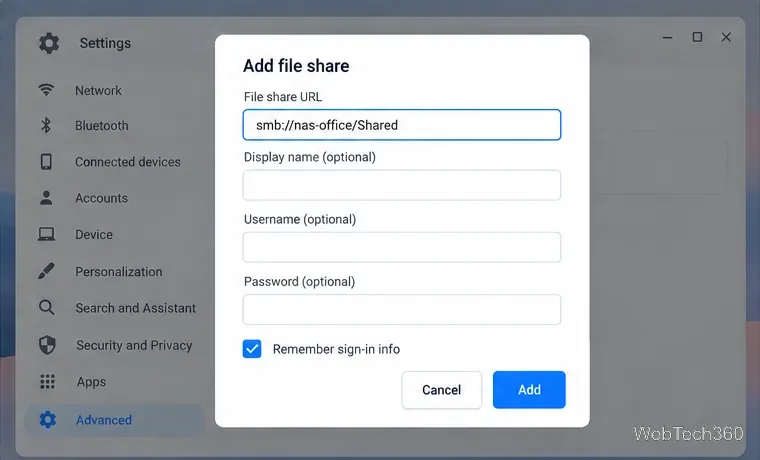
  1. Enter the file share URL. Use the server and share name, for example smb://192.168.1.25/Shared. Replace the example address and “Shared” with the values for your server. ChromeOS also accepts the Windows-style form A Windows UNC path is also supported, according to Chromium’s interface strings.
  2. Fill in optional details. Optionally add a label such as “Home NAS.” If the share requires authentication, enter the server credentials; do not assume your Google Account will work. Leave the fields blank only for a share that permits anonymous access. Save sign-in info only on a Chromebook you trust.
  3. Select Add. If the URL, server, and permissions are valid, ChromeOS mounts the share. You do not need to wait for a list of automatically detected shares; enter the address directly when you know it.
Illustration of the Add file share form with an SMB URL and optional sign-in fields.

Open the share and transfer files

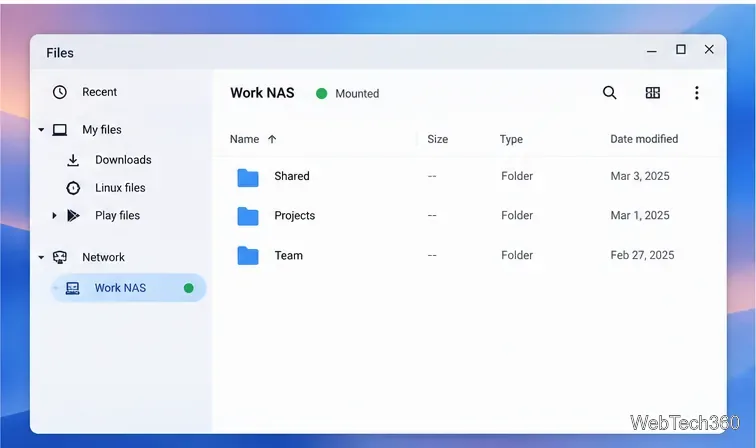
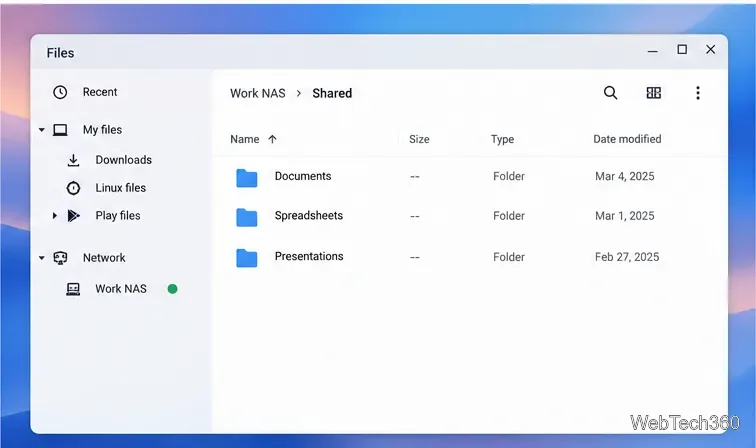
After a successful connection, open Files and look for the display name in the left sidebar, usually under Network. Select it to see the folders the server has made available. A share can be visible but read-only, so the ability to upload or edit depends on the permissions configured on the server.

Illustration of a mounted Work NAS share in the Files app sidebar.

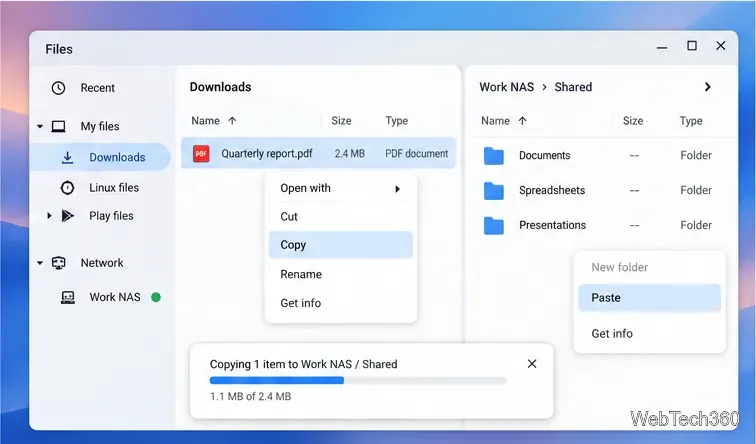
To copy from the share to your Chromebook, select a file and press Ctrl+C, open a local destination such as Downloads, and press Ctrl+V. To upload, copy a local file, open the destination folder on the share, and paste it. The Files context menu also has copy and paste commands. Keep the connection open until the transfer finishes.

Illustration of folders opened inside the Shared directory on Work NAS.
Illustration of copying a Chromebook file into an SMB share with a transfer progress bar.

Close a mounted share

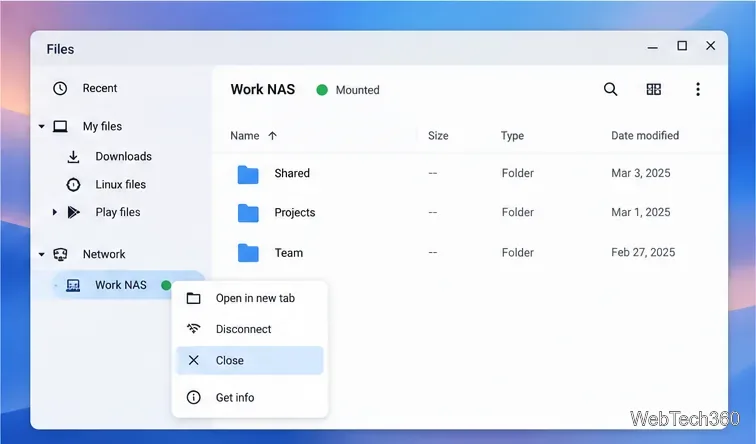
To disconnect, open Files, right-click the share in the sidebar, and choose Close. This closes the mounted network location in Files; it does not erase the files stored on the server. You can connect again later through More > Add new service > SMB Shares.

Illustration of the Work NAS context menu with Close selected.

Troubleshoot a Chromebook network share

  • “Invalid URL format” or a URL error: Check for a typo and include both the server and the share name. Try the smb://server/share format shown above.
  • “The specified share was not found”: Confirm the share name on the server, make sure the host is powered on, and check that the Chromebook can reach it over the current network or VPN.
  • “Check your credentials”: Confirm the username and password with the device owner or administrator. A Google Account password works only if that account is also configured for the file server.
  • Unsupported server: ChromeOS reports that the file server needs to support SMBv2 or later. Update or reconfigure an older NAS rather than enabling the insecure SMBv1 protocol.
  • Work or school Chromebook: An administrator can restrict file shares or network access. Google notes that some devices or files may not work on managed Chromebooks, so contact your administrator if the SMB option is missing or blocked.

For current connection steps, see Google’s Chromebook file types and external devices help and Files app guide. Chromium’s SMB share interface strings document the accepted URL formats and the SMBv2-or-later compatibility message.

Leave a Comment

How to Watch Emby on ChromeOS in Chrome
How to Watch Emby on ChromeOS in Chrome

Open the Emby Web App on your Chromebook, sign in to your server, and play movies, shows, music, and photos without installing Linux.

How to Set Up Syncthing on a Chromebook

How to Set Up Syncthing on a Chromebook

Install Syncthing on a Chromebook, share a ChromeOS folder with Linux, connect another device, and keep the web interface private.

How to Use Tor Browser on a Chromebook

How to Use Tor Browser on a Chromebook

Enable Linux on your Chromebook, install Tor Browser with the Tor Project’s Flatpak launcher, connect to Tor, and understand what the setup protects.

How to Use Bitwarden on ChromeOS: Install, Save, and Autofill

How to Use Bitwarden on ChromeOS: Install, Save, and Autofill

Install Bitwarden on a Chromebook, save your first login, autofill websites, and learn when the optional Linux desktop app makes sense.

How to Install and Use Alternate Browsers on a Chromebook

How to Install and Use Alternate Browsers on a Chromebook

Install Firefox, Brave, Edge, or Opera on a Chromebook with Linux. Learn how to enable the Debian environment, choose a compatible package, and understand the limits.

How to Read E-Books on a Chromebook: Play Books and Foliate

How to Read E-Books on a Chromebook: Play Books and Foliate

Read EPUBs and PDFs in Google Play Books on your Chromebook, or install Foliate through Linux for a local reader that supports more formats.

How to Install and Use VLC on a Chromebook

How to Install and Use VLC on a Chromebook

Install VLC on a Chromebook from Google Play, play local files and network media, or set up the Linux desktop version when you need it.

How to Set Up Krita on a Chromebook

How to Set Up Krita on a Chromebook

Install Krita on a Chromebook with ChromeOS Linux and Flatpak, then launch the app, open shared artwork, and troubleshoot common setup limits.

How to Use Microsoft Teams on a Chromebook

How to Use Microsoft Teams on a Chromebook

Use Teams on a Chromebook through Chrome, sign in with a work or school account, install the optional web app, and resolve camera or microphone issues.

How to Install Visual Studio Code on a Chromebook

How to Install Visual Studio Code on a Chromebook

Set up ChromeOS Linux, choose the right VS Code Debian package for your Chromebook, and install the desktop editor with APT.