iMessage Is Signed Out on iPhone: How to Fix It
Fix the iMessage Is Signed Out error on iPhone by checking Apple Account sign-in, activation, connectivity, and settings—without erasing your messages.
To put an iPad in Recovery Mode, connect it to a Mac or Windows PC, then use the button sequence for its design. On an iPad without a Home button, quickly press and release Volume Up, quickly press and release Volume Down, then hold the top button until the computer-and-cable screen appears. On a model with a Home button, hold Home and the top button together; when the screen goes dark, release the top button but keep holding Home until the recovery screen appears.
Recovery Mode is a way for a computer to update or reinstall iPadOS. Entering it does not erase the iPad. Choosing Restore does erase its data, so try Update first when you are troubleshooting and that option is available.
Use a cable that supports data as well as charging, and connect the iPad directly to the computer. Make sure the computer has an internet connection because it may need to download iPadOS. On a Mac running macOS Catalina or later, open Finder; on macOS Mojave or earlier, open iTunes. On a Windows PC, open the Apple Devices app or iTunes.
If the iPad still starts normally, make a backup before troubleshooting. Recovery Mode is useful when an update fails, the iPad remains on the Apple logo without a progress bar, or the computer asks you to update or restore it. It is not a fix for a damaged charging port, failed battery, or other hardware fault.
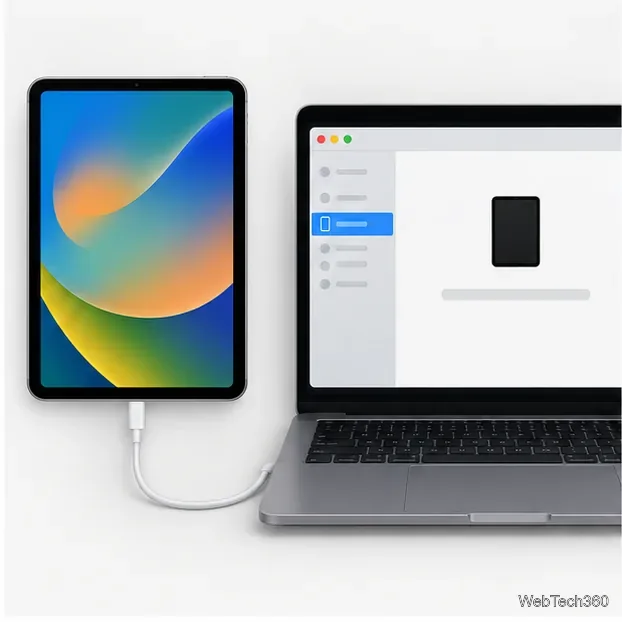
Keep the iPad connected to the computer while you press the buttons. The volume presses should be quick, one after the other:
If the passcode screen or Home Screen appears instead, the iPad started normally. Turn it off and repeat the sequence, making sure the two volume buttons are pressed and released separately before you hold the top button.
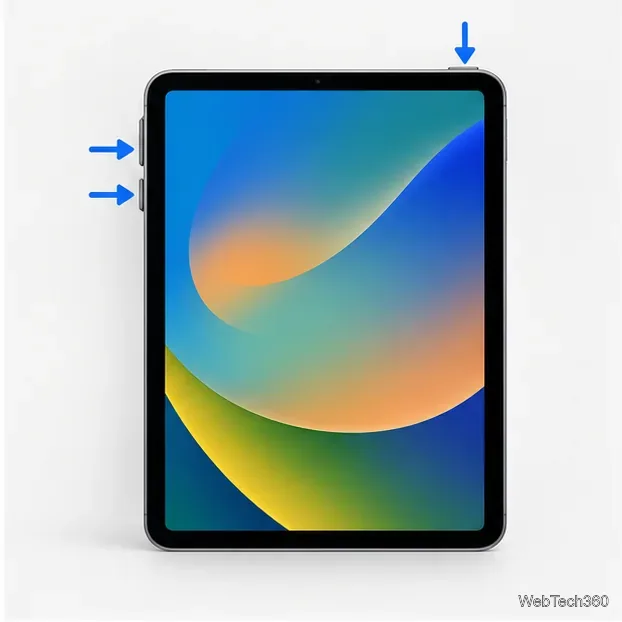
Keep the iPad connected. Press and hold the Home button and the top button at the same time. When the iPad turns off, let go of the top button while continuing to hold Home. Keep holding Home through the Apple logo, then release it when the recovery screen appears.
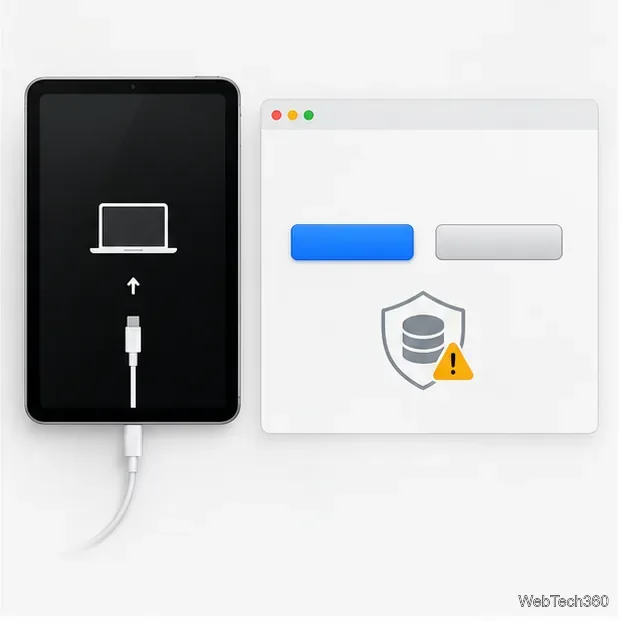
The screen should show a cable and a computer. If you see the passcode screen or the iPad returns to the Lock Screen, start again. The timing matters: releasing both buttons as soon as the screen goes black will usually restart the iPad instead of opening Recovery Mode.
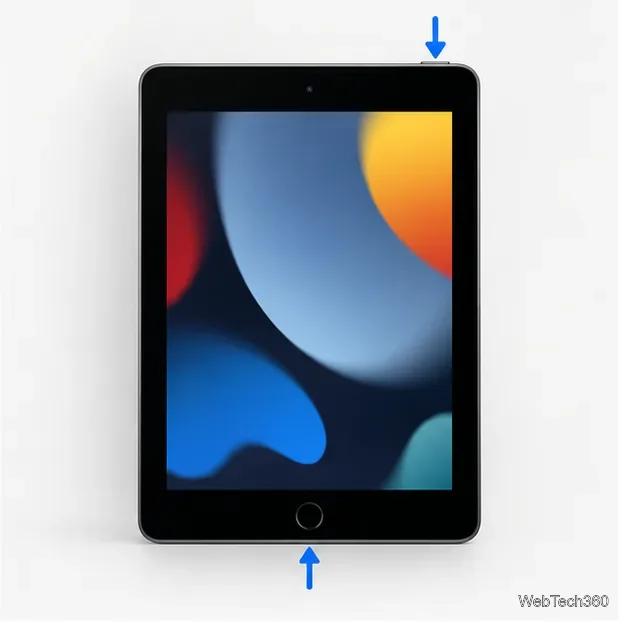
After the recovery screen appears, select the iPad in Finder or the Apple Devices app. If the computer offers Update or Restore, choose Update first when your goal is to fix iPadOS without erasing personal data. Apple says Update reinstalls the software while keeping personal data, although it is still wise to have a backup whenever possible.
Restore reinstalls iPadOS and erases the iPad’s data and settings. Use it only if Update does not solve the problem or you intend to erase the device. After a restore, set up the iPad again and recover your information from a backup if you have one. See Apple’s current iPad recovery instructions for the full process.
For a connected-device walkthrough, see how to locate an iPad in Finder or Apple Devices. If the Restore screen returns after restarting, Apple explains when to try Update in its persistent Restore screen guidance.
Fix the iMessage Is Signed Out error on iPhone by checking Apple Account sign-in, activation, connectivity, and settings—without erasing your messages.
Turn off your iPhone VPN in the app or Settings, confirm it disconnected, and stop automatic reconnections without deleting your account.
Learn how to encrypt your iPhone with a strong passcode, protect iCloud and computer backups, and secure your data if your phone is lost or stolen.
Learn how to clear Safari and Chrome cache on iPhone, manage app storage safely, and understand when clearing cached data actually helps.
Learn how to fight Gym Battles in Pokémon GO, pick effective attackers, use Charged Attacks and dodges, and claim a Gym after defeating its defenders.
Explore classic Cydia tweaks for jailbroken iPads, from SwipeSelection to Quasar, with compatibility warnings and modern alternatives.
Stop Apple Music signup prompts in the Music app. Learn where to find Show Apple Music on iOS and what turning it off does—and does not—change.
Set up a Shortcuts automation to text Mom when your iPhone battery gets low. Follow four steps, plus delivery checks and privacy tips.
Save posts on X in a few taps. Learn where to find the Bookmark button on iPhone, Android, and desktop, plus how to view, remove, and organize saved tweets.
Turn on AR mode in Pokémon GO during a wild encounter, find AR settings, and fix camera or device compatibility issues.