How to Screenshot on Mac: A Comprehensive Guide
Learn how to screenshot on Mac with shortcuts for the full screen, an area, or a window, plus the Screenshot app, clipboard, editing, and save-location tips.
To display custom text directly on a macOS desktop, use GeekTool’s Shell Geeklet to show the output of a plain-text file. You write a reminder or checklist in a .txt file, place a Shell Geeklet on the desktop, and point it to that file. GeekTool runs the command and puts its output over the wallpaper.
Check compatibility first. GeekTool is a third-party utility. Its developer’s download page currently lists version 3.4, but does not provide a current macOS compatibility chart. Confirm that the app supports your macOS release before installing it, and do not bypass a macOS security warning to force an install. If GeekTool is unavailable on your Mac, Apple’s built-in Stickies app can keep a note on the desktop while it is open.
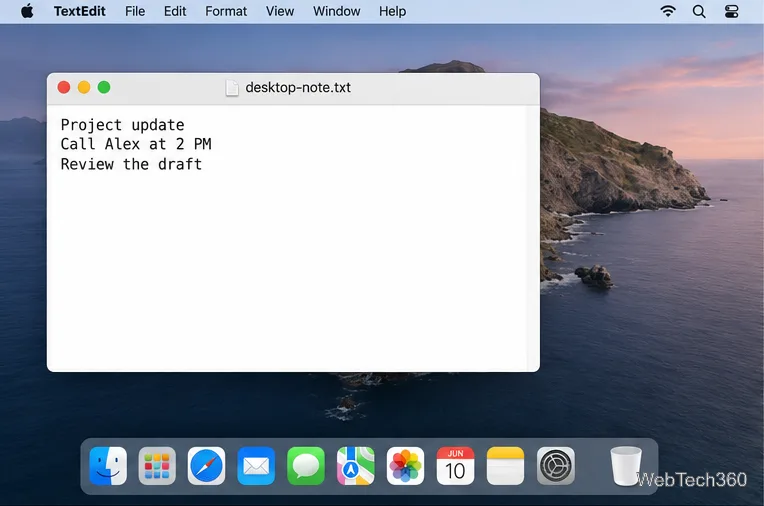
Open TextEdit, choose File > New, then choose Format > Make Plain Text. Enter the message you want to see, using separate lines for a short checklist or reminder. Plain text is important because GeekTool will print the file’s characters as command output; rich-text formatting is not needed.
Save the file to your Desktop as desktop-note.txt. TextEdit can create both rich-text and plain-text documents, so check the format before saving. Apple’s TextEdit guide explains how to convert a document to plain text and save it as a .txt file.
Download GeekTool from the developer’s official site, following the installation instructions provided with the download. Open GeekTool. Its main window lists the available Geeklets; the developer’s quick-start guide says to drag the Shell module onto the desktop. Drop it where you want the text to appear. GeekTool creates a frame for the output and opens an Inspector for that Geeklet.
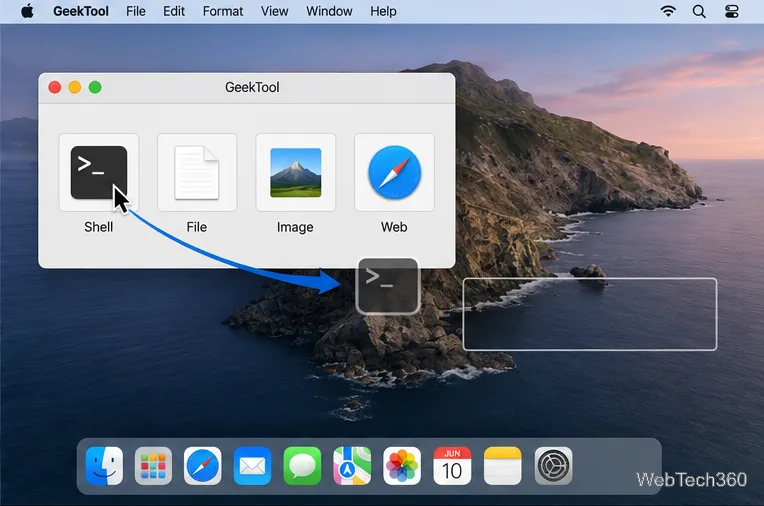
In the Inspector’s Command field, enter:
cat ~/Desktop/desktop-note.txt
The cat command reads the file and prints its contents, which is what GeekTool displays. The tilde (~) stands for your home folder. If you saved the file somewhere else or gave it another name, update the path to match. For a path that contains spaces, use quotes around the full path, for example:
cat "$HOME/Desktop/desktop-note.txt"
As soon as the Shell Geeklet runs the command, its frame should show the text. This command only reads the file; it does not edit your note or change your wallpaper. GeekTool’s official documentation describes Shell Geeklets as a way to display the output of a Unix shell command.
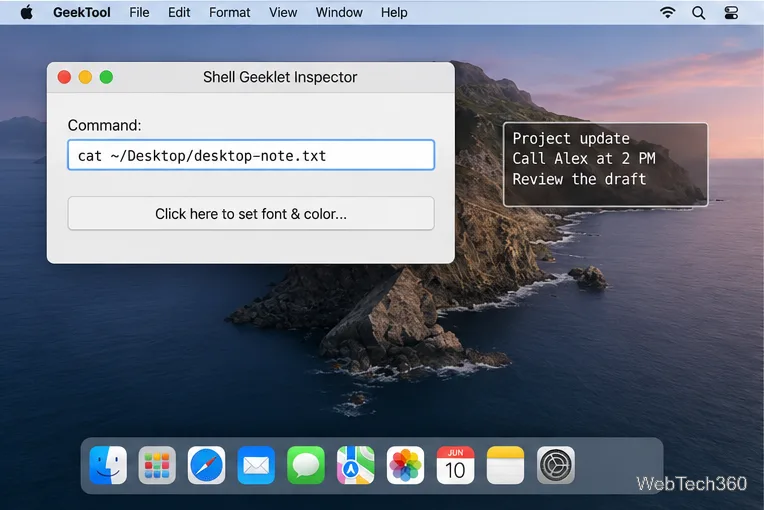
Move the Geeklet frame to place the text. In the Inspector, use the font and text-color controls to choose a readable style; the official quick-start also documents text alignment. Pick a color with enough contrast against the wallpaper, and leave room for the longest line so it is not clipped. A quieter area of the desktop usually makes a reminder easier to scan.
GeekTool places Geeklets on the desktop layer, around Finder icons and the wallpaper. They are not lock-screen messages, and open windows can cover them. The developer documentation notes that a Geeklet can be set to stay on top, if that behavior is available in your version.
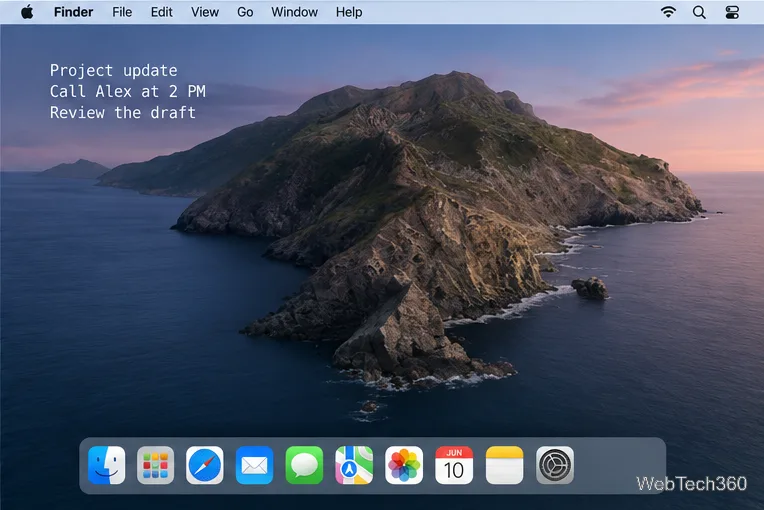
To change the message, edit desktop-note.txt in TextEdit and save it. GeekTool must run the Shell command again to show the new contents. If the display still shows the old text, reopen GeekTool and check that the command points to the file you edited; you can also refresh or reopen the Geeklet from its controls if your version provides that option.
Keep GeekTool running for the text to remain on the desktop. Closing its settings window is different from quitting the app; if you quit GeekTool, the Geeklet stops displaying output. To start it automatically after you sign in, open Apple menu > System Settings > General > Login Items & Extensions. Under Open at Login, click the add button, select GeekTool, then click Add. Apple’s login-items guide covers this setting.
desktop-note.txt, and the path in the Command field matches its location.Learn how to screenshot on Mac with shortcuts for the full screen, an area, or a window, plus the Screenshot app, clipboard, editing, and save-location tips.
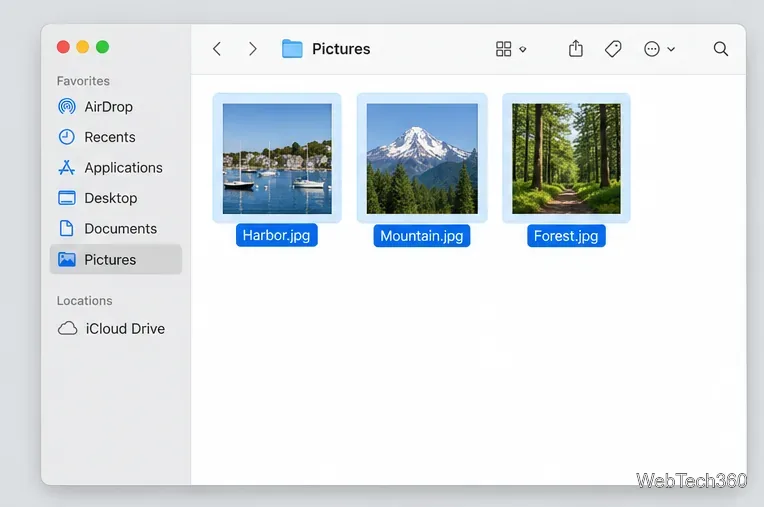
Combine multiple images into a single PDF on macOS using Finder or Preview. Control page order, avoid cropping, and fix missing pages without extra software.
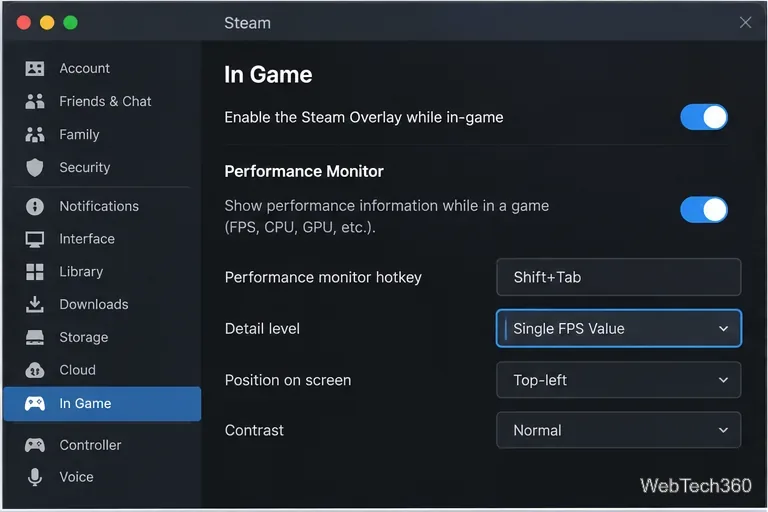
Learn how to show FPS on a Mac with Steam’s performance overlay or Apple’s Metal Performance HUD, plus fixes when the counter does not appear.
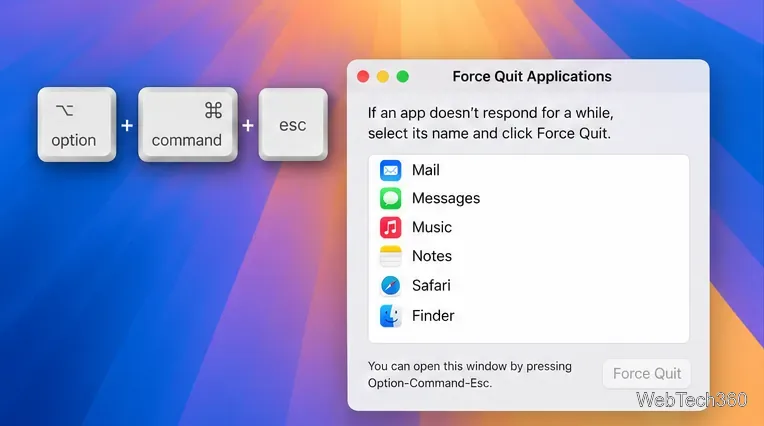
Use Option–Command–Esc to force quit an unresponsive Mac app, or close it from the Apple menu, Dock, Activity Monitor, or Terminal.
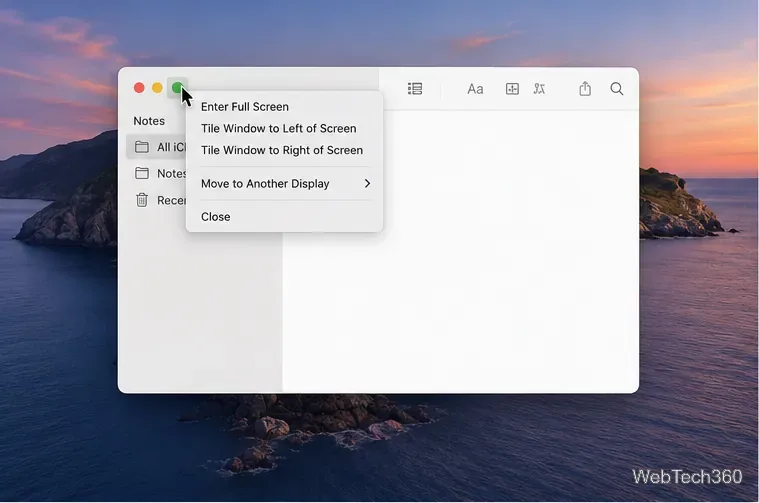
Set up Split View, resize or replace a pane, use Mission Control, and learn when desktop window tiling is a better fit on your Mac.
Learn how to remove EXIF data from photos on macOS, hide location in Photos, clean exported JPEG copies with ExifTool, and verify the result.
Sync two folders on a Mac with SyncTwoFolders, choose a one-way or two-way update, and preview changes before files are replaced or removed.
Back up a Tumblr blog on your Mac with Tumblr’s web export. Download and unpack the ZIP, keep its posts and media safe, and know what the archive leaves out.
Use Google Maps on your Mac in Safari or Chrome, find places and routes, switch map layers, and add a Safari web app to your Dock on macOS Sonoma 14 or later.
Compare five free WAV-to-MP3 converters for Windows and macOS, including online file limits, local batch tools, and practical export settings.