How to Screenshot on Mac: A Comprehensive Guide

Learn how to screenshot on Mac with shortcuts for the full screen, an area, or a window, plus the Screenshot app, clipboard, editing, and save-location tips.
You can edit a property list (.plist) file on macOS in Xcode’s structured editor. Back up the file, open it in Xcode, change only documented keys and values, then save. Avoid editing a third-party app’s installed bundle: changing a signed app can invalidate its signature or break updates. For your own app, edit the project source or build settings and rebuild.
Property lists hold structured data—strings, numbers, Boolean values, arrays, and dictionaries. An app’s Info.plist describes its bundle; separate plists may store preferences. Use the file and key documented by the app: inventing a key will not add support for a setting.
Before editing, identify whether the file contains app metadata or a user preference. If you want to change a feature in an app you use, start in that app’s settings or documentation. A preference file may be rewritten when the app launches or quits; an installed bundle’s Info.plist is not a general settings panel.
For an Xcode project you maintain, check the target’s Info pane and build settings first. Xcode may generate Info.plist at build time, so editing a built copy can be temporary. Apple’s editing guide covers the structured editor; its build settings reference explains generated values.
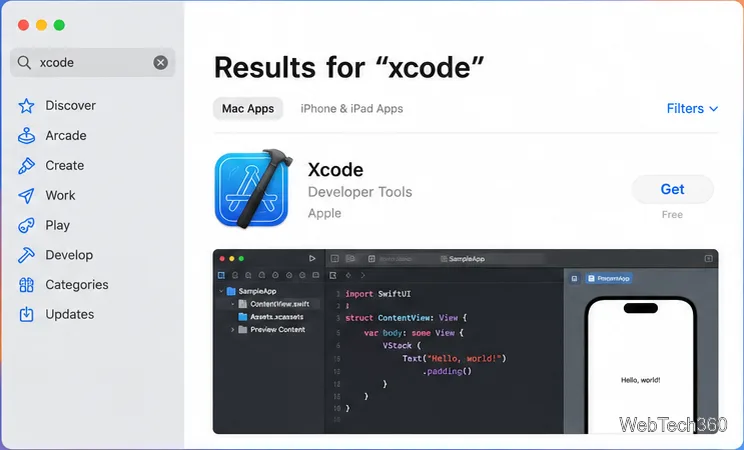
Get Xcode from the Mac App Store. It is currently listed as free; check the listing for requirements for the version available to your Mac. Launch Xcode once after installation.
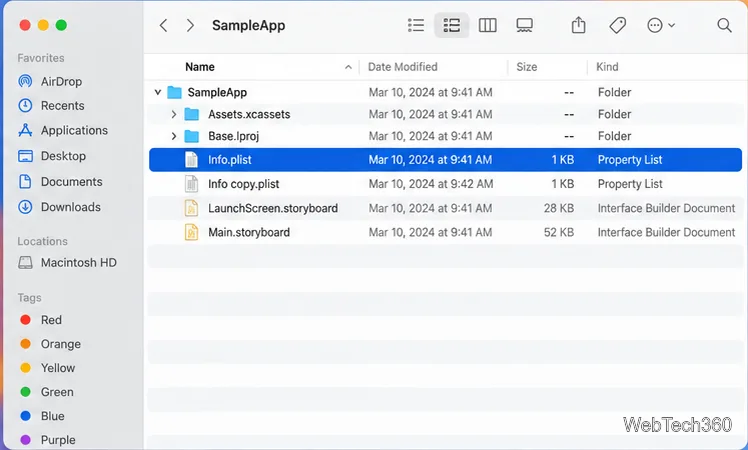
Find the plist in Finder and duplicate it or copy it to a working folder before editing. Keep the original until you verify the change. Store backups outside an app’s .app bundle; adding files there can alter its signed contents.
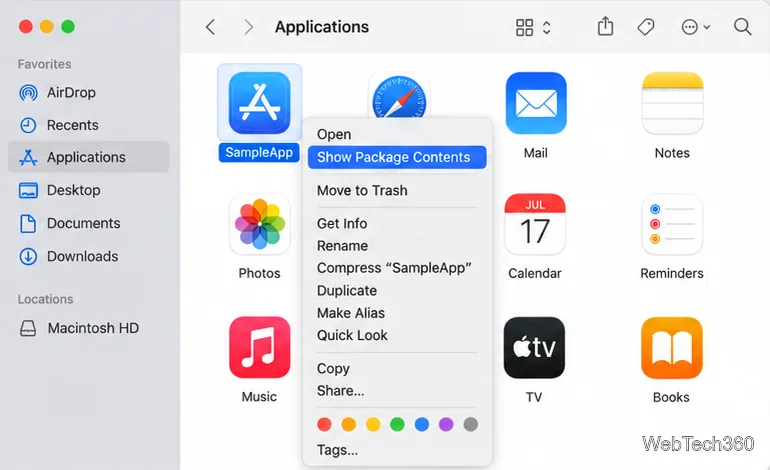
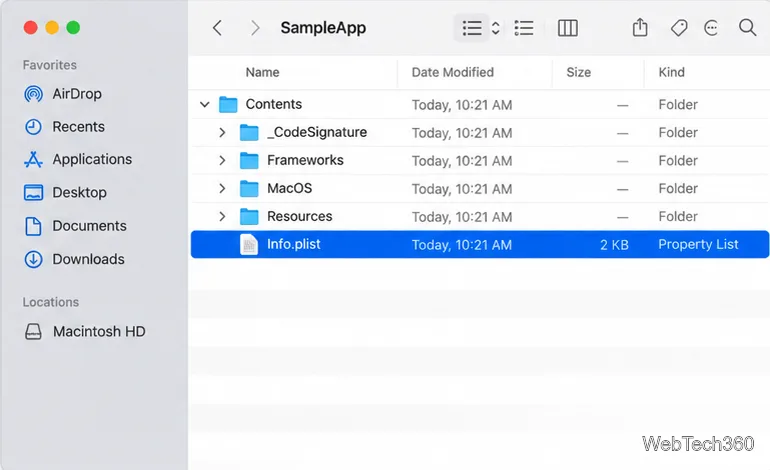
To inspect an app bundle, Control-click the app in Finder and choose Show Package Contents. This reveals its internal folders. Use this to locate a file, or edit only an app you maintain and can rebuild or re-sign; don’t patch a third-party app in place.
Open Contents, then look for Info.plist. Other plists may be elsewhere, so follow the app or project documentation. For a standalone file, use its normal Finder location.
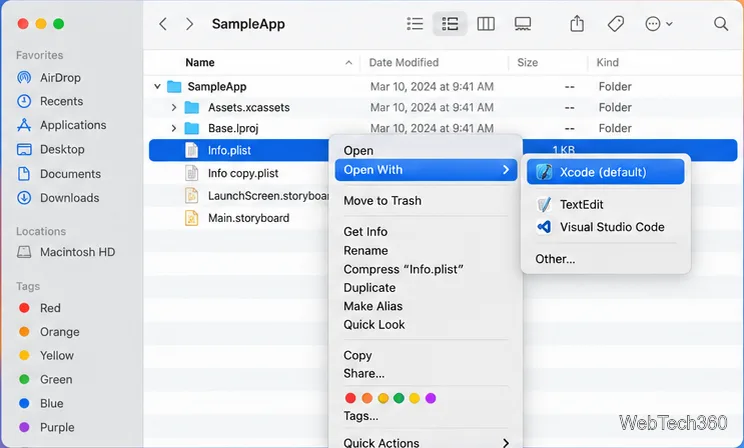
Control-click the plist and choose Open With > Xcode. If Xcode is missing, choose Other and select it from Applications. You can also open Xcode and use File > Open. A structured plist appears as key, type, and value rows.
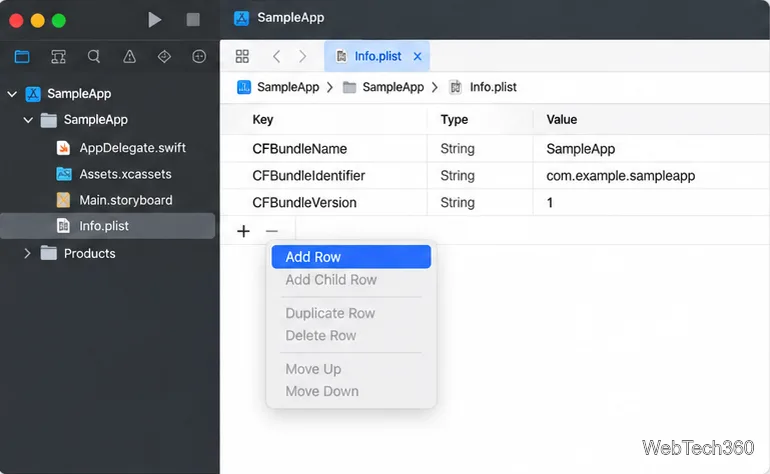
Click an existing value to edit it. To add a setting, Control-click in the editor and choose Add Row, or click the add control. Use the exact key documented by the app; misspelled or unsupported keys may be ignored.
Match the value type to the documented format: a Boolean, number, and string are not interchangeable. Arrays hold ordered items; dictionaries hold named values. Avoid guessed or duplicate keys, then press Command-S.
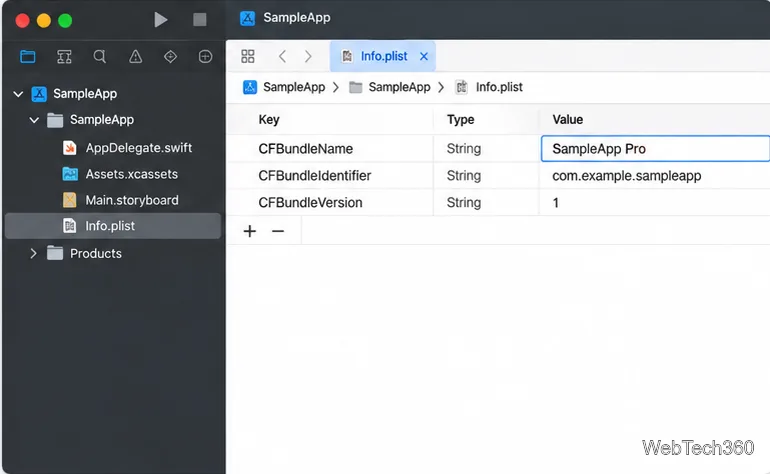
Close and reopen the plist to confirm the value persisted. For your own project, rebuild and test a copy. If the app ignores it, check that you edited the right source file; apps can read preferences elsewhere or replace them at launch. Restore the backup or reinstall if the app fails.
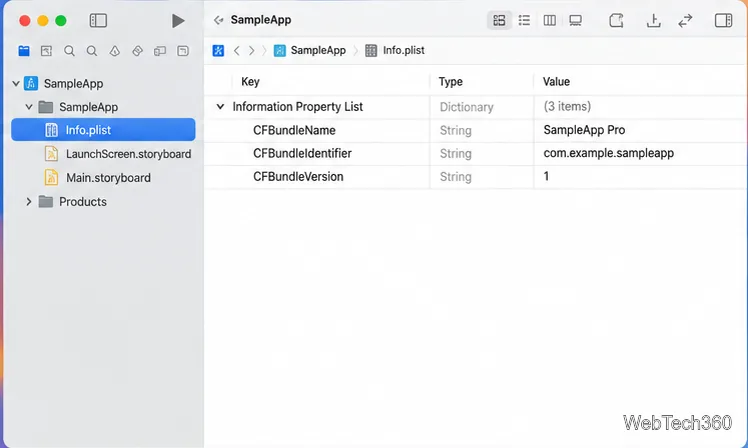
Apple notes that modifying a signed app bundle can invalidate its signature; updates may also replace edits. For software you maintain, change the source plist or target setting, then rebuild. For ordinary preferences, use the app’s settings. Do not disable macOS protections to edit a plist.
If Xcode cannot save, work from a writable copy. If a change disappears after rebuilding, update the source or build setting. If a key is ignored, verify its spelling, type, and location in the app’s documentation.
For more detail, see Apple’s Information Property List documentation and its Technical Note on macOS code signing.
Learn how to screenshot on Mac with shortcuts for the full screen, an area, or a window, plus the Screenshot app, clipboard, editing, and save-location tips.
Combine multiple images into a single PDF on macOS using Finder or Preview. Control page order, avoid cropping, and fix missing pages without extra software.
Learn how to show FPS on a Mac with Steam’s performance overlay or Apple’s Metal Performance HUD, plus fixes when the counter does not appear.
Use Option–Command–Esc to force quit an unresponsive Mac app, or close it from the Apple menu, Dock, Activity Monitor, or Terminal.
Set up Split View, resize or replace a pane, use Mission Control, and learn when desktop window tiling is a better fit on your Mac.
Learn how to remove EXIF data from photos on macOS, hide location in Photos, clean exported JPEG copies with ExifTool, and verify the result.
Sync two folders on a Mac with SyncTwoFolders, choose a one-way or two-way update, and preview changes before files are replaced or removed.
Back up a Tumblr blog on your Mac with Tumblr’s web export. Download and unpack the ZIP, keep its posts and media safe, and know what the archive leaves out.
Use Google Maps on your Mac in Safari or Chrome, find places and routes, switch map layers, and add a Safari web app to your Dock on macOS Sonoma 14 or later.
Compare five free WAV-to-MP3 converters for Windows and macOS, including online file limits, local batch tools, and practical export settings.